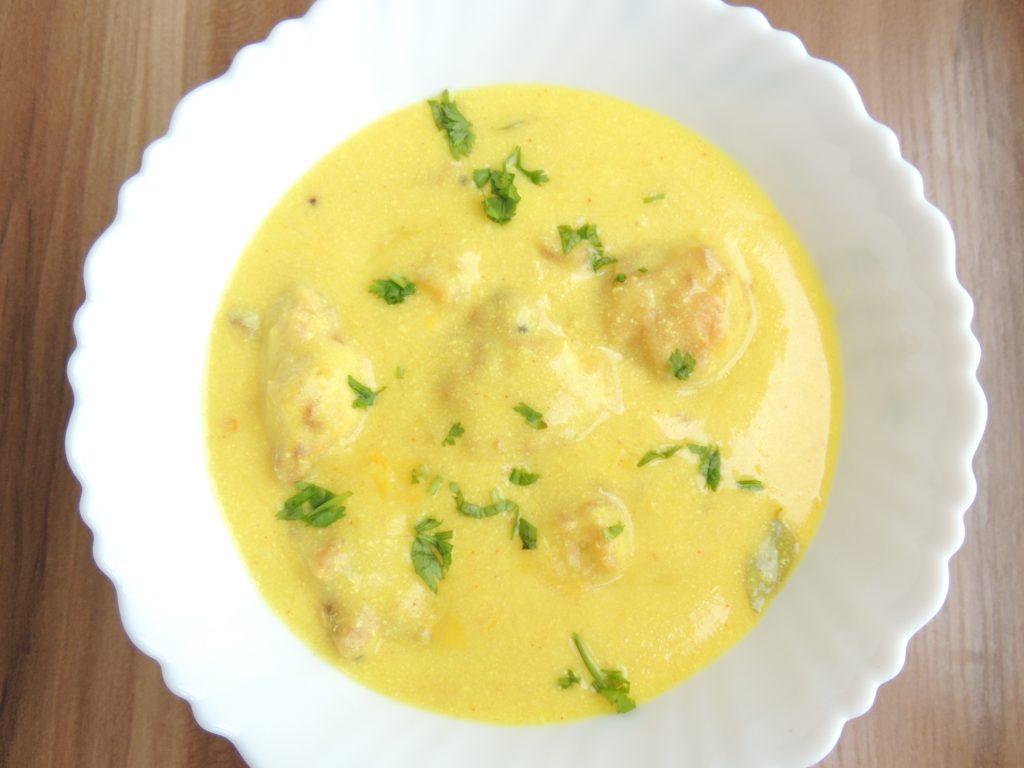
Kadhi Pakoda or Besan Ki Kadhi Or Punjabi Kadhi Pakoda recipe is made up of gram flour or besan, onion, green chilly and sour curd or yogurt or dahi. It is a perfect mouth-watering food. Kadai Pakoda is eaten with rice and chapati. While eating kadhi add 1 tsp of desi ghee. It will give an exotic flavor to kadhi. Kadhi and rice is a great combination in the Northern and Western part of India.To make Punjabi Kadhi Pakora at home follow step by step detailed recipe with photos as given below…
Course Dinner, Indian, Lunch, Main Dish
Cuisine dinner, Indian, lunch, Main
Prep Time 5minutes
Cook Time 20minutes
Total Time 25minutes
Servings 5People
Calories 0.11kcal
Equipment
Kadhai / Fry Pan
Big Spoon
Bowl
Ingredients
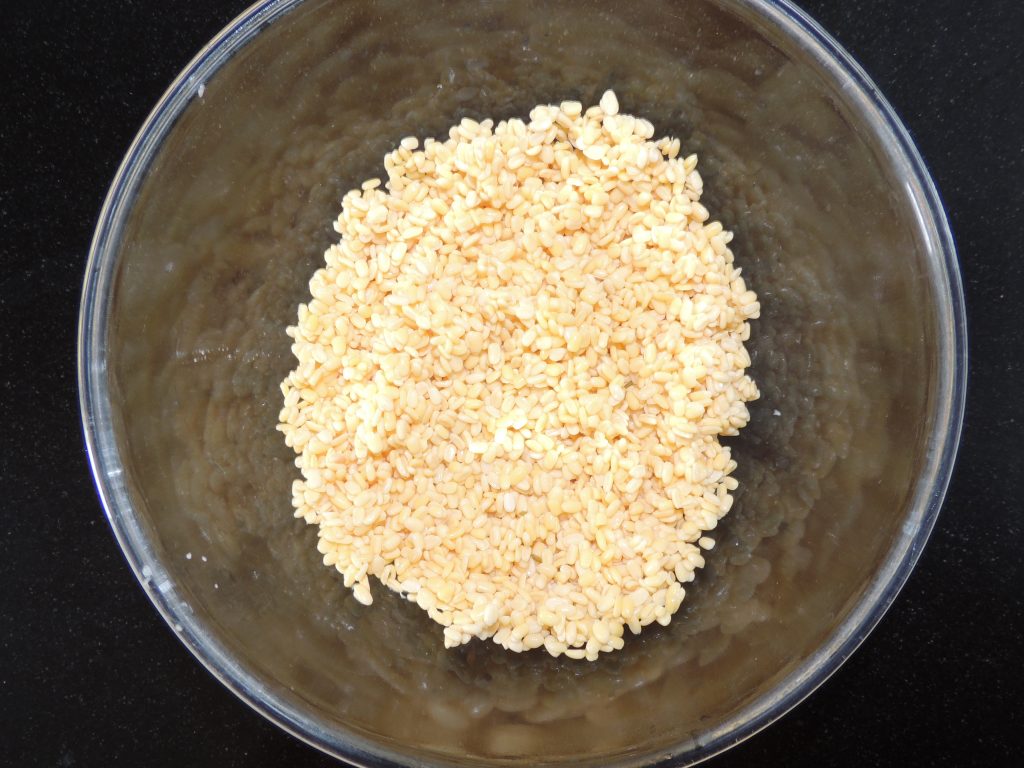
6tbspGram Flour / Besan
200 GramsSour Curd / Dahi / Yogurt, If curd is not sour, add 4 balls of lemon salt not more than that.
1/4tspMustard Seeds
1/4 tspCoriander Seeds, break into pieces, do not powder
1Pinchasafoetida, don’t use much, otherwise it will spoil the taste of kadhi
2unit WholeRed Chilly
1Unitonion, Chopped
1Unitgreen chilly, finely chpped in small pieces
1tspGinger Garlic Paste
2 UnitCloves, Break into pieces
4small ballsLemon Salt, use only when curd is not sour
Water
1/4tspcumin seed
1/2tspRed Chilly Powder
2tspCoriander leaves / Dhaniya Patti, Chop them
1/2 tspTurmeric Powder
50GramsOil, for frying pakodi / pakoda of kadhi
2tspOil, Chhaunk lagane ke liye / To blow
Instructions
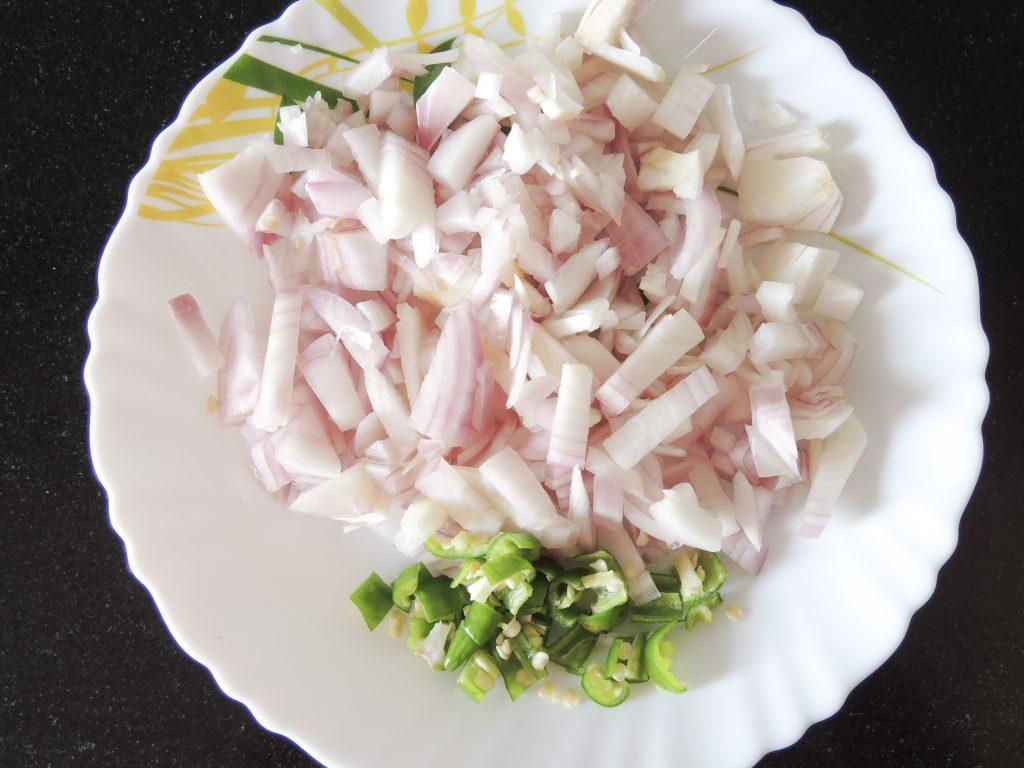
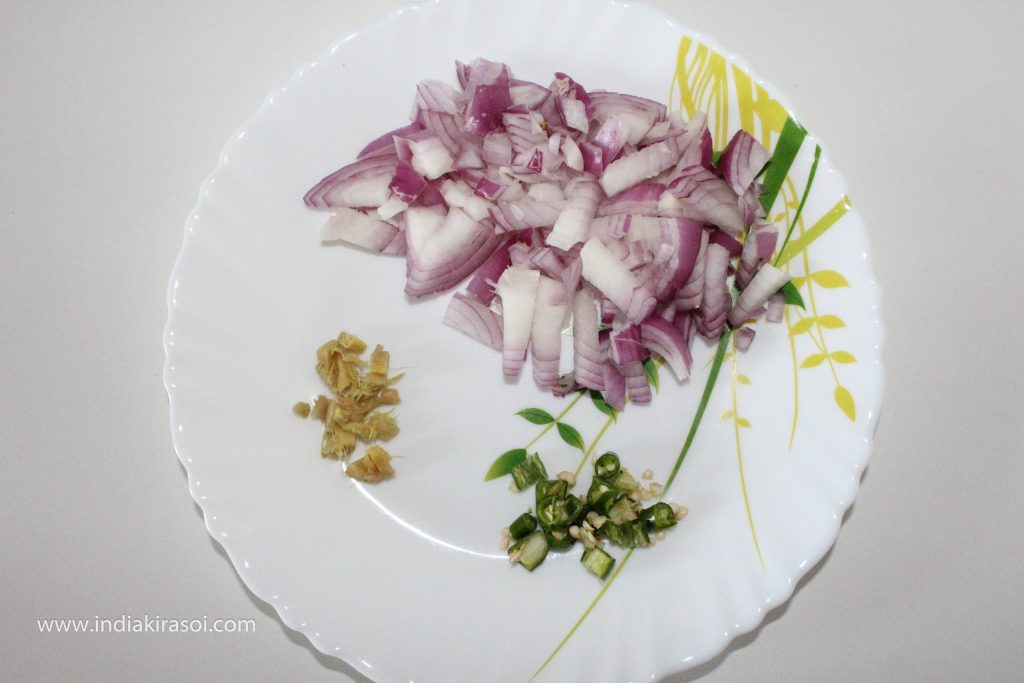
Chop Onion, Chop Green chilly.
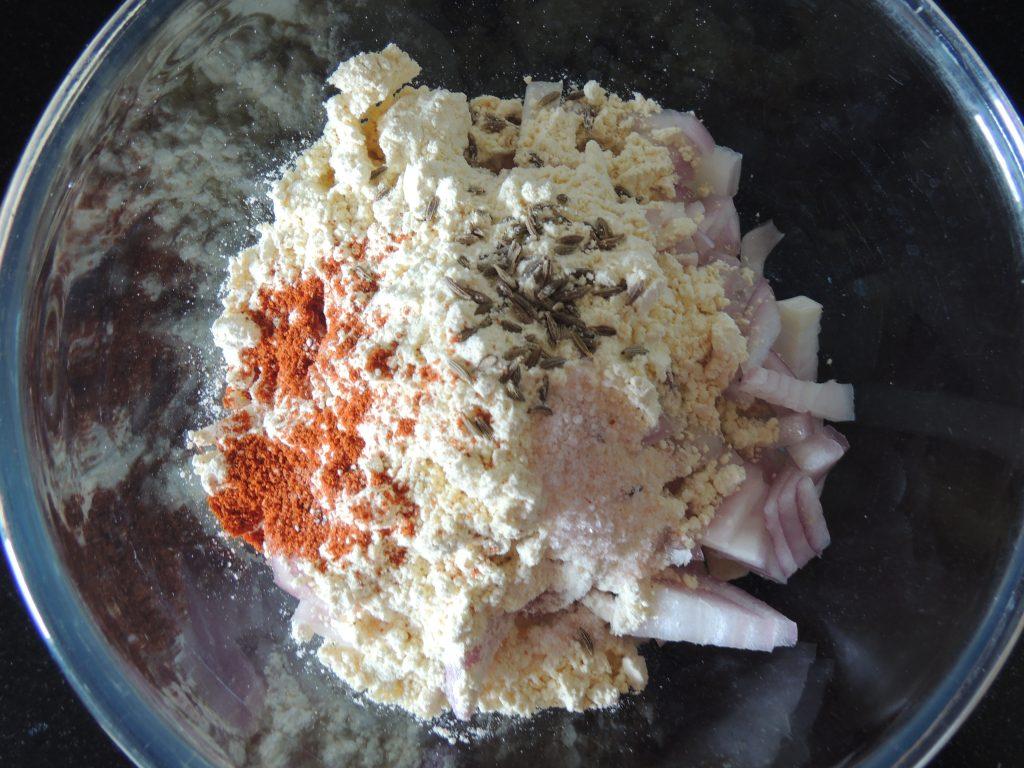
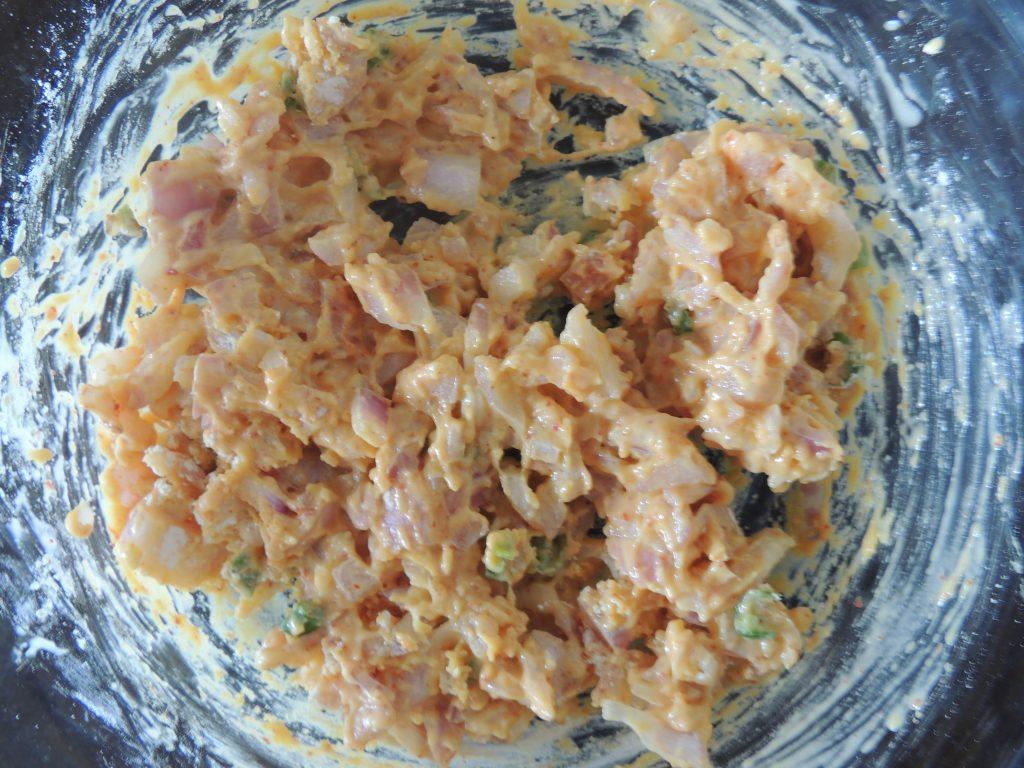
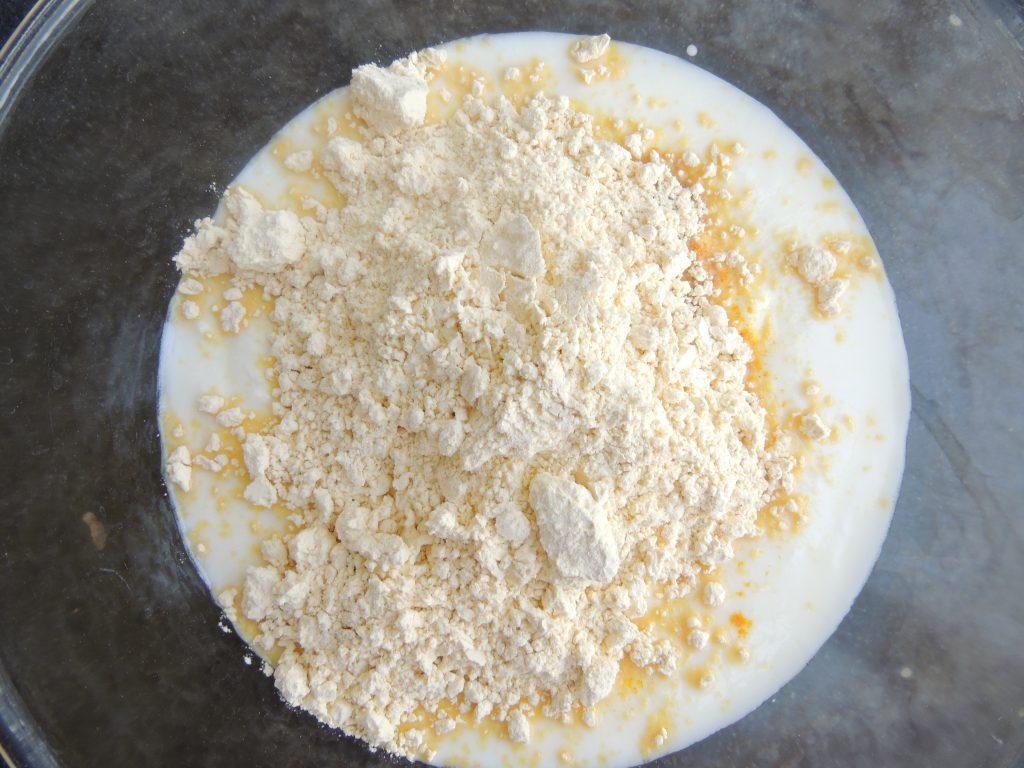
Add Chopped onion, chopped green chilly and a very small amount of salt, add a pinch of asafoetida, add 1/4 tsp red chili powder and 3 tsp gram flour into a bowl.
Add a small portion of water to the bowl, the mixture should be tight. The mixture should not be watery.
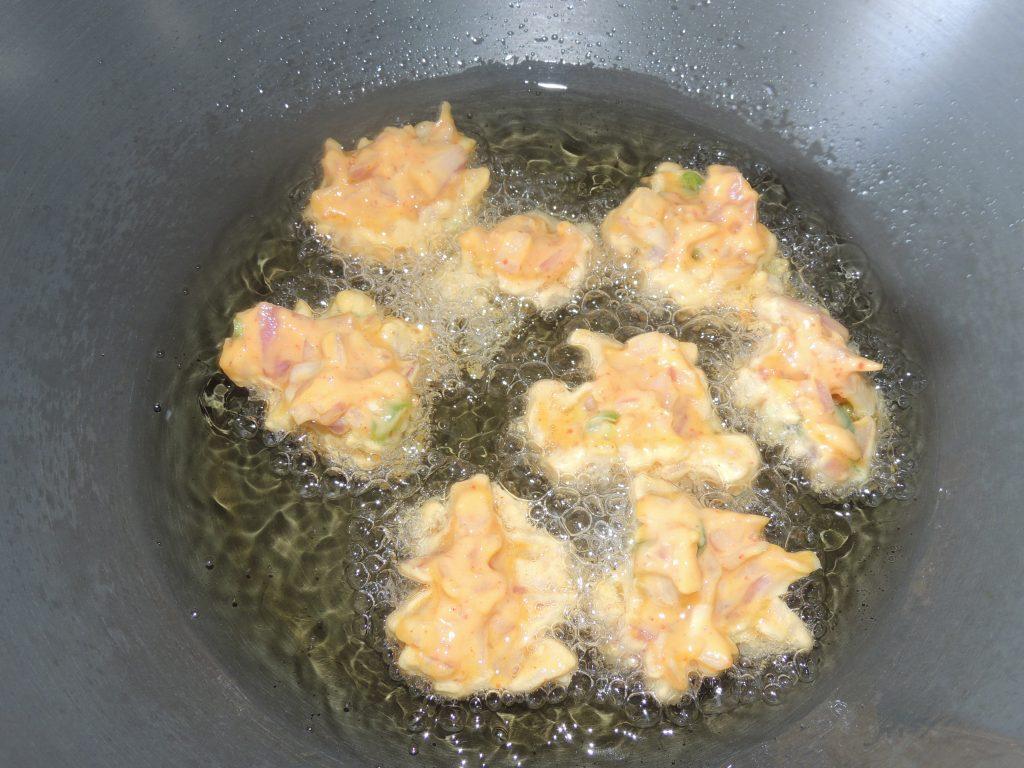
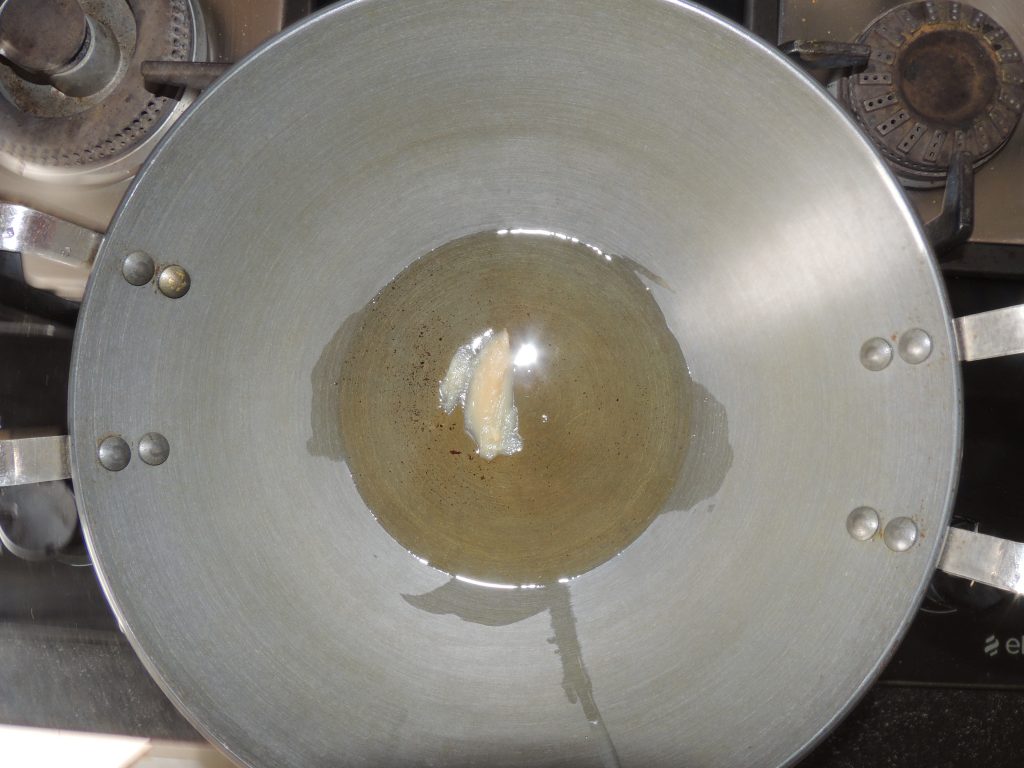
Put kadhai on the gas stove, add the oil in the kadhai.
Once the oil becomes hot. Drop a small ball of the mixture into the oil.
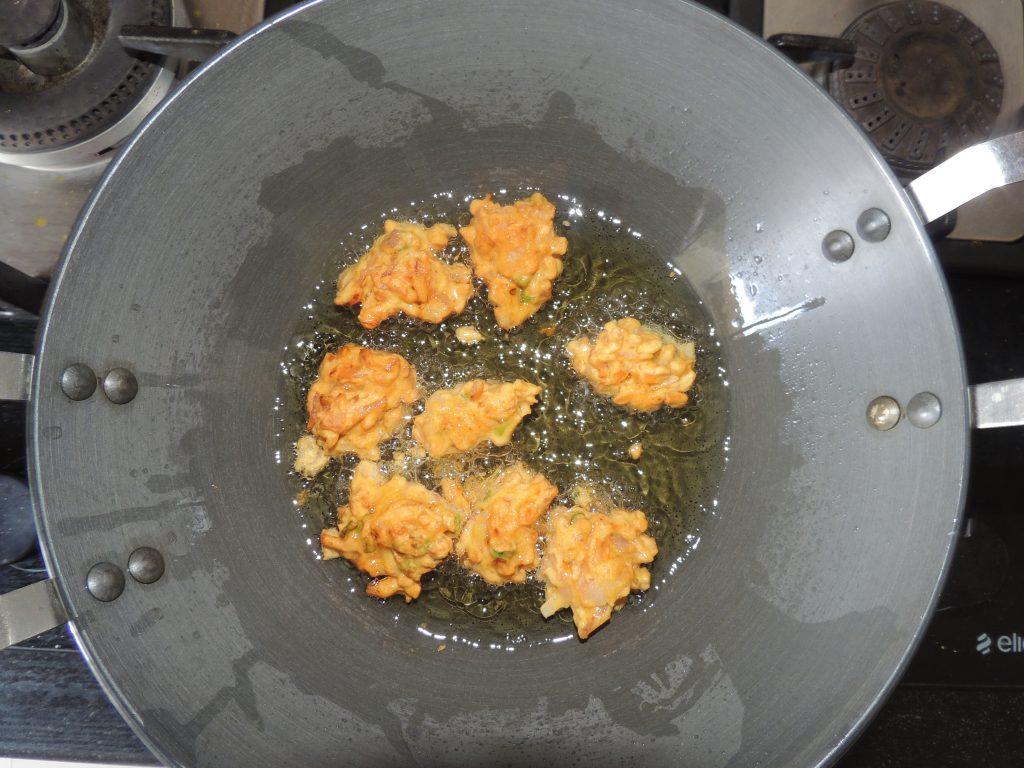
Flip the pakoda in the kadhai. Fry until pakoda becomes a little brown.
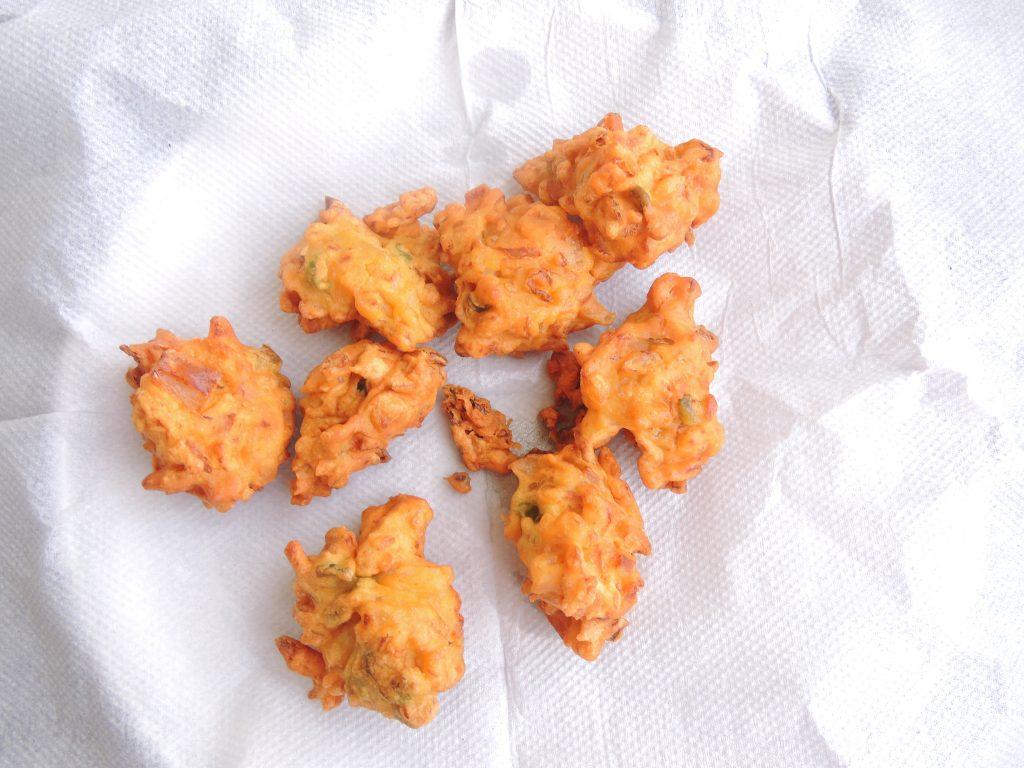
Remove pakoda's from the kadhai.
After that take one bowl with 2 cups of water in it.
Drop cooked pakoda's in it so that pakoda's will be soft. cover the bowl with a plate for 5 minutes.
After 5-minute strain water from the pakoda's.
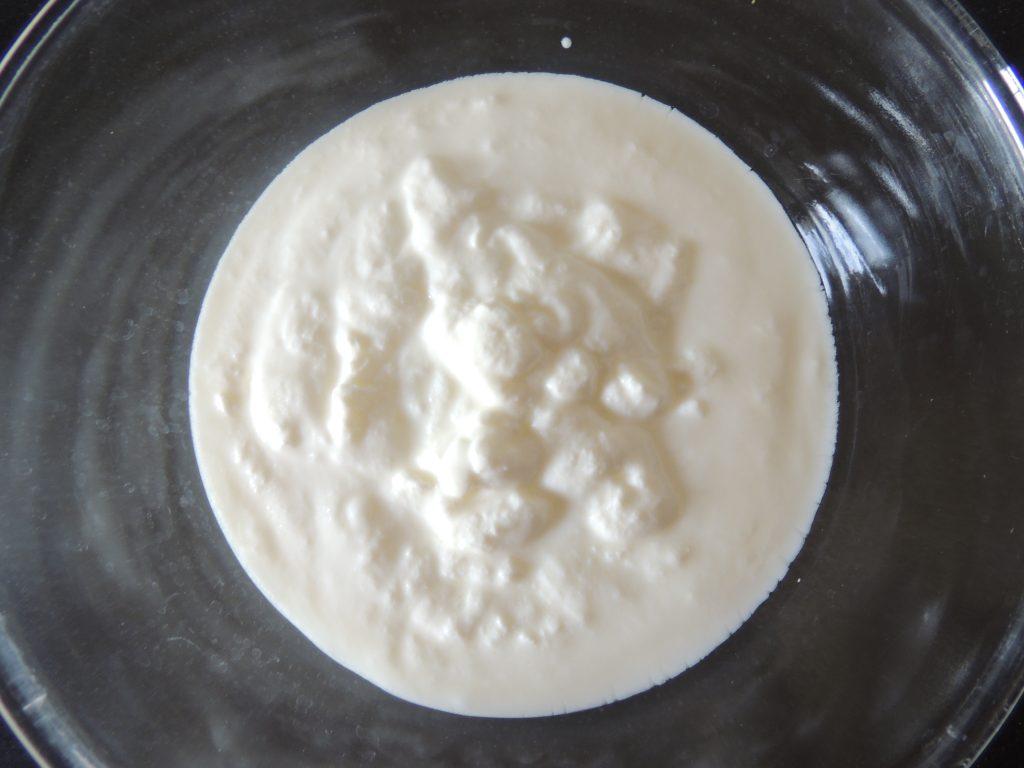
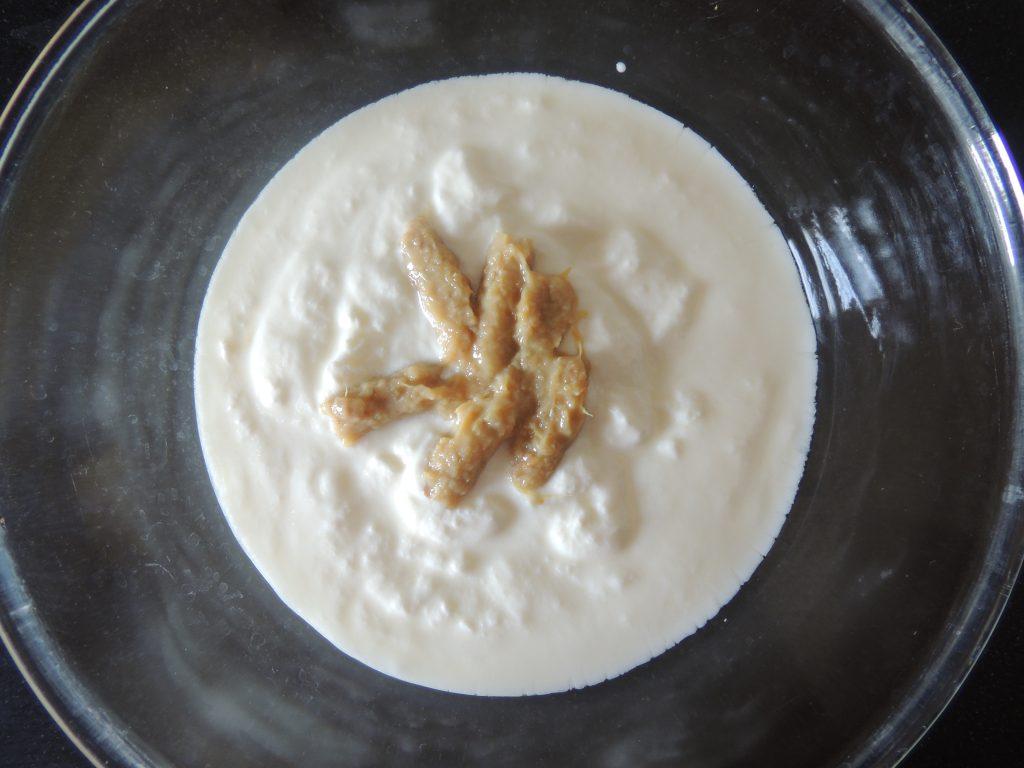
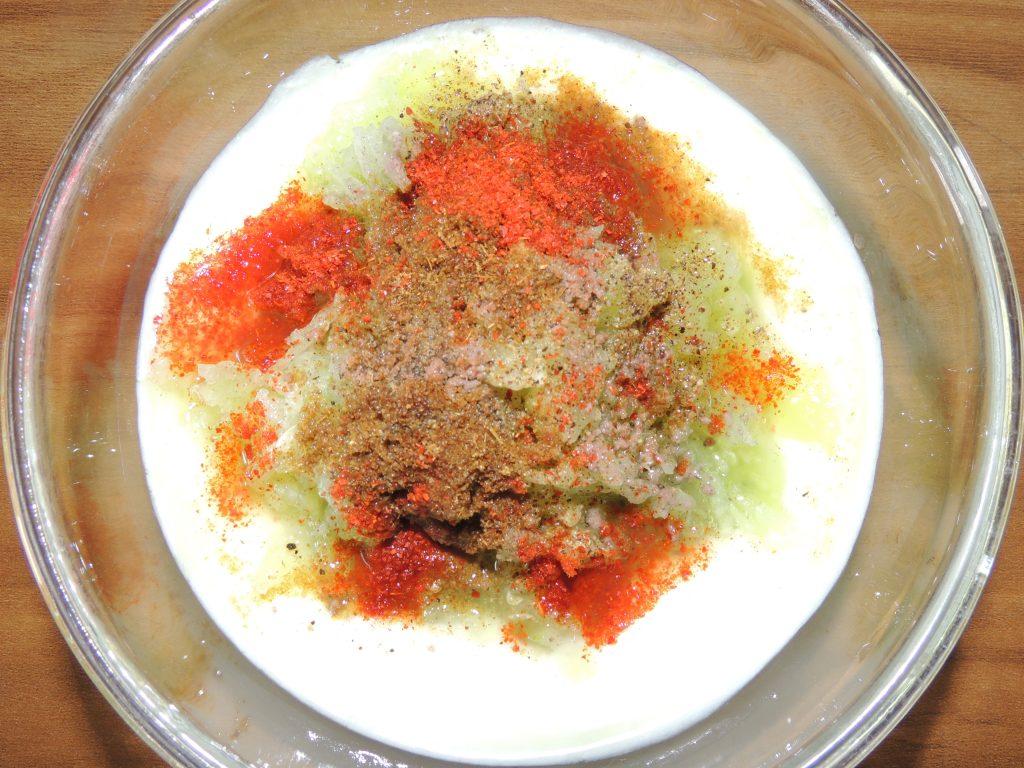
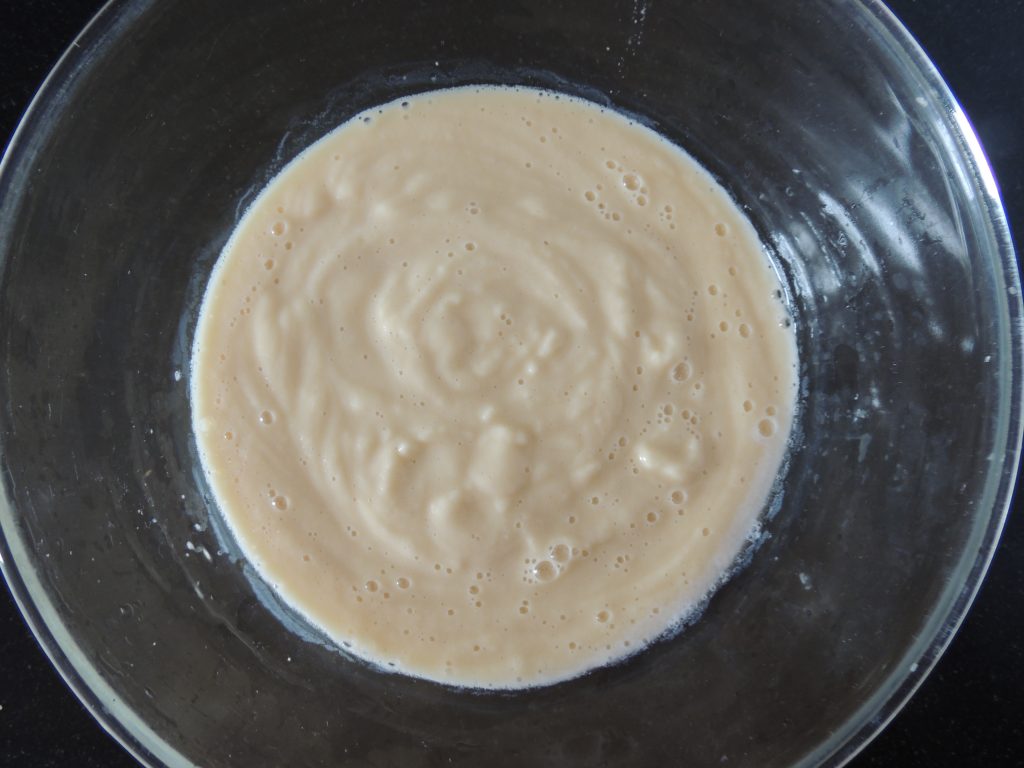
After that take 200 grams of curd or yogurt in the bowl.
Add 1 tbsp of ginger garlic paste into a bowl.
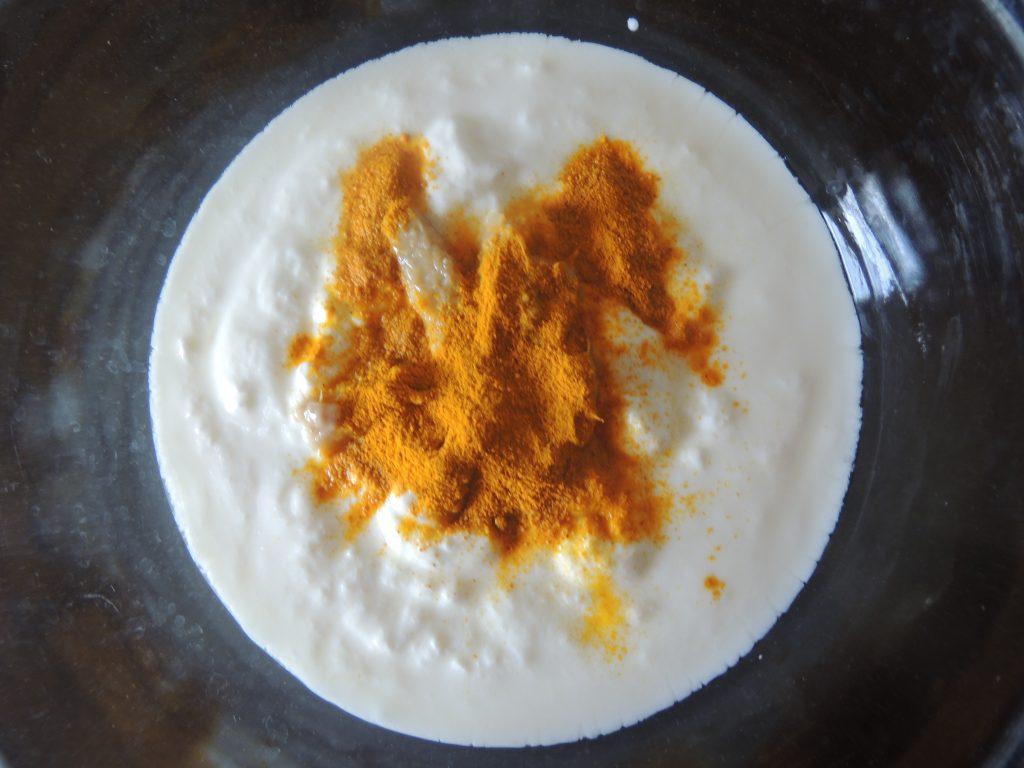
Similarly, add turmeric / haldi in the bowl.
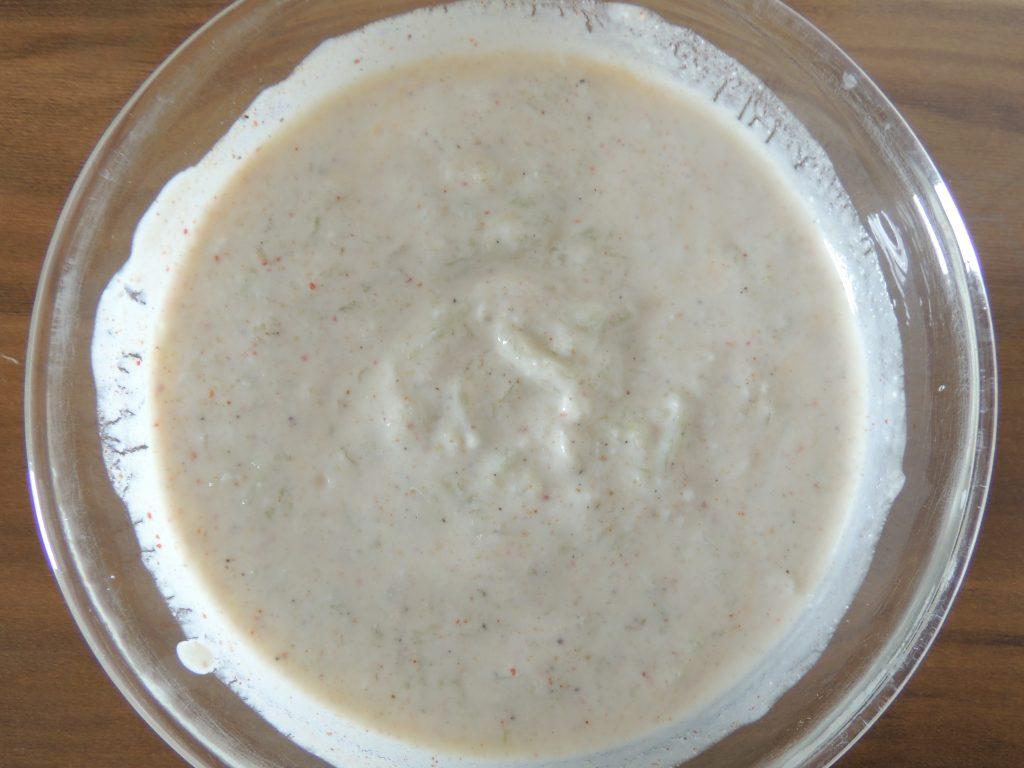
Similarly, add 3 tbsp gram flour/besan in the bowl. Beat the mixture in the bowl so that mixture should be homogenous in viscosity.
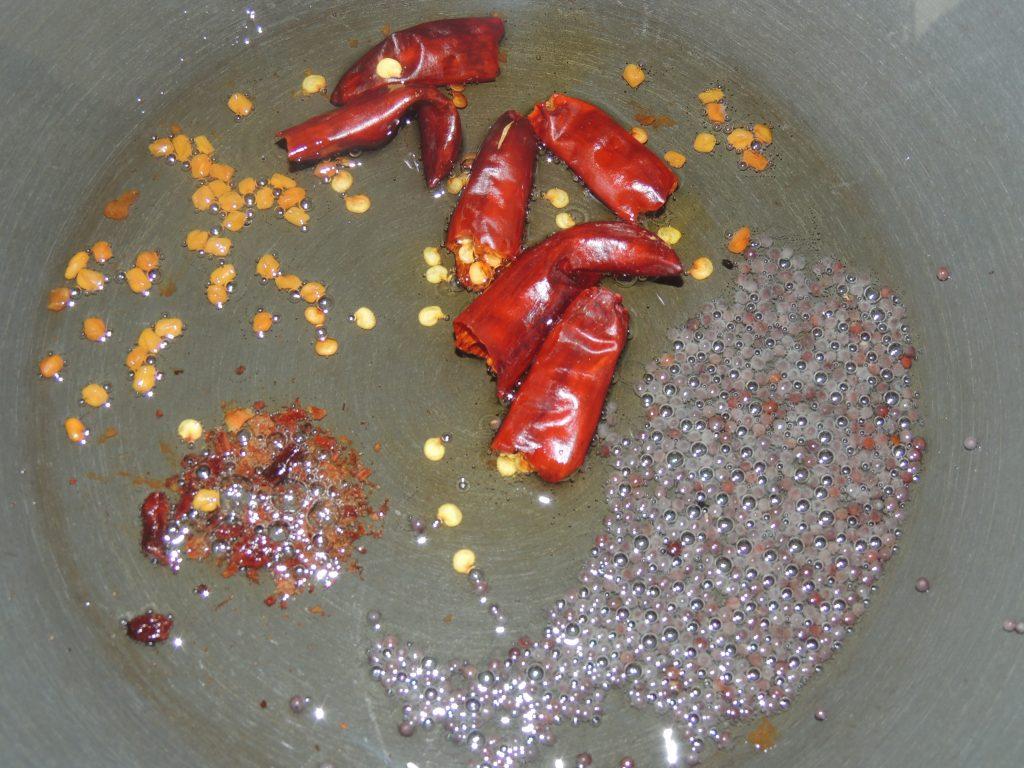
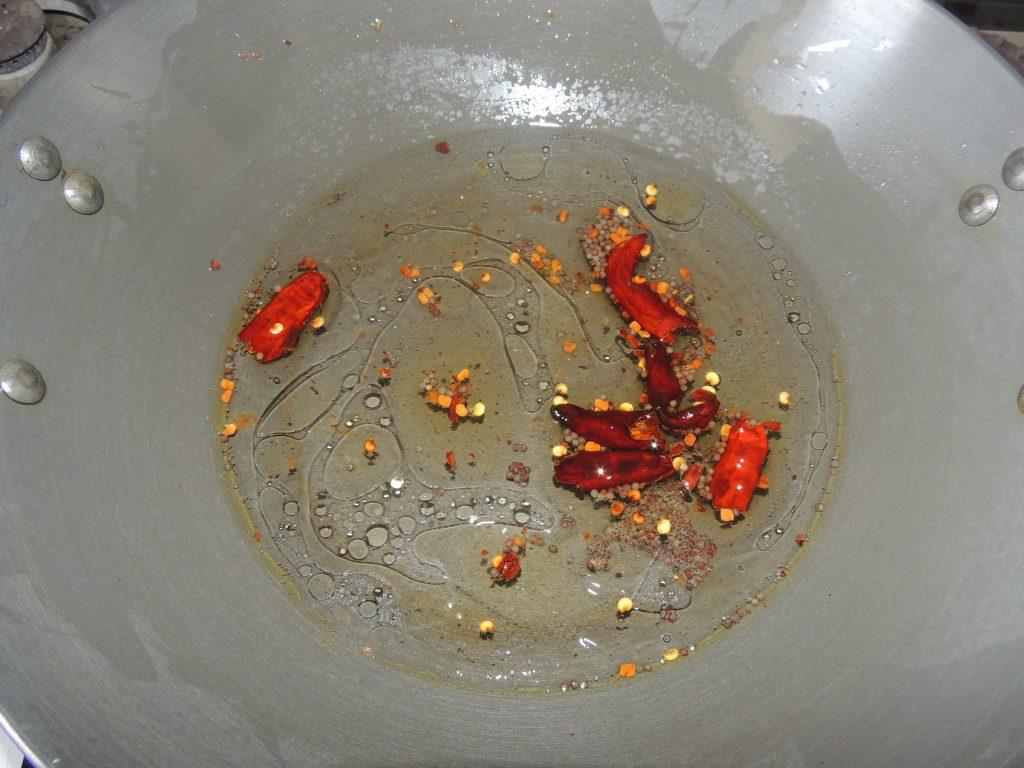
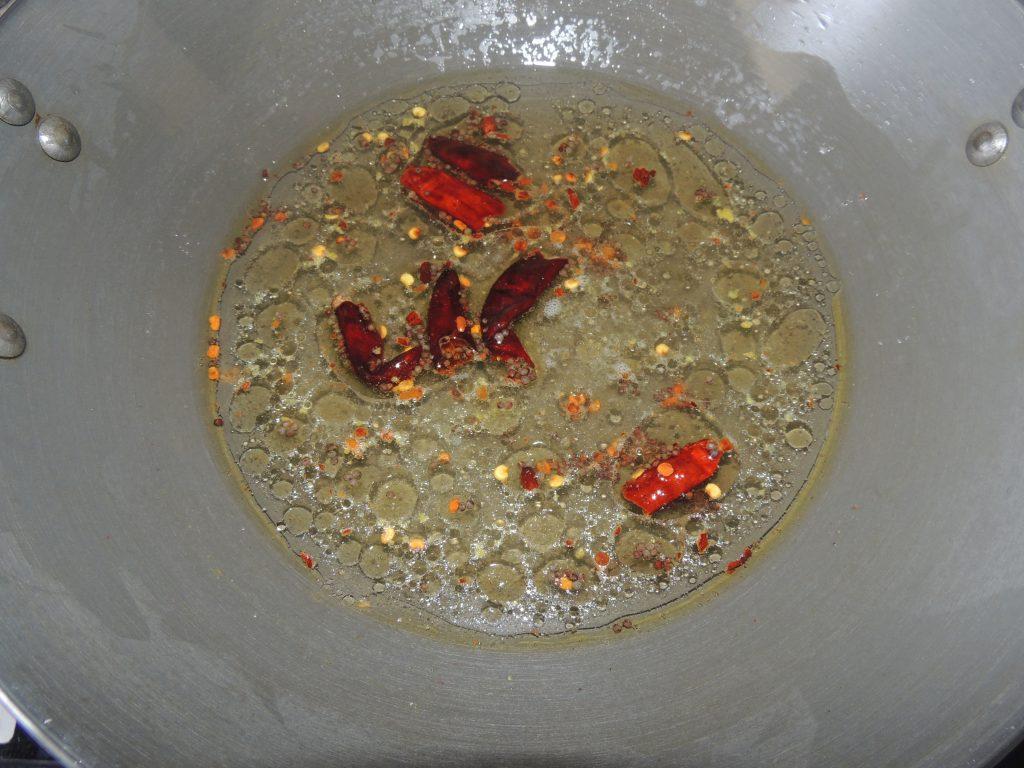
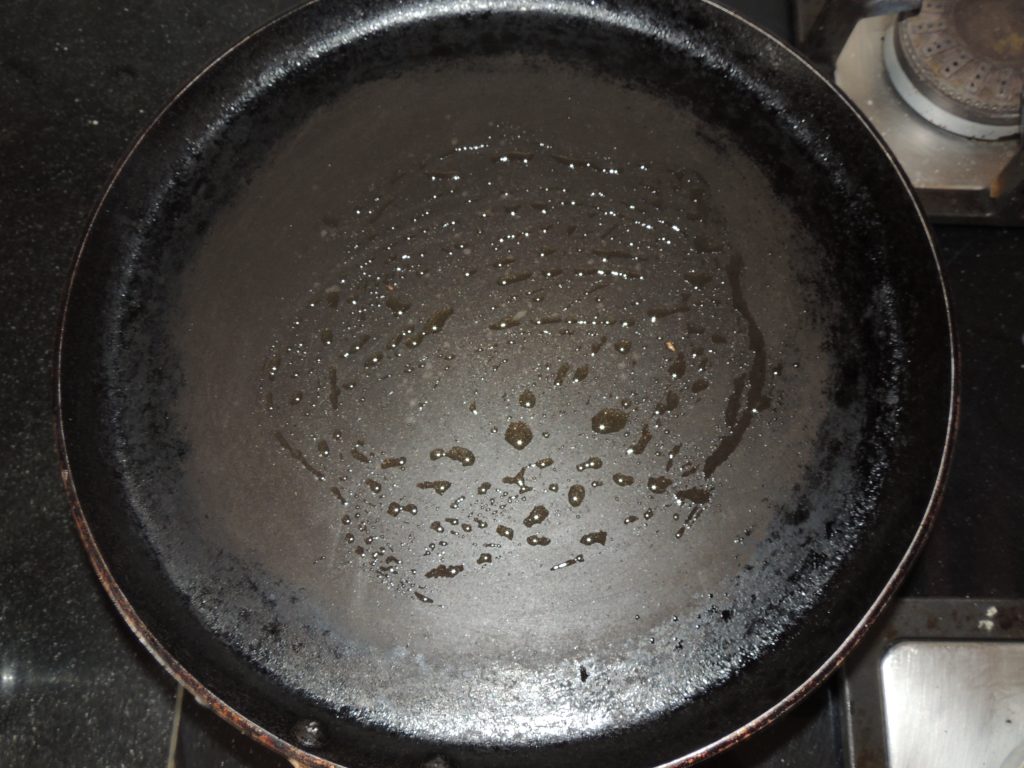
After that switch on the gas stove. Add 2 tsp of oil in the kadhai.
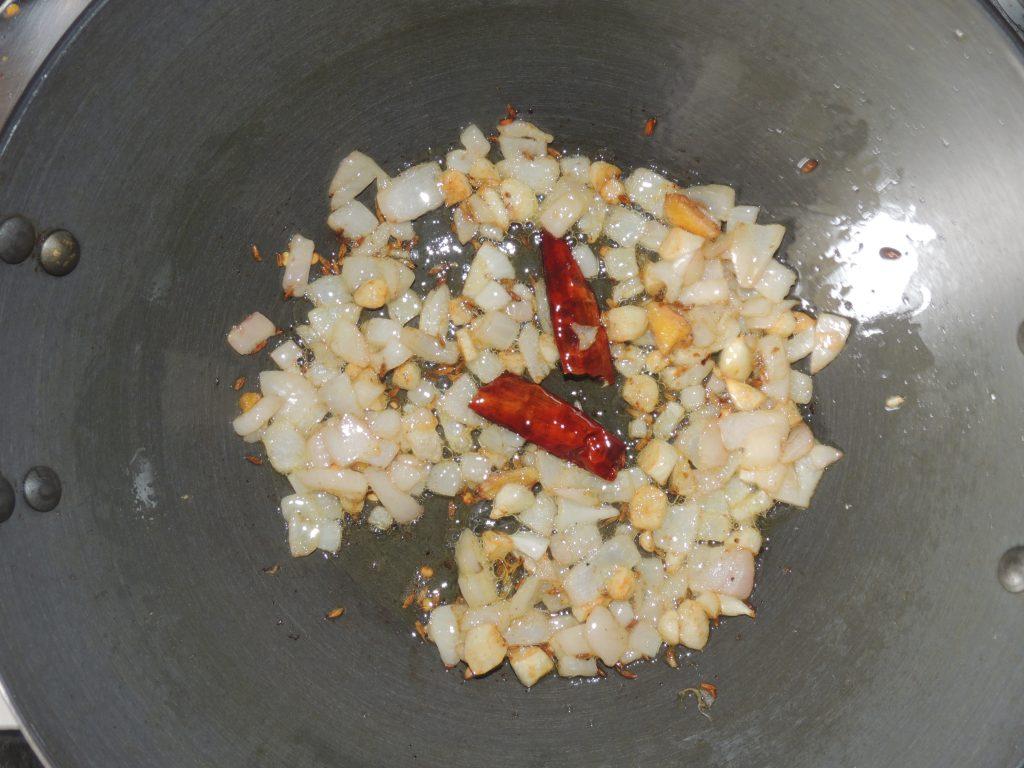
Once the oil becomes hot, add fenugreek seed, mustard seed, and broken coriander seed, broken cloves into the kadhai.
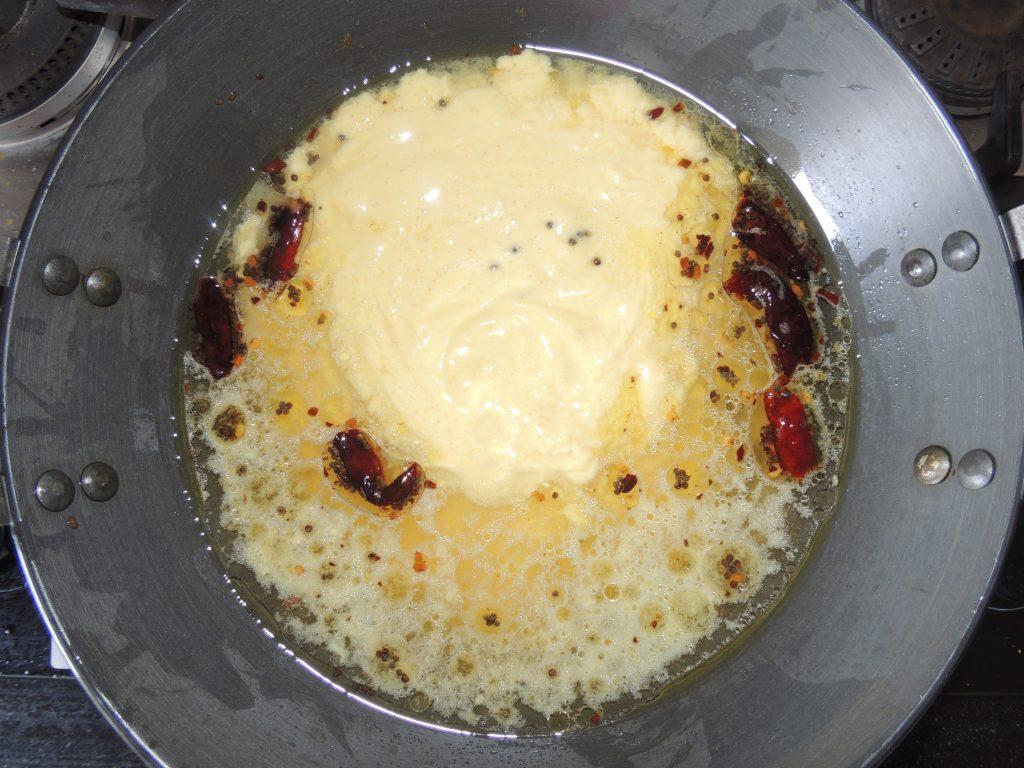
After that add pinch of asafoetida in the kadhai. Once spices started crackling. Add 1 cup of water into the kadhai.
Once the water starts boiling.
After that add the mixture of curd and gram flour/besan in the kadhai and add 200 ml water if you want less consistency of mixture then you can add more water.
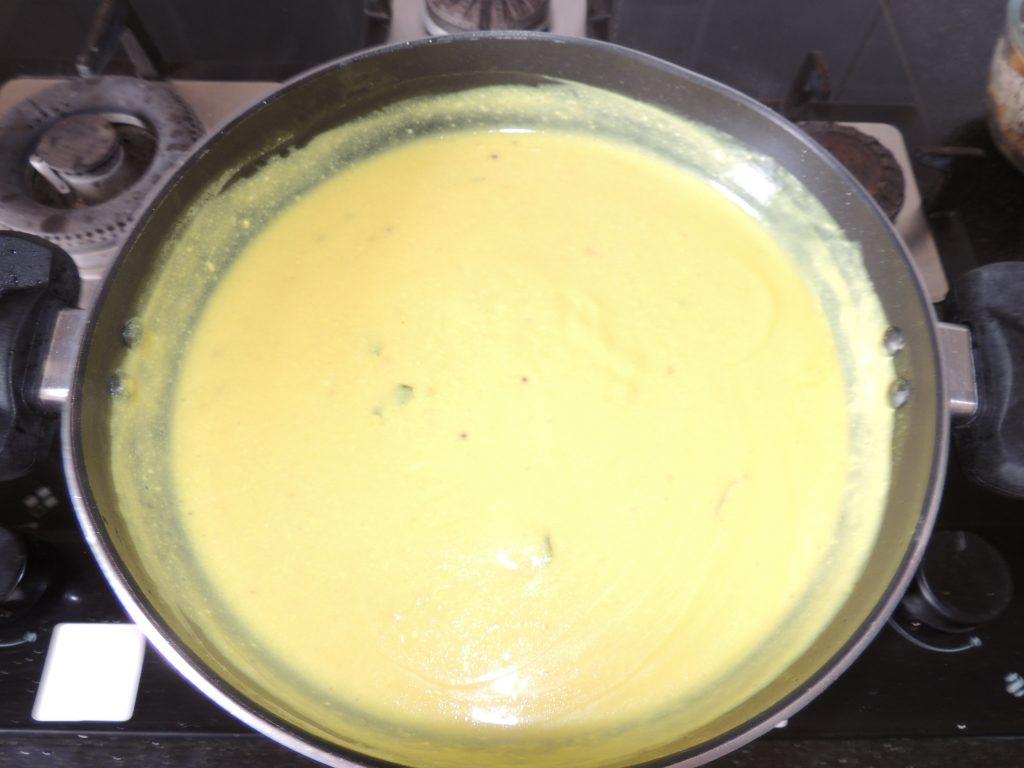
Continuously stir the mixture in the kadhai.
Stir the mixture until it starts boiling.
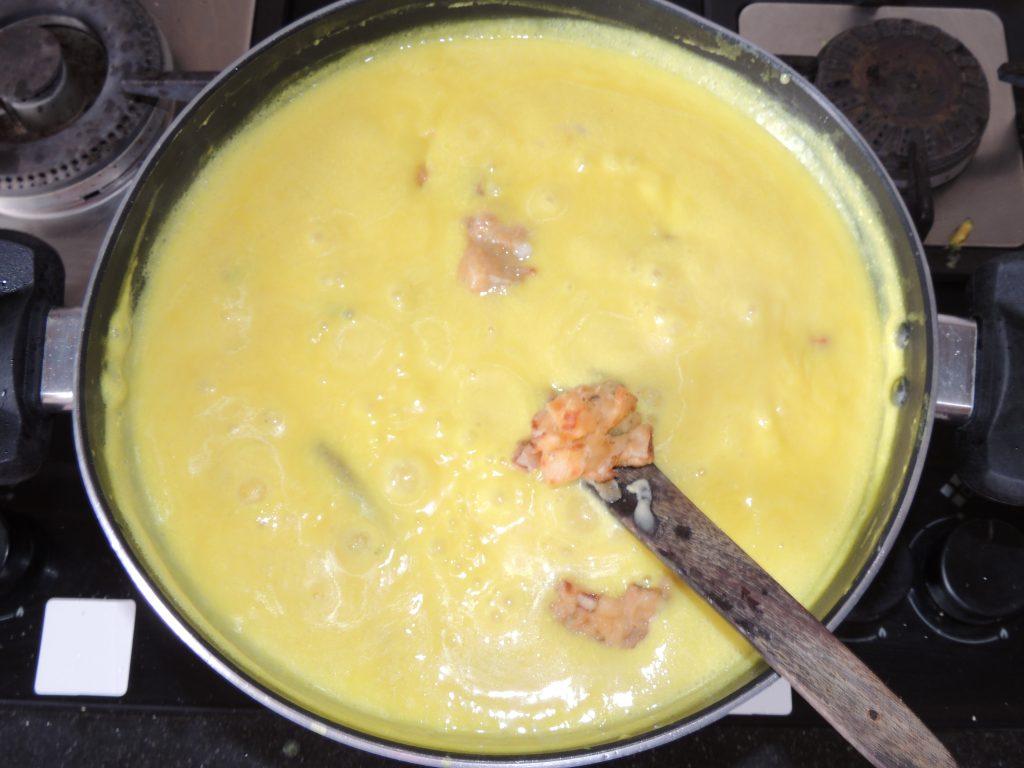
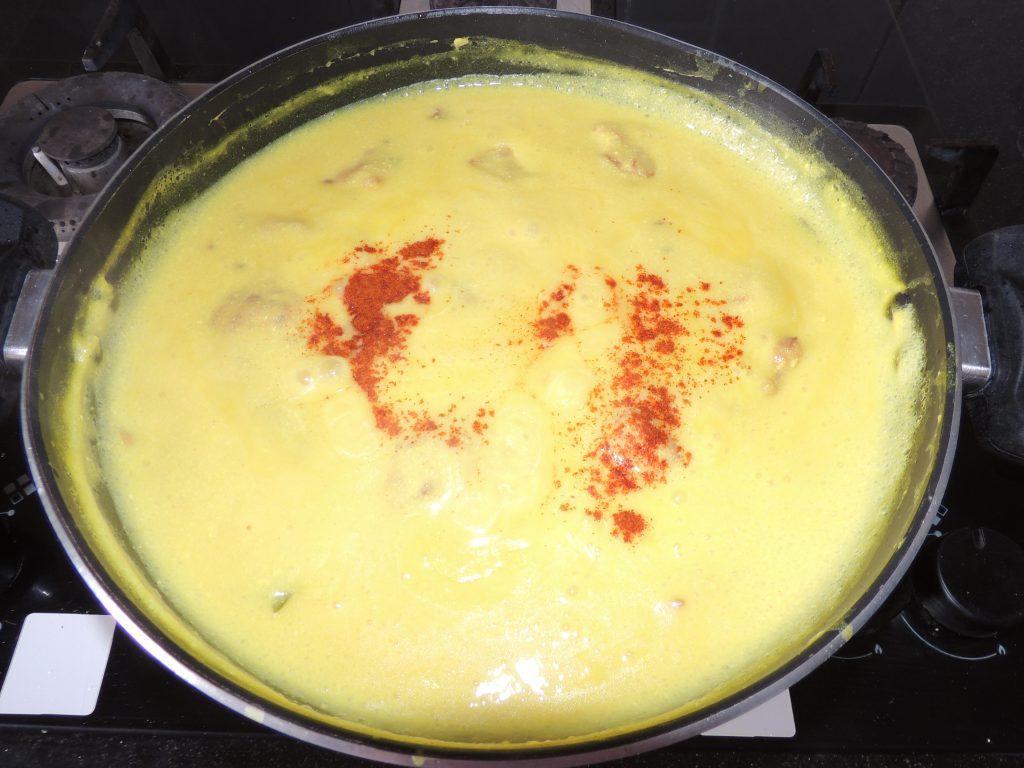
Once the mixture starts boiling after that add strained pakoda in the mixture of the kadhai .
After that add the red chilly powder. At the same time add salt.
Leave the mixture for boiling on low flame for 10 minutes. If the curd is not sour then add 4 to 5 balls of lemon salt.
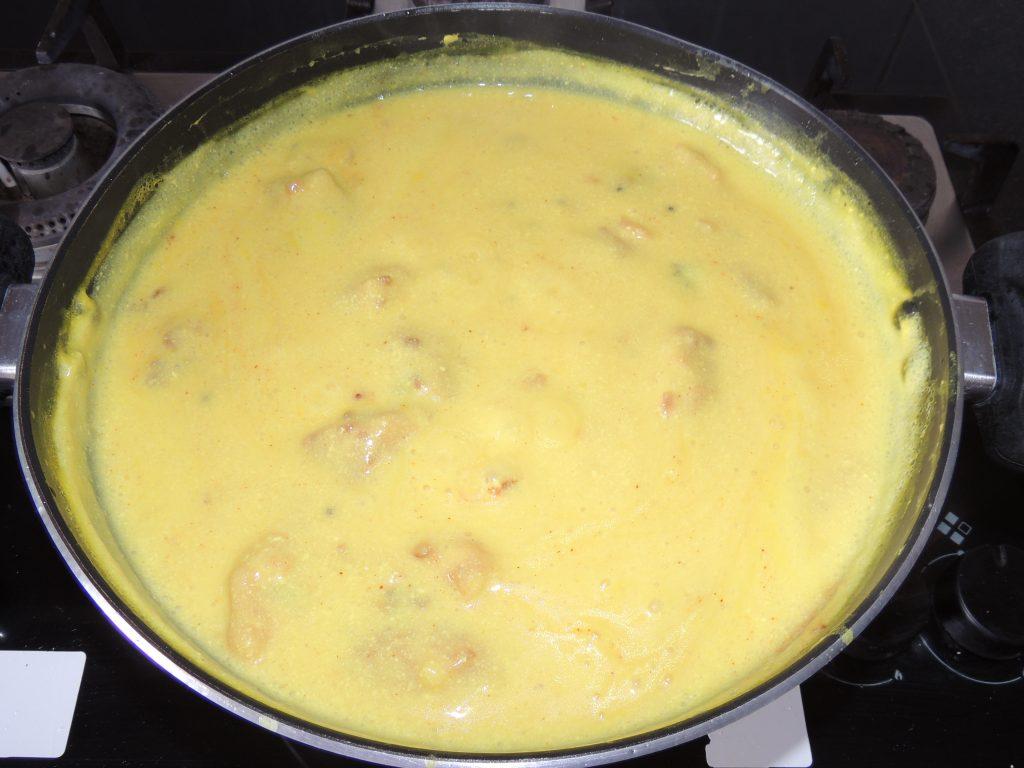
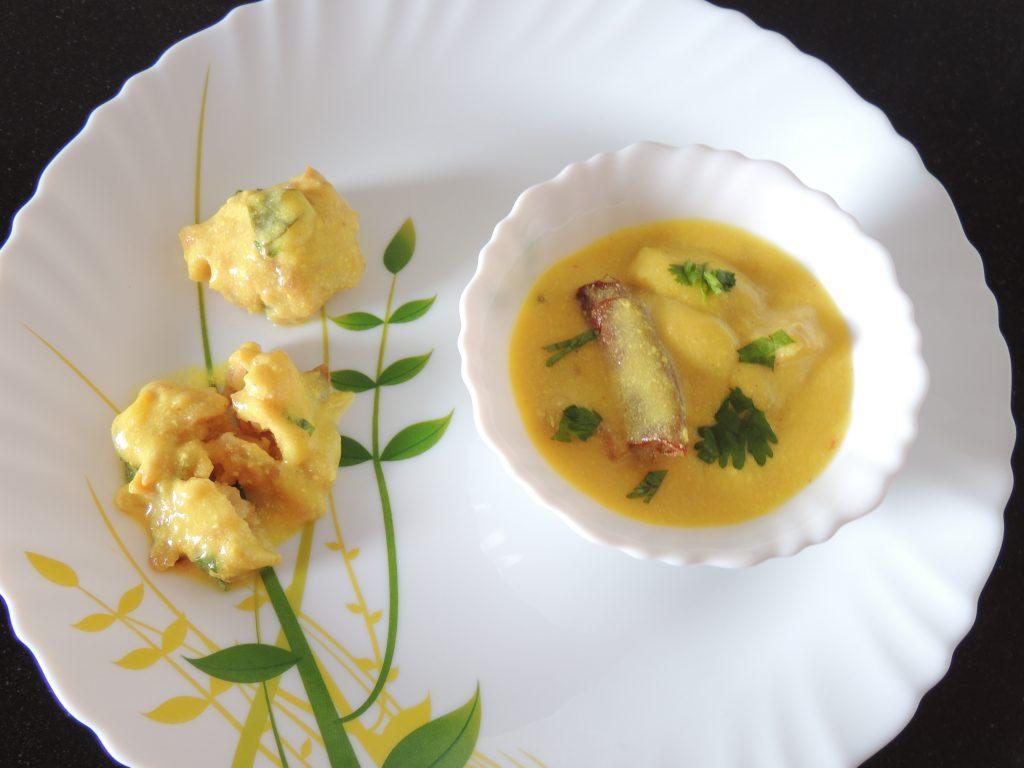
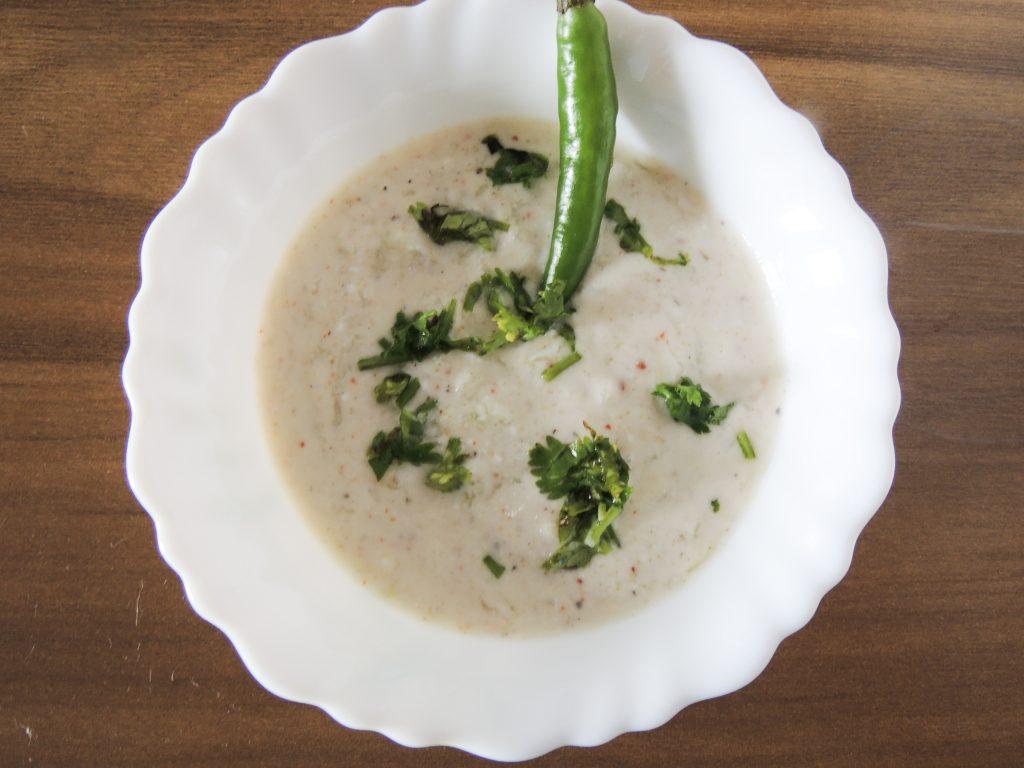
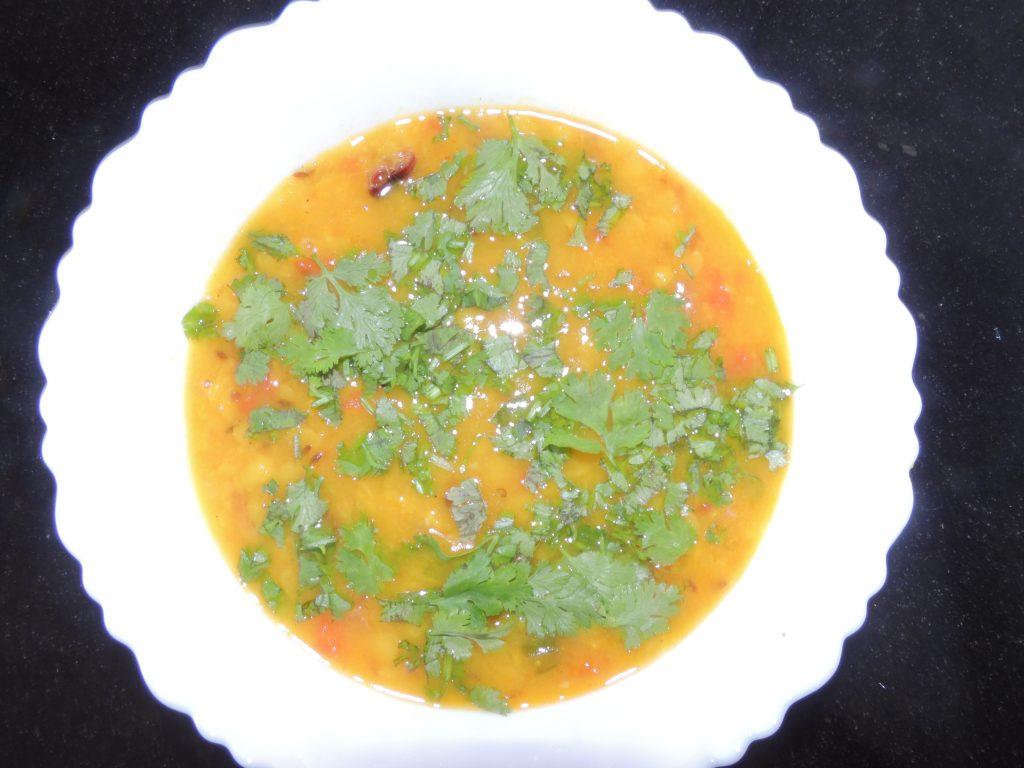
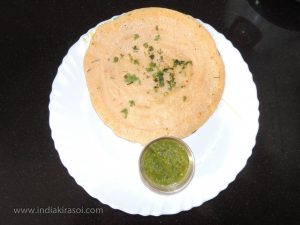
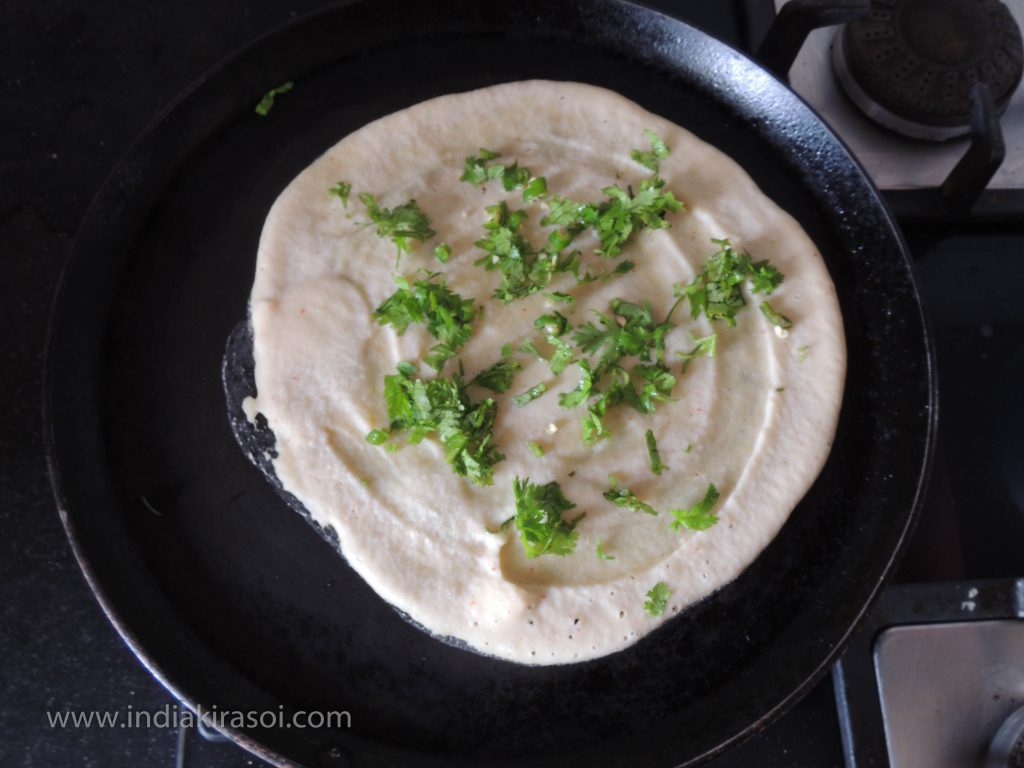
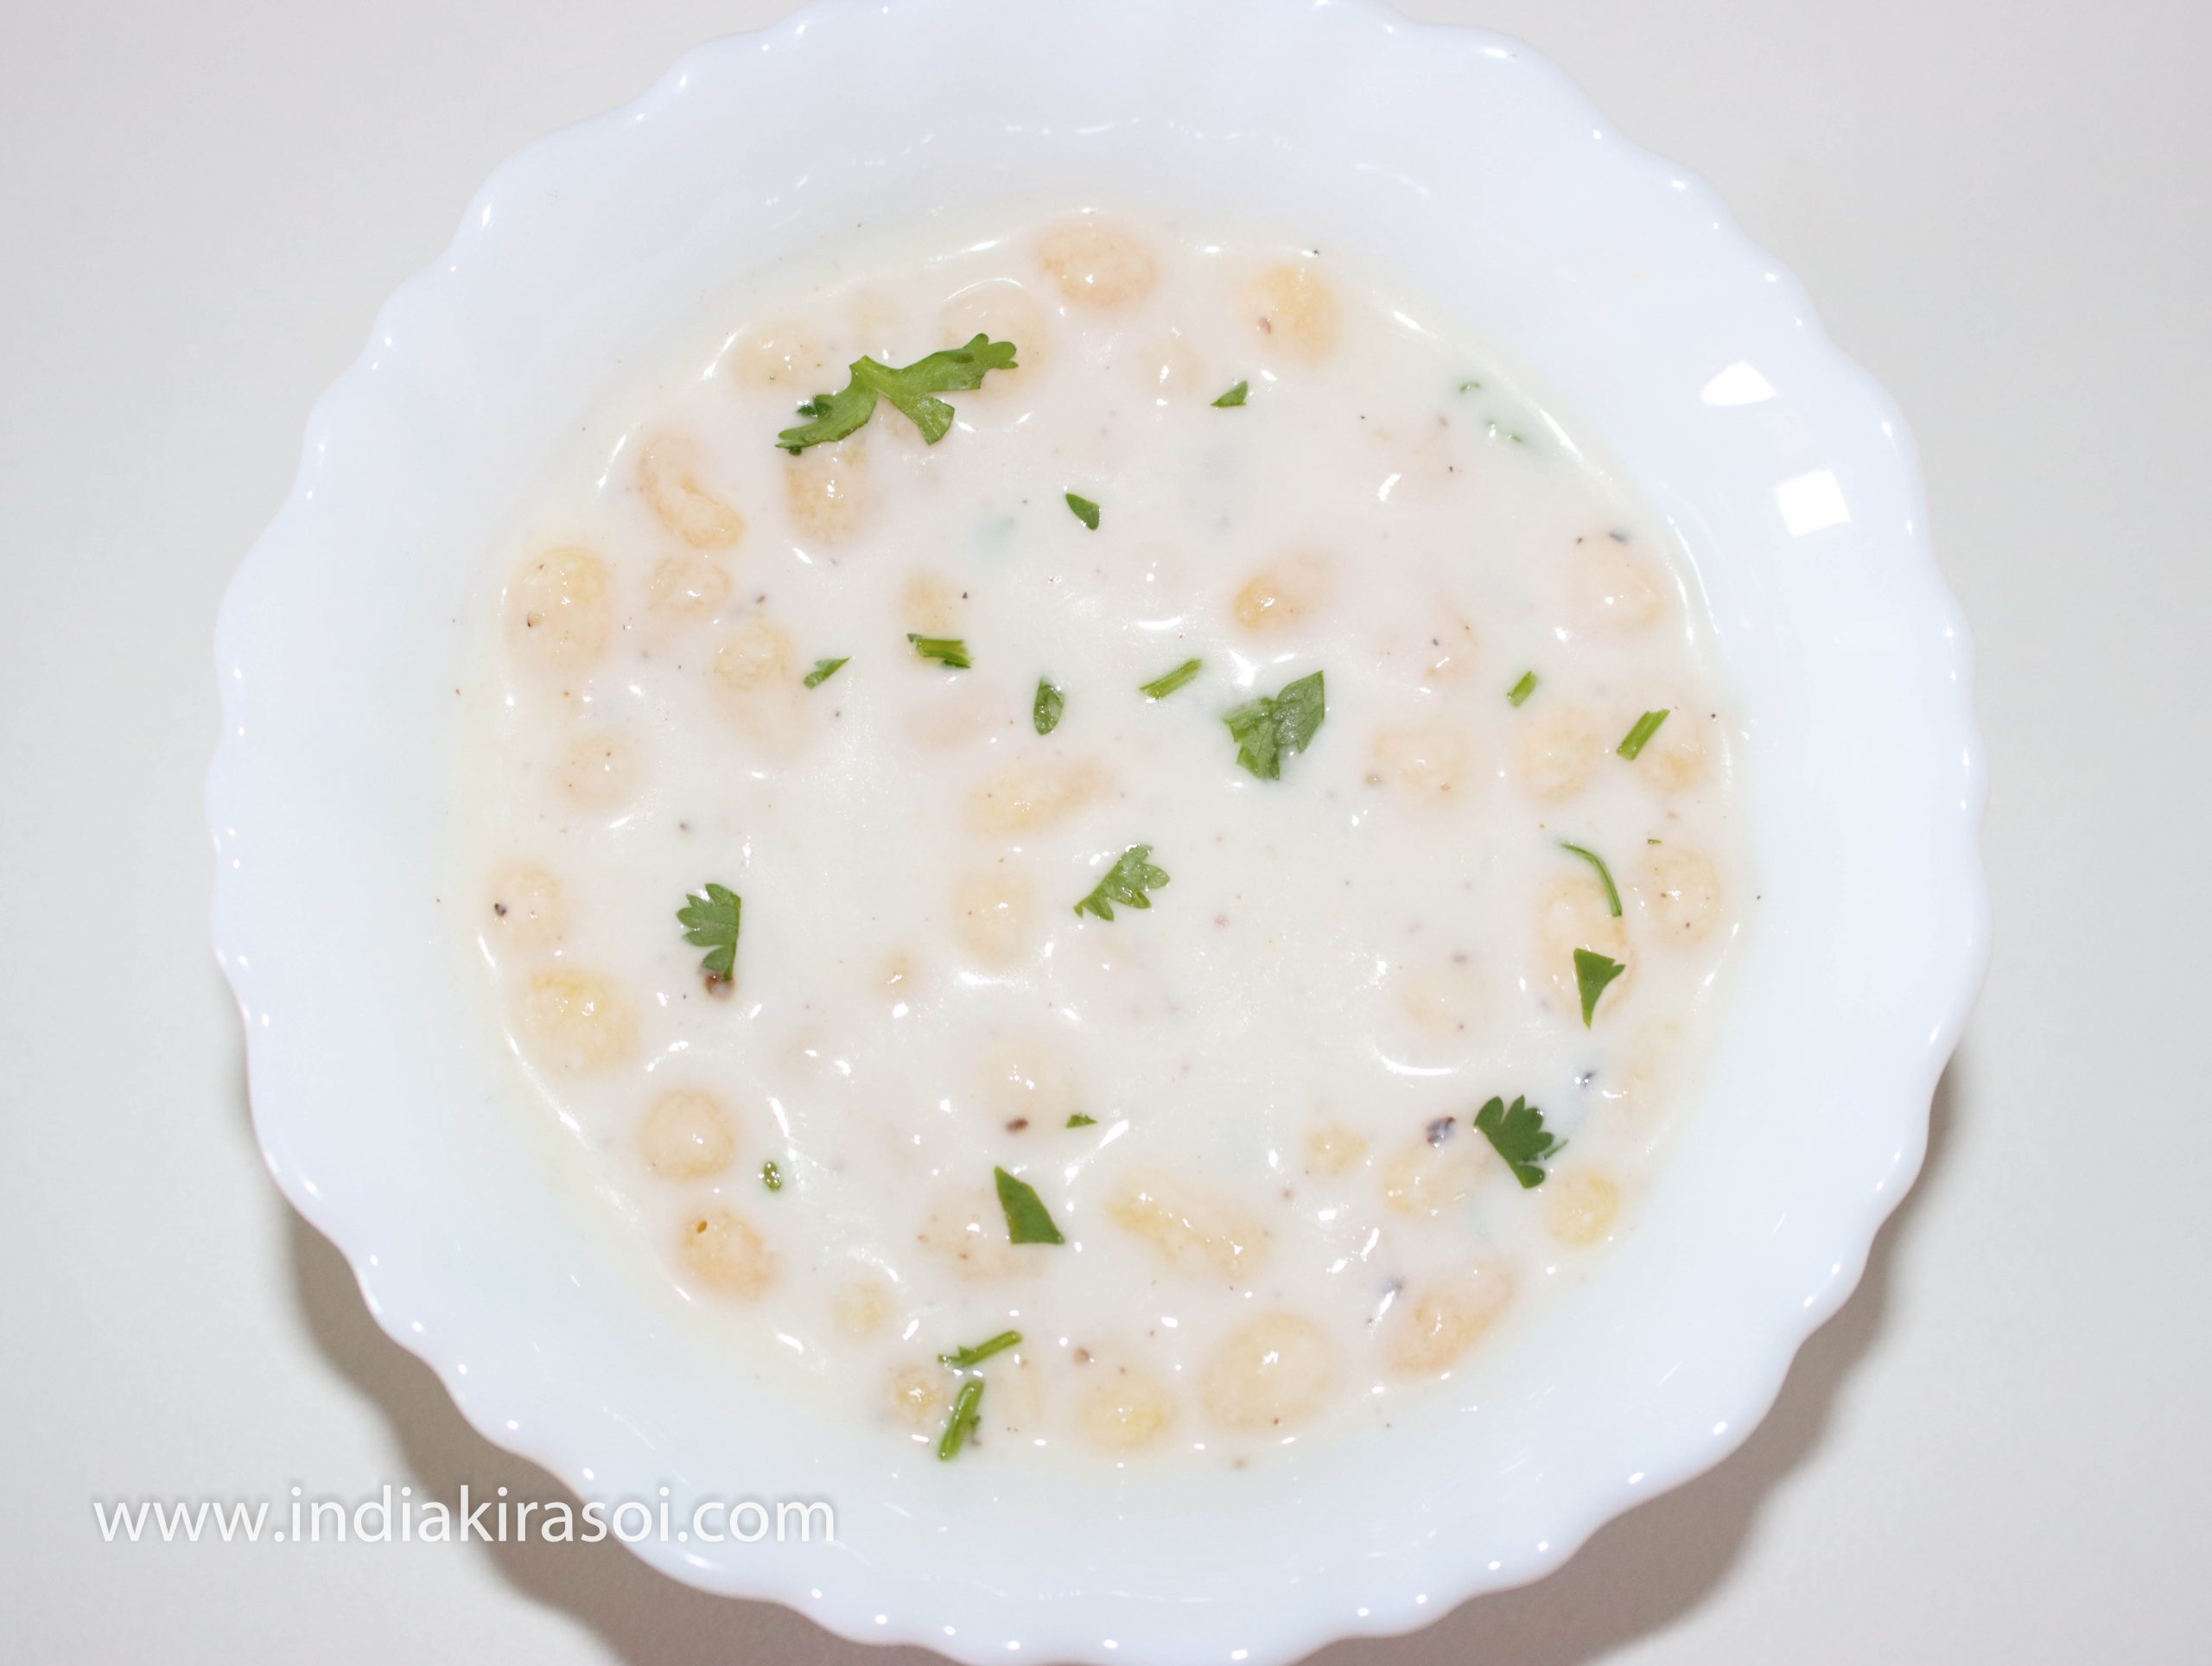
Put 1 tbsp of desi ghee in the kadhi and Garnish with coriander leaves. Serve with chapati and rice. Enjoy the tempting taste of Punjabi kadhi.
As you can see pakoda of kadhi is very soft. This gives a very soothing taste to kadhi.
Notes
Punjabi Kadhi pakoda is rich in flavor with several spices like cloves, fenugreek and coriander seeds.
Kadhi is the native dish of Rajasthan. But this is a very important recipe in many states like in Gujrat, Uttar Pradesh, Haryana, Punjabi.Its rich flavor and cooling effect gives a good change when one gets bored from the daily routine of eating dal and vegetable.
The important thing in the kadhi pakoda recipe is that the pakoda in kadhi should not be tight. But the pakoda in the recipe should be soft so that when it enters the mouth, it should give a yummy taste.
Kadhi is very important for the stomach also. When anyone is feeling very tight stomach or loose motion, he/she should eat kadhi, It will give instant relief to the stomach.
Tamarind / Imli is a leguminous tree belonging to the Fabaceae family and indigenous to tropical Africa. The tamarind tree produces edible, pod-like fruits, which are used extensively in cuisines around the world. Tamarind Chutney or Imli Chutney is a sour and tangy sauce made from Tamarind extract. Tamarind chutney is delicious with samosas, any type of pakoras, serve over dahi vadas, or any kind of chat. As Tamarind add tastes to almost all the India snacks but it has many heathy benefits too. It protects the health of heart, manages diabetes, boosts immunity and improves digestion.
Course Dinner, Indian, Lunch, Main Dish
Cuisine Indian, snacks
Prep Time 5minutes
Cook Time 5minutes
Total Time 10minutes
Servings 4People
Calories 0.019kcal
Cost 10 rupee
Equipment
Mixer Grinder
Knife
Bowl
Ingredients
3tspTamarind / Imli, Make paste
6tspCoriander leaves / Dhaniya Patti
1/2tspCoriander Seeds
1/2tspCumin / Jeera Seeds
1unitgreen chilly, You can add more chilly.
Saltasper taste
Instructions
Break the tamarind / imli into peaces and soak them into water.
If you are sort of time you can boil tamarind with little water.
Put tamarind / imli, green chilly, coriander leaves, coriander seeds, cumin seeds, black / kala, white / safed salt into grinding jar.
Make paste in the grinder.
Exotic Tamarind / Imli chutney is ready.
Notes
Black / Kala salt is good for stomach.
Cumin / Jeera seeds is also good for digestion.
Exotic chutney is ready. Serve with samosas, any type of pakoras, serve over dahi vadas, or any kind of chat.
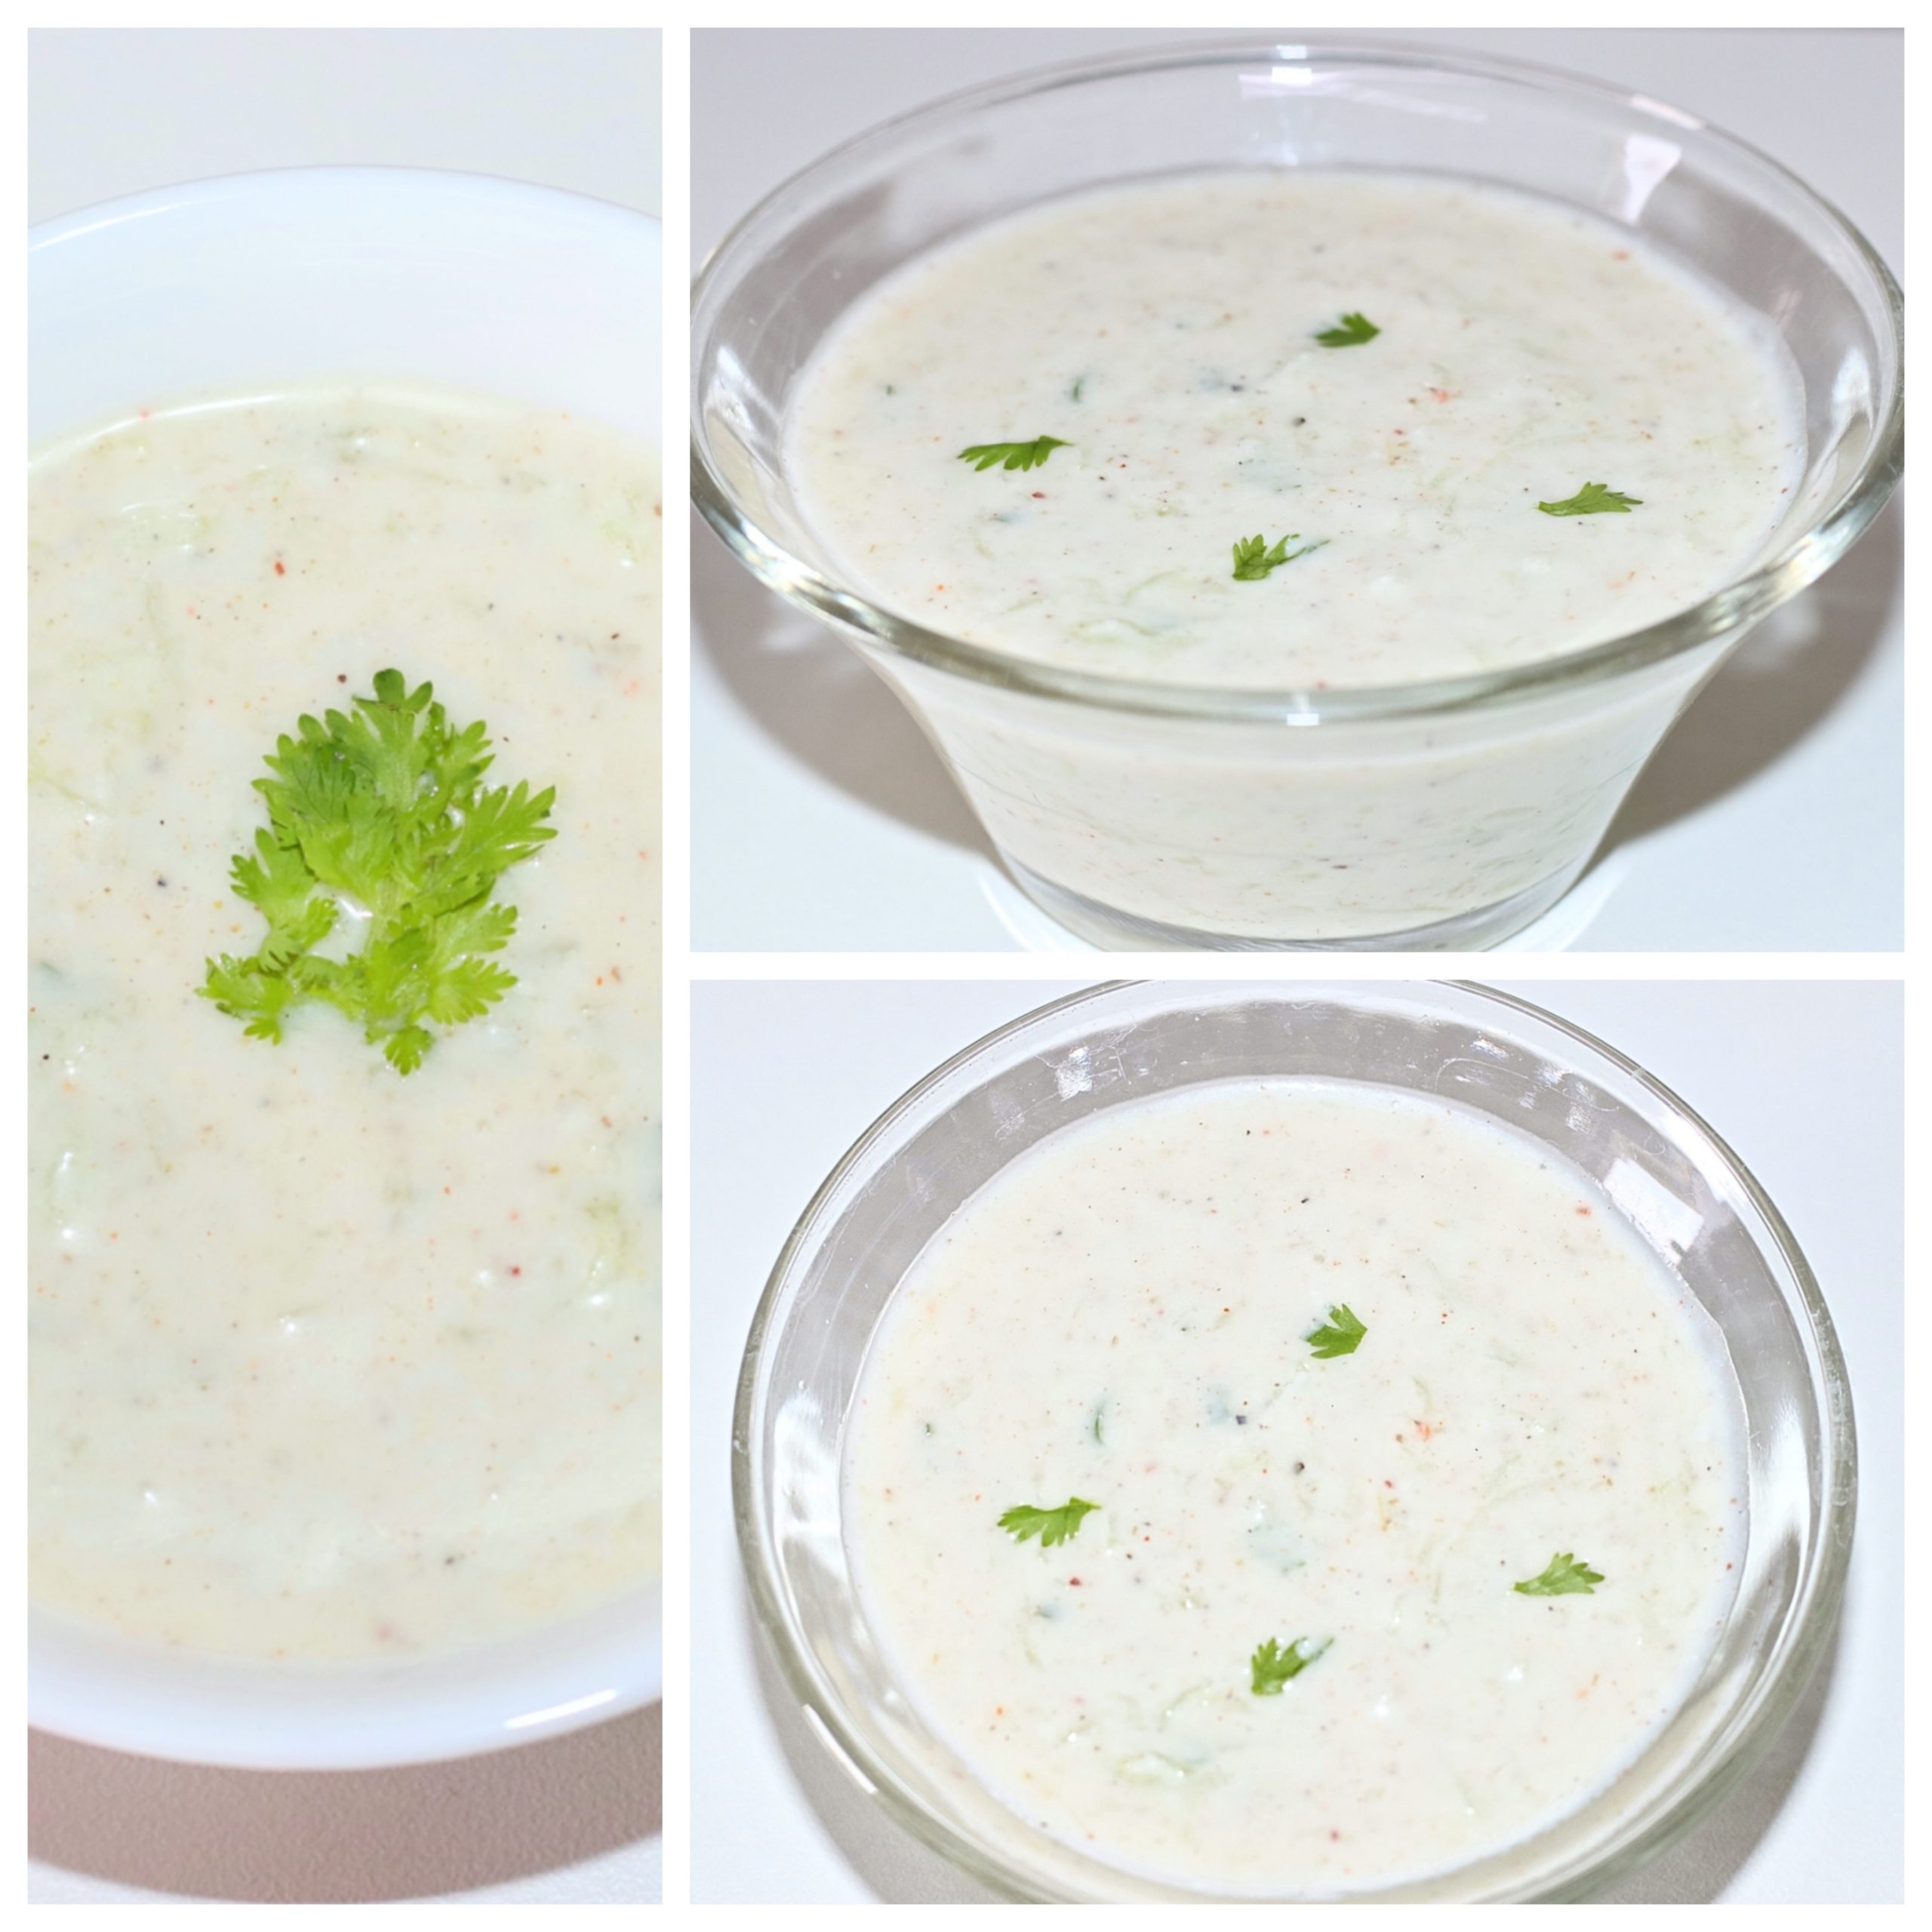
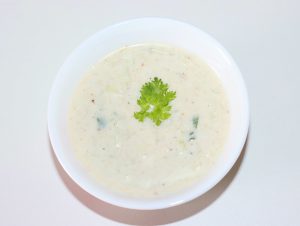
Cucumber or kheera Raita is a delightful refreshing dish and adds very good taste to any meal. Cucumber dip in curd or yogurt typically served with paratha and full meal. Spices in this raita makes very yummy taste. Cucumber or kheera raita usually served during summer to counter the heat in the body and also it tastes very good.
Course Dinner, Indian, Lunch, Main Dish
Cuisine Breakfast, dinner, Indian, lunch, Main
Prep Time 5minutes
Cook Time 5minutes
Total Time 10minutes
Servings 2People
Calories 0.098kcal
Cost 12 rupee
Equipment
Knife
Bowl
Ingredients
1unitCucumber (Kheera)
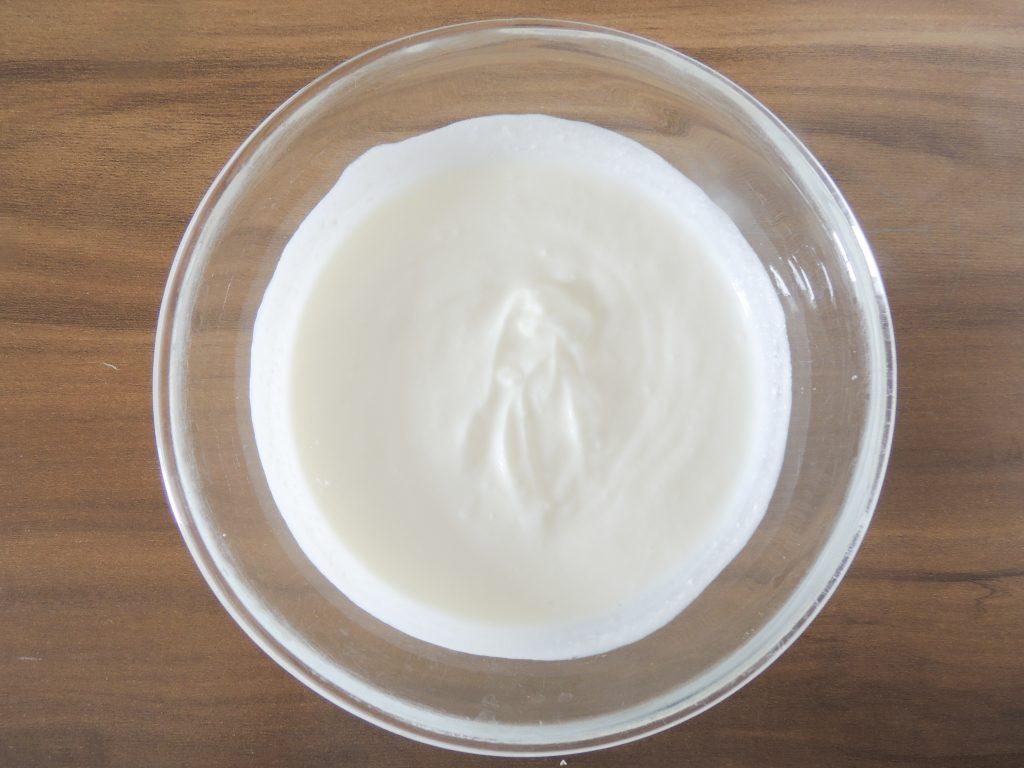
150gramsCurd (Yogurt)/ Dahi, Beat the curd
1/2tspBlack Pepper / Kali Mirch
1/2tspCumin / Jeera Powder
1/2 tspCoriander leaves / Dhaniya Patti
1/4tspChilly / Lal Mirch Powder
asper tasteSalt / Namak, add half white salt as we need to add black salt as well
asper tasteBlack Salt / Kala namak, add half black salt as we already added white salt
Instructions
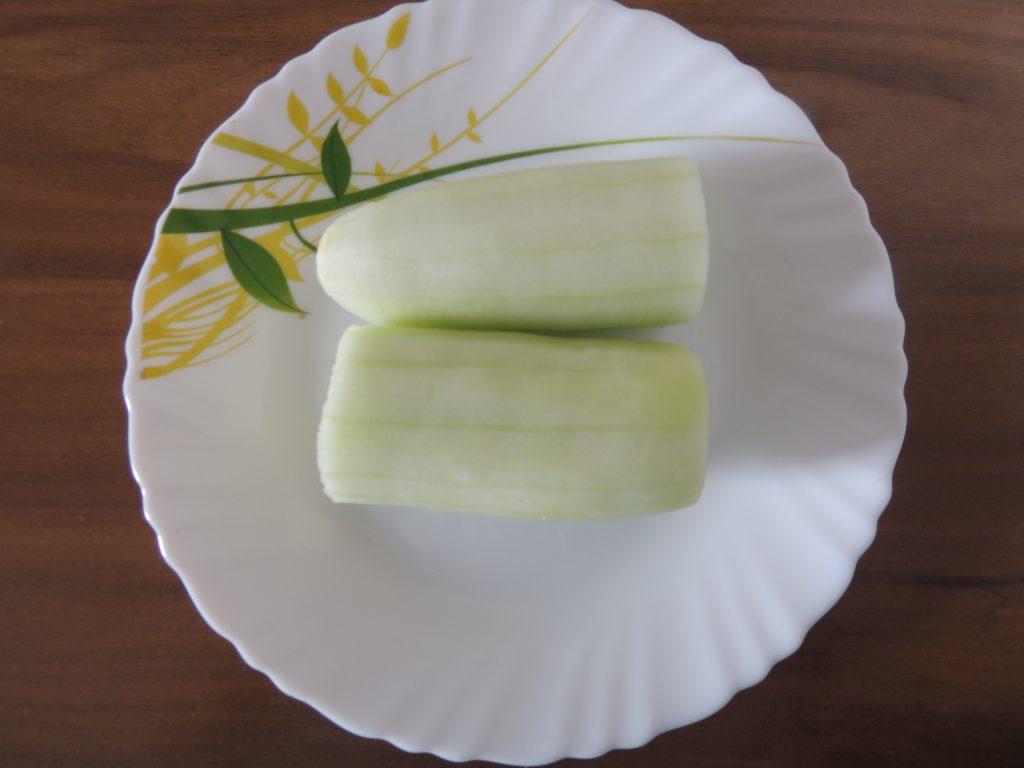
Take cucumber ( kheera ), peel off the cucumber.
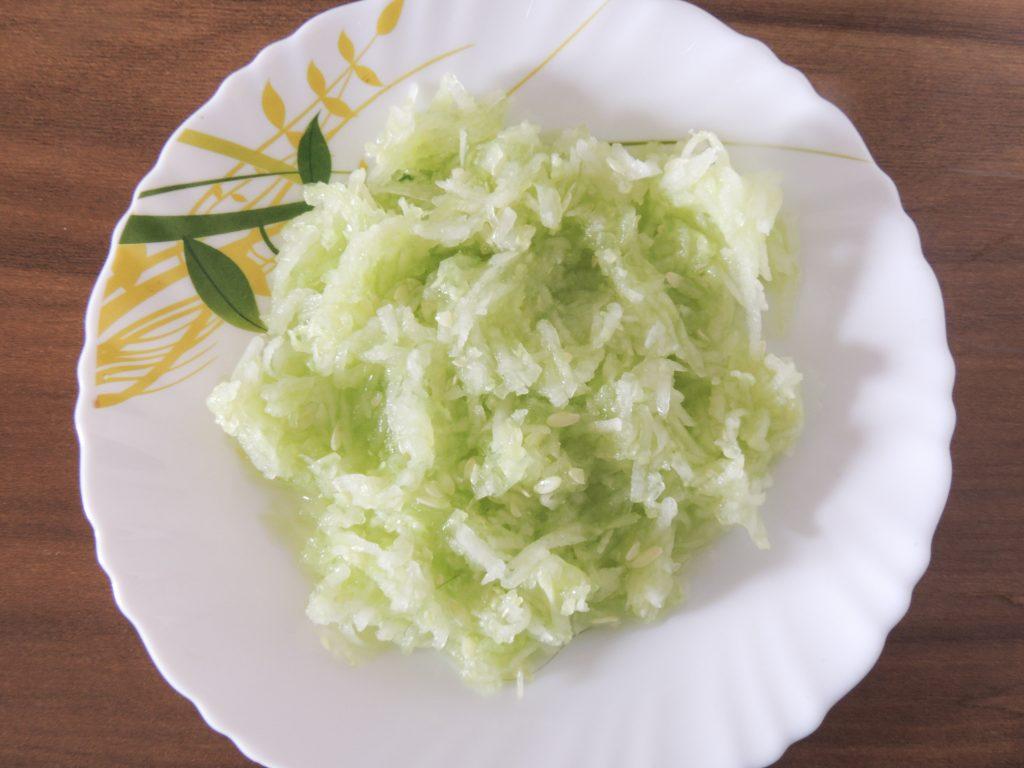
Grate the cucumber / kheera with grater.
Take the curd / dahi and beat the curd
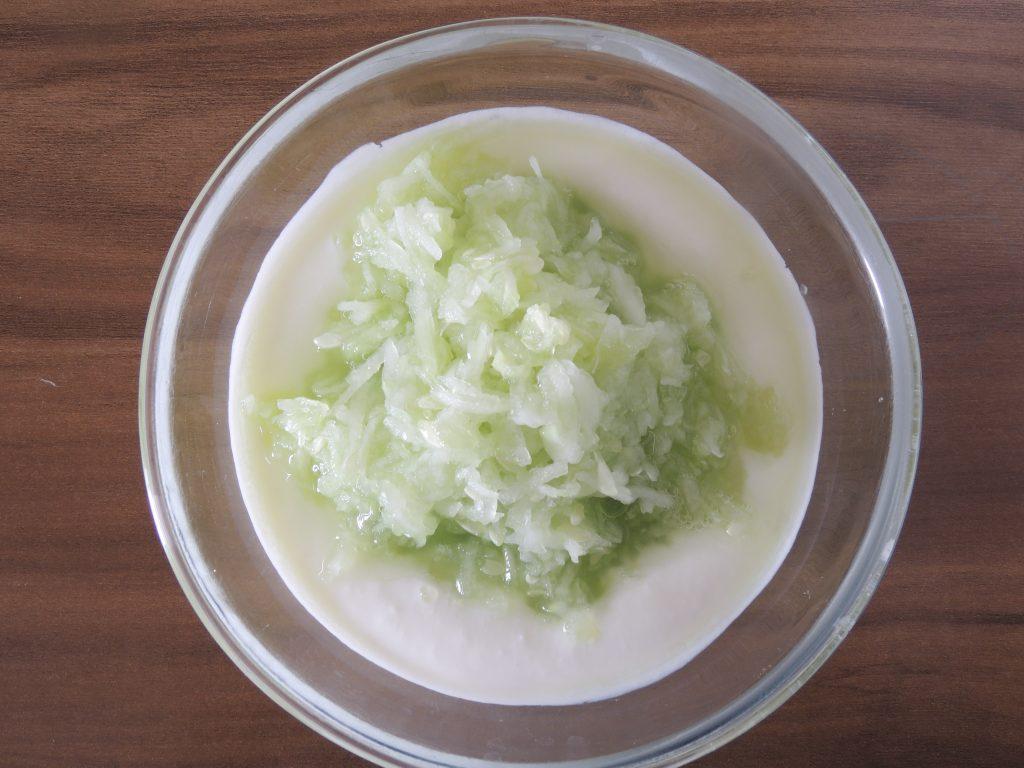
Add grated cucumber / Kheera into beaten curd / dahi.
Add all the spices black salt, cumin powder, black pepper, red chilly powder, white salt.
Mix all the spices with curd.
Sprinkle Coriander leave in the raita.
Serve the raita with meal or paratha.
Video
Notes
Cucumber (Cucumis sativus) is a widely cultivated plant in the gourd family, Cucurbitaceae.
It is a creeping vine that bears cucumiform fruits that are used as vegetables.
There are three main varieties of cucumber: slicing, pickling, and seedless. Within these varieties, several cultivars have been created.
In a 100-gram serving, raw cucumber (with peel) is 95% water, provides 67 kilojoules (16 kilocalories) and supplies low content of essential nutrients, as it is notable only for vitamin K at 16% of the Daily Value (table).
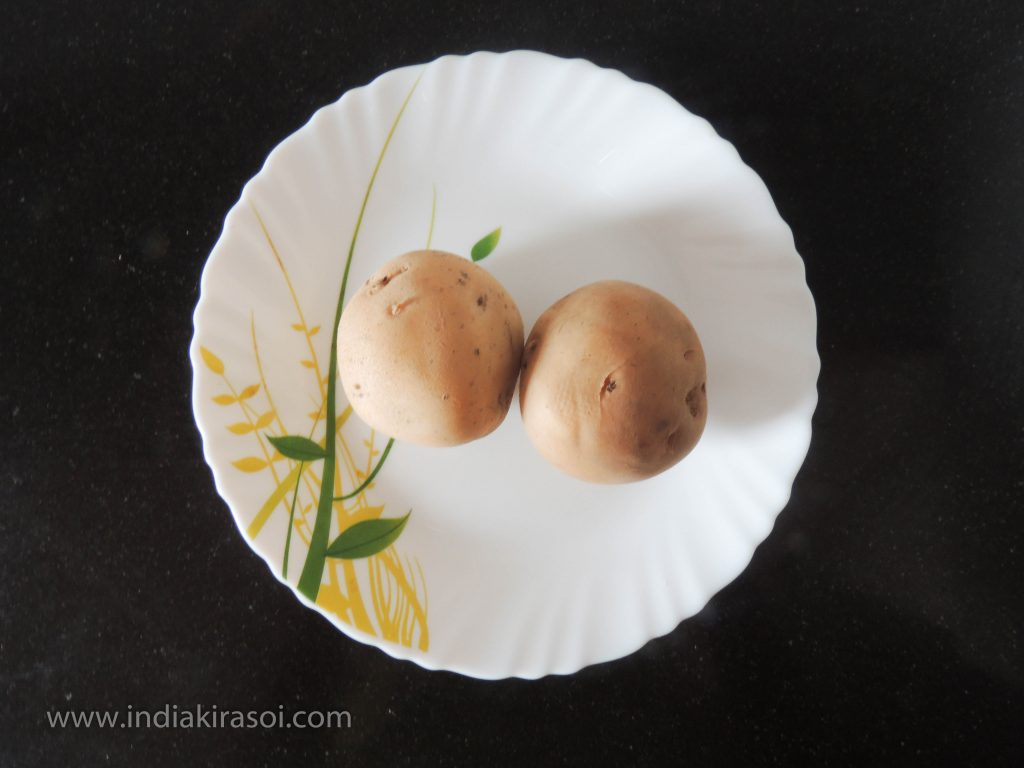
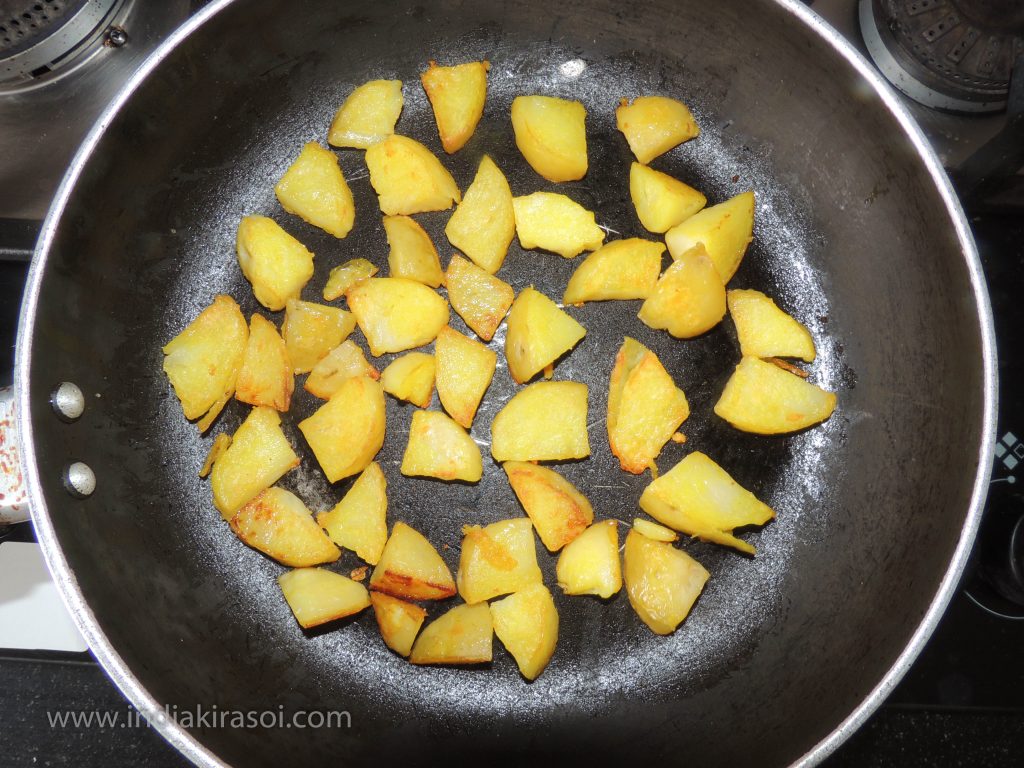
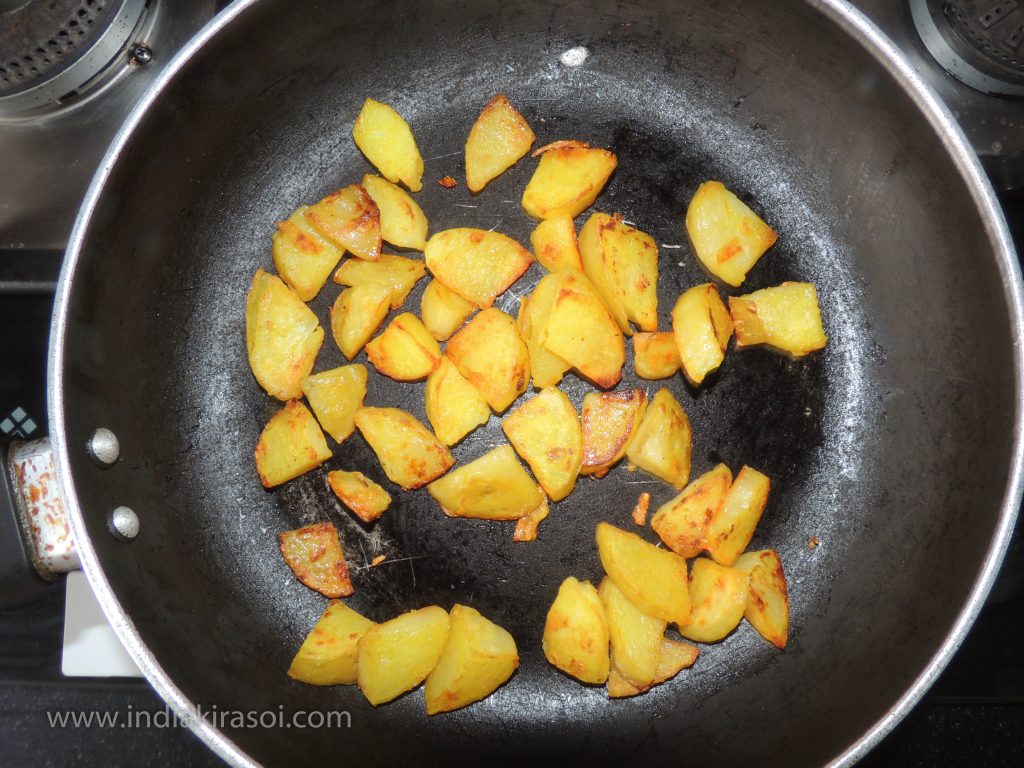
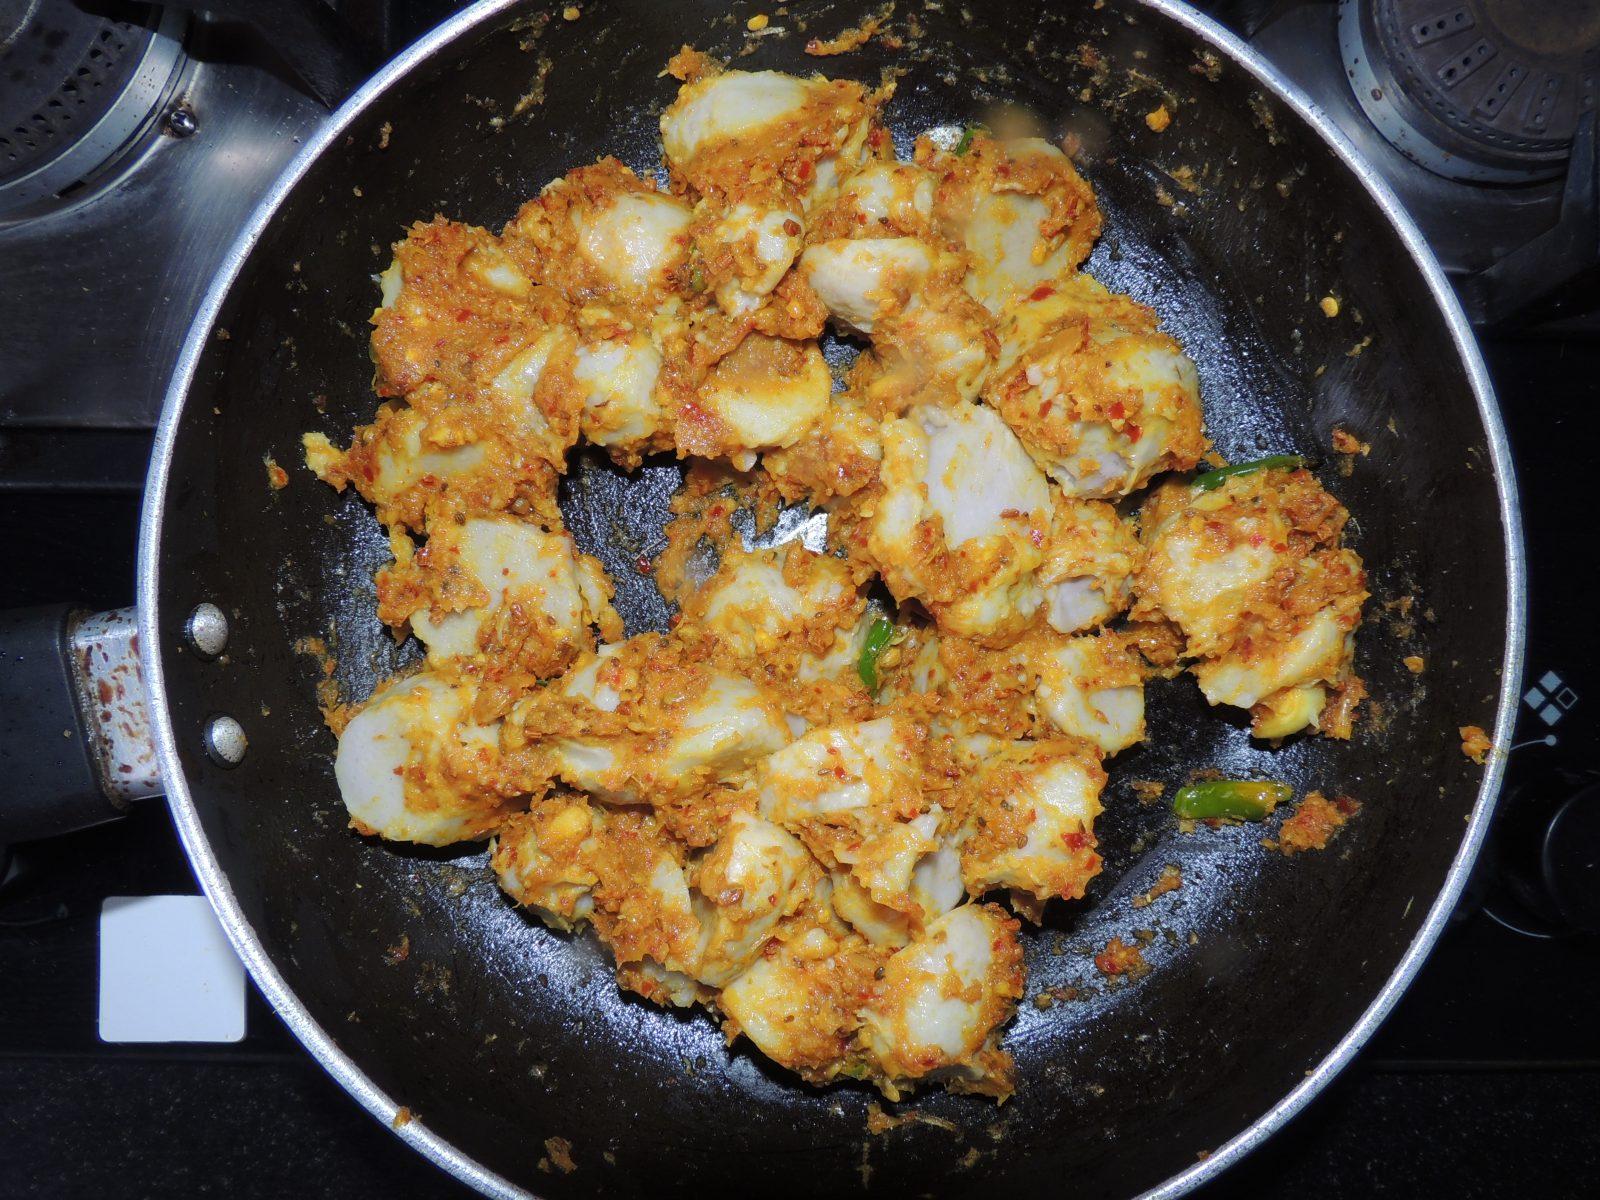
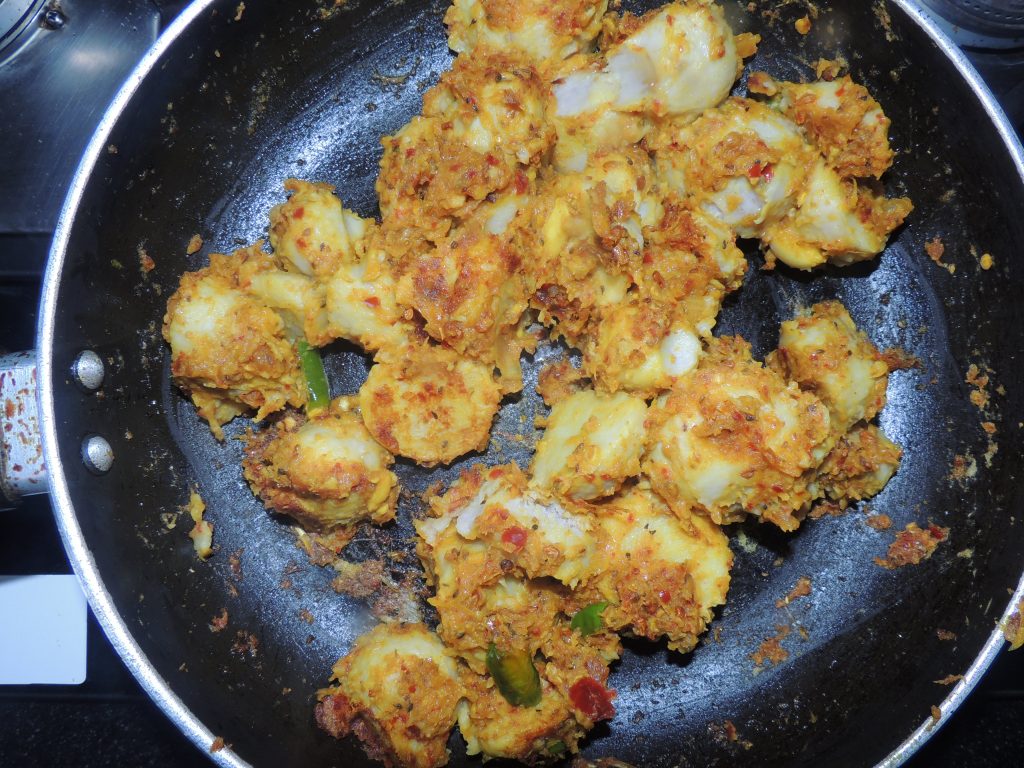
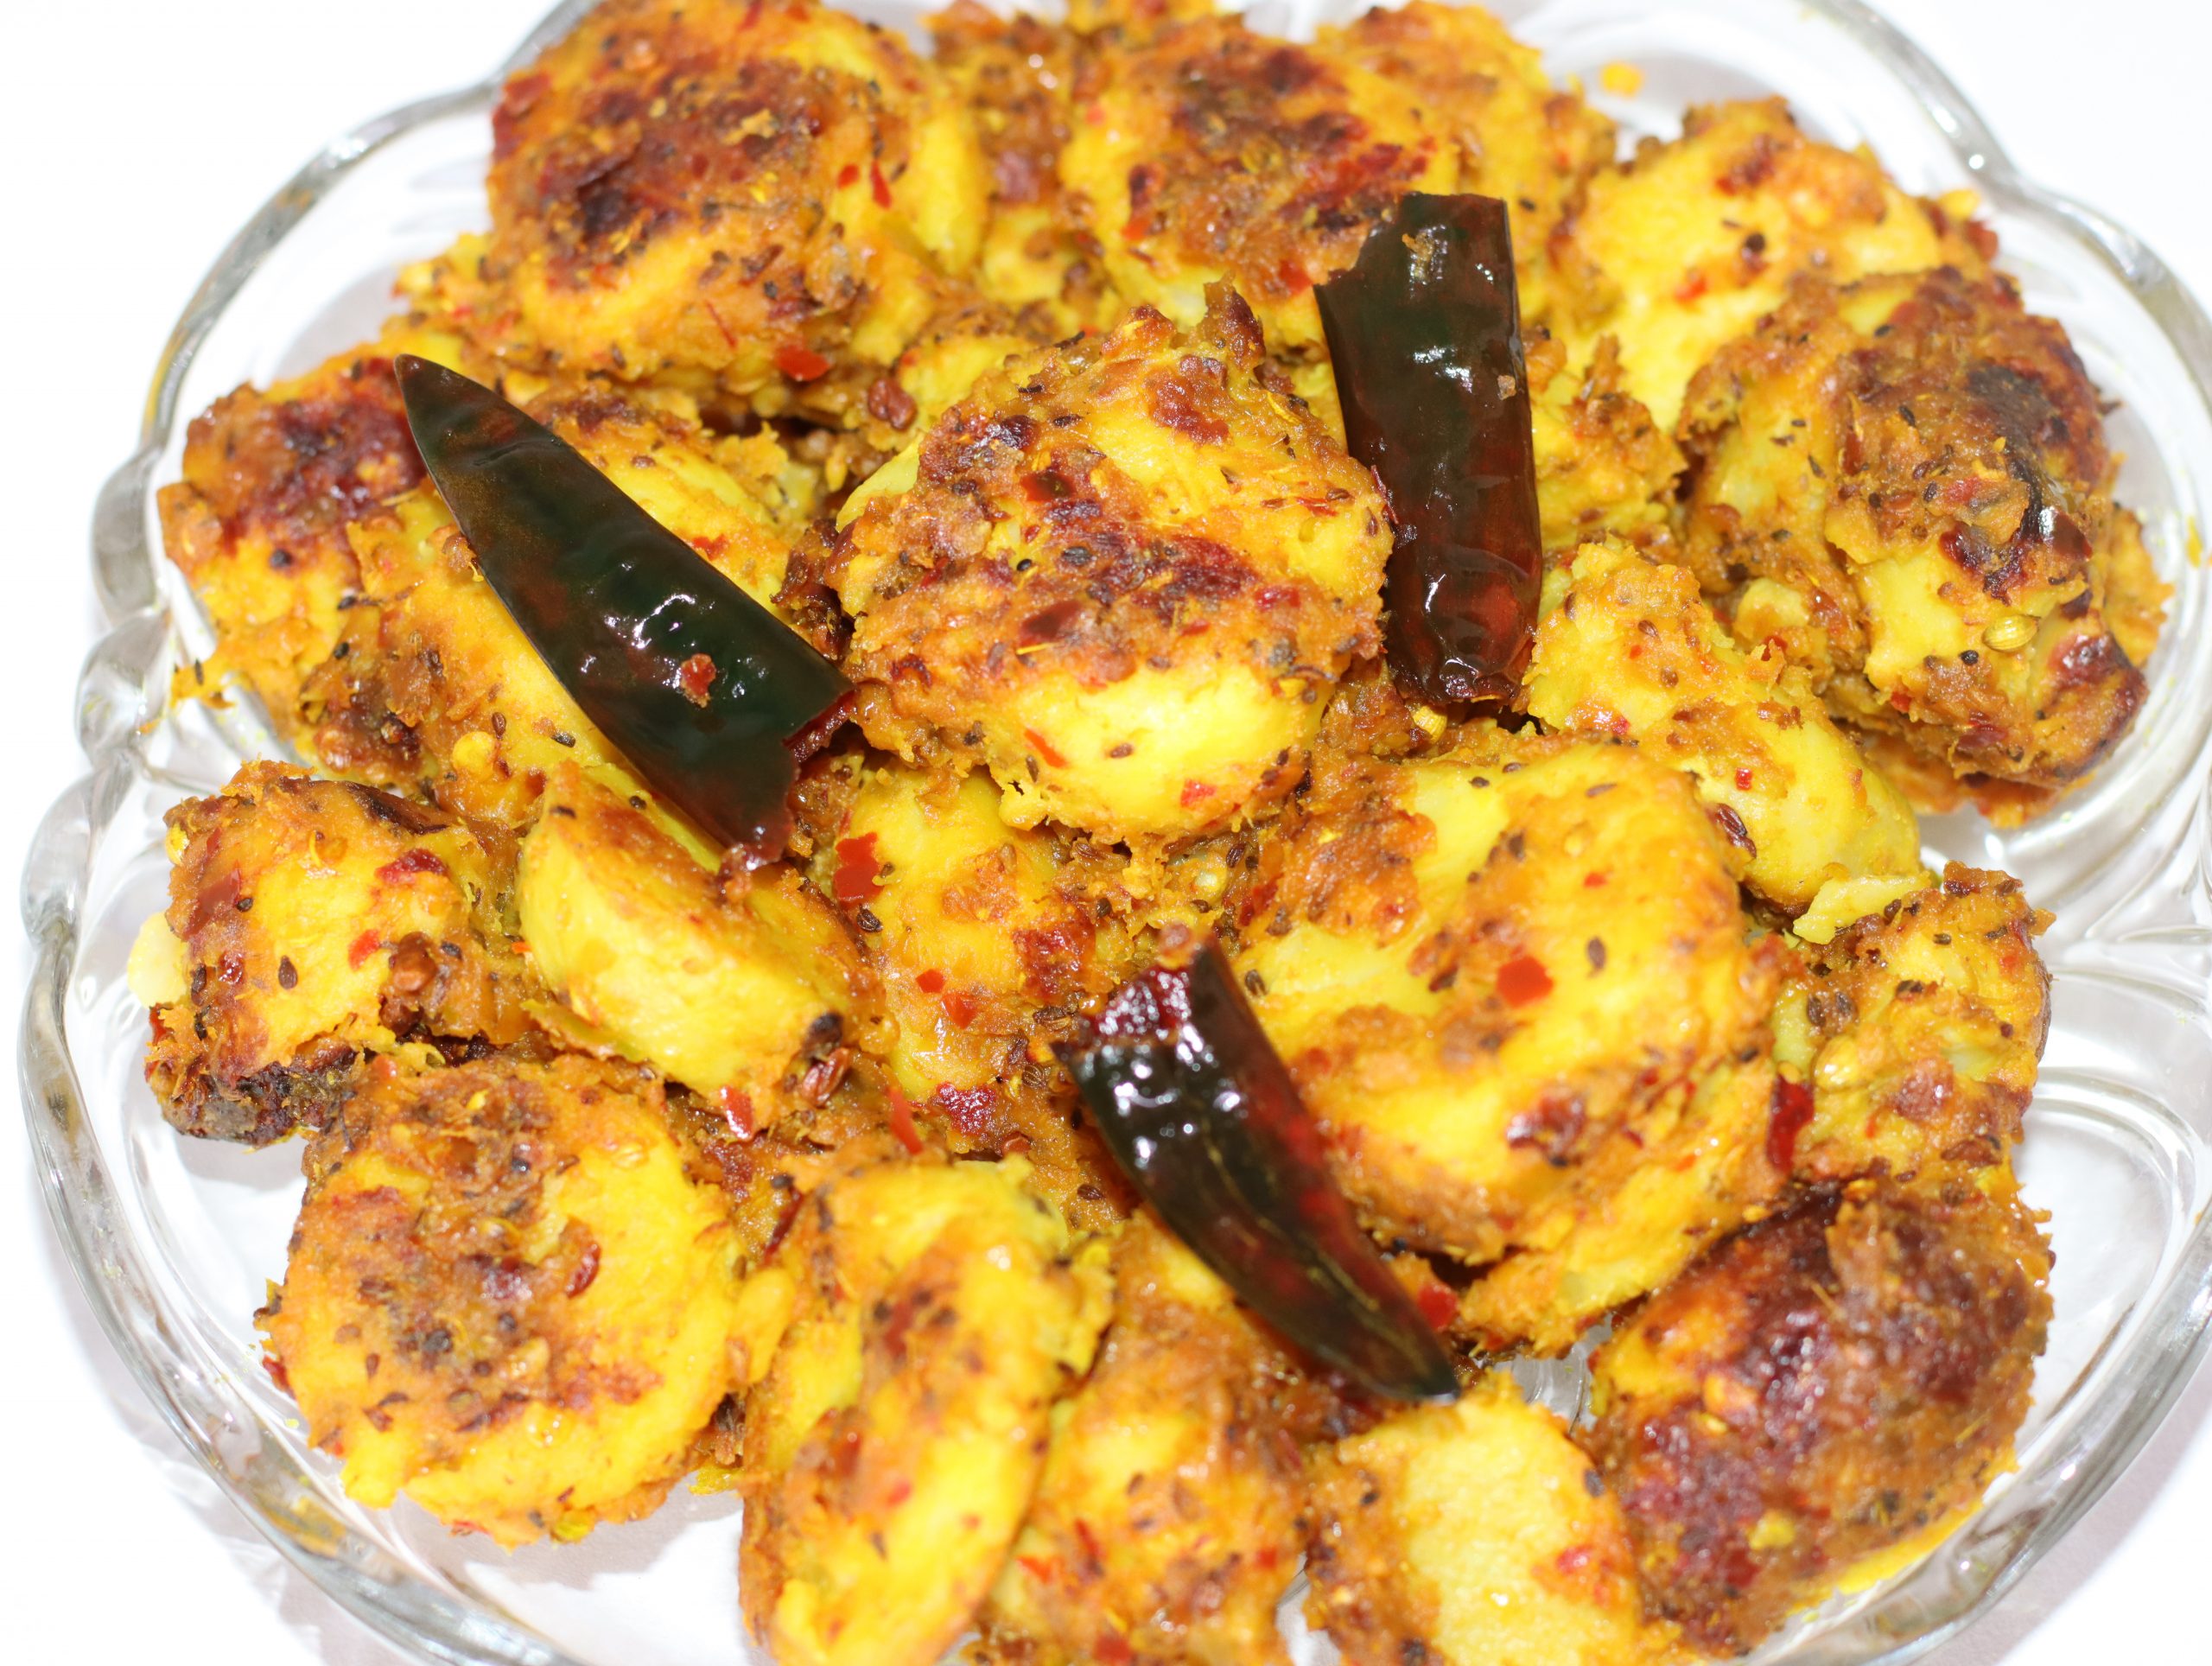
Potato Butter fry is very easy and quick snacks. If you came from office at the evening and feeling some craving, this is the best snacks. This recipe is very delicious and can be made from very less ingredients. meanwhile if you want to change the taste, this is very good option to have with little effort. If you are planning to host a party and not sure for the starter, then go for it. This fry butter potato recipe will impress your guest with your culinary skills. They are surely going to give compliments. Potato is good in carbohydrate and gives instant energy to body. This crispy potato butter fry one can enjoy with tea or coffee. If you want to add more tempting flavour the enjoy with tamarind chutney or tomato dhaniya chutney.
Course Breakfast, Snacks, Starter
Cuisine Indian, Italian
Prep Time 5minutes
Cook Time 10minutes
Total Time 15minutes
Servings 2People
Calories 0.045kcal
Equipment
Pressure Cooker
Griddle/ Tawa
Knife
Ingredients
2UnitBoiled Potato
2tspButter
asper tasteSalt
1/4tspChat Masala, optional
2tspLemon Juice
Instructions
Take two potato and boil the in the cooker with 2 whistle.
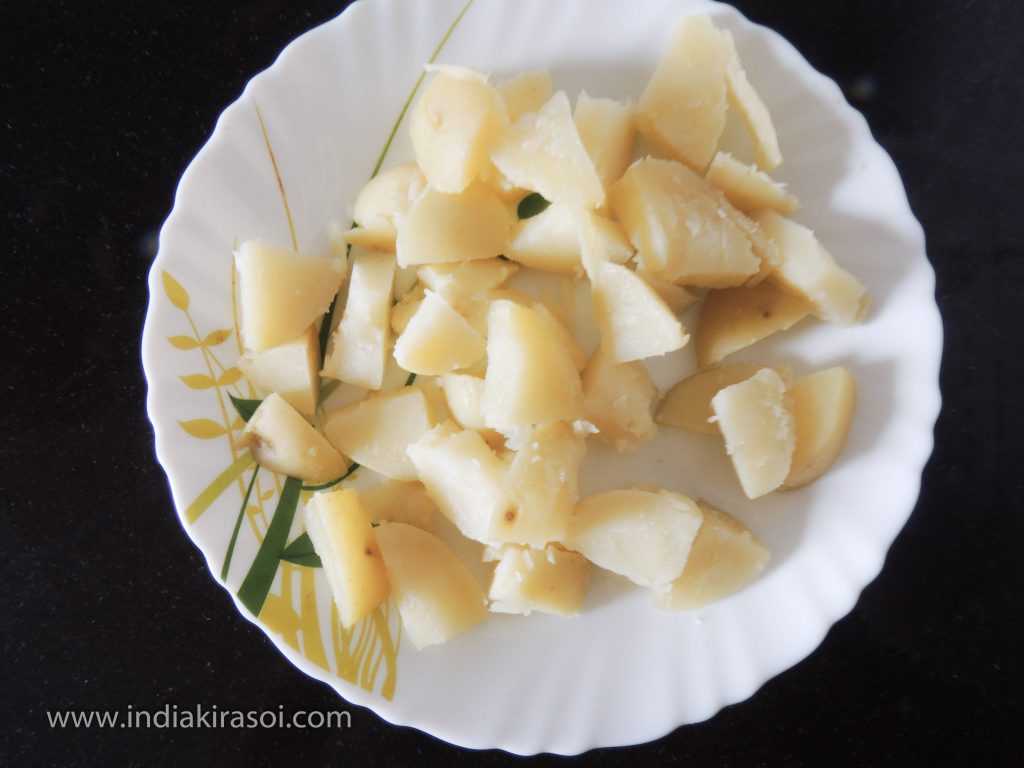
Peel the potato.
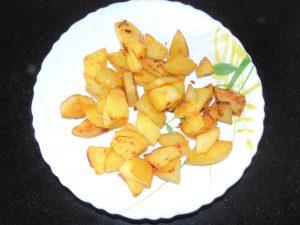
Cut the potato in small slices.
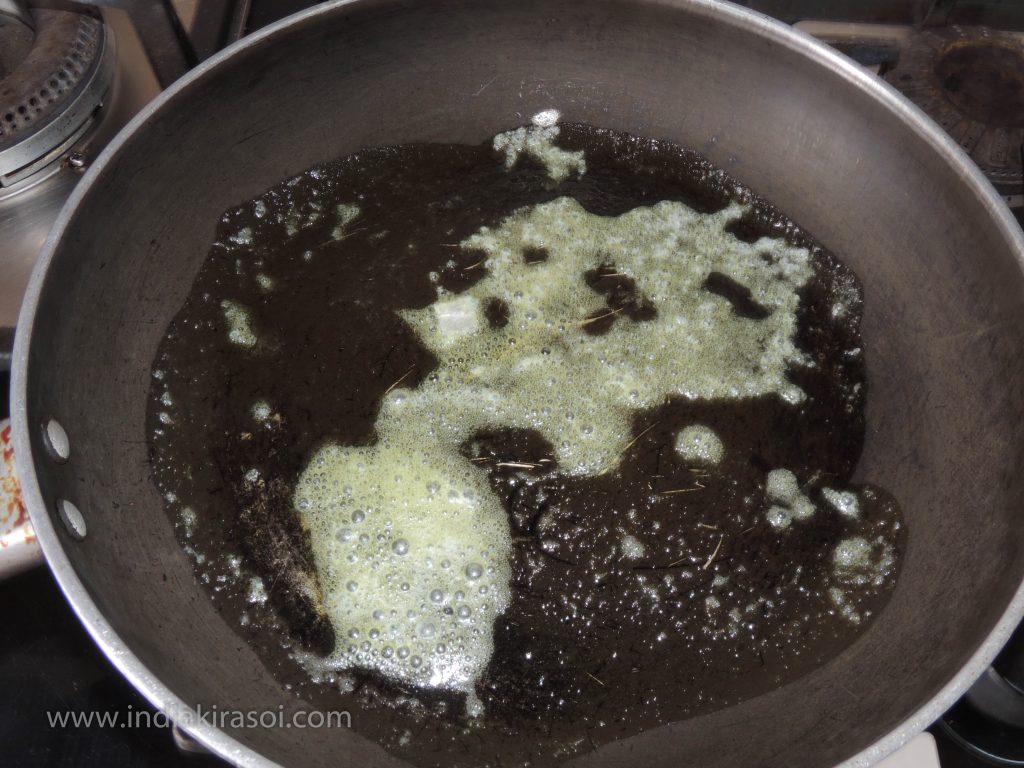
Take a fry pan ( non stick is preferable ), add the 1 – 2 tbsp butter into it.
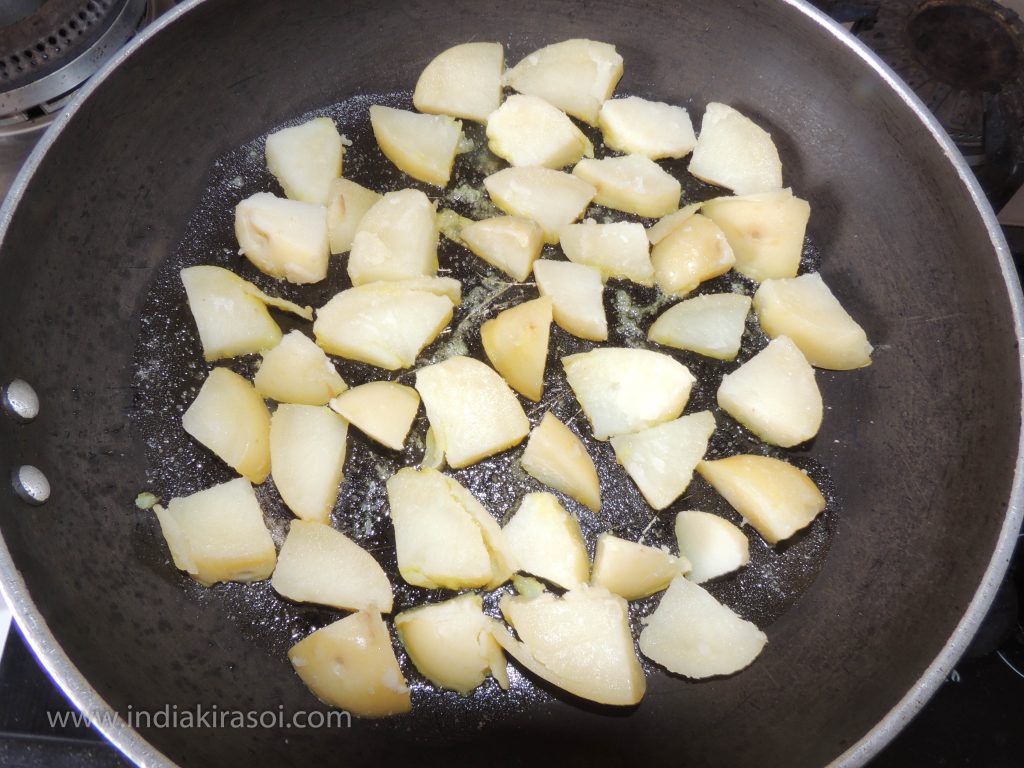
After that add the sliced potato in the frying pan.
After that flip the potato in the frying pan.
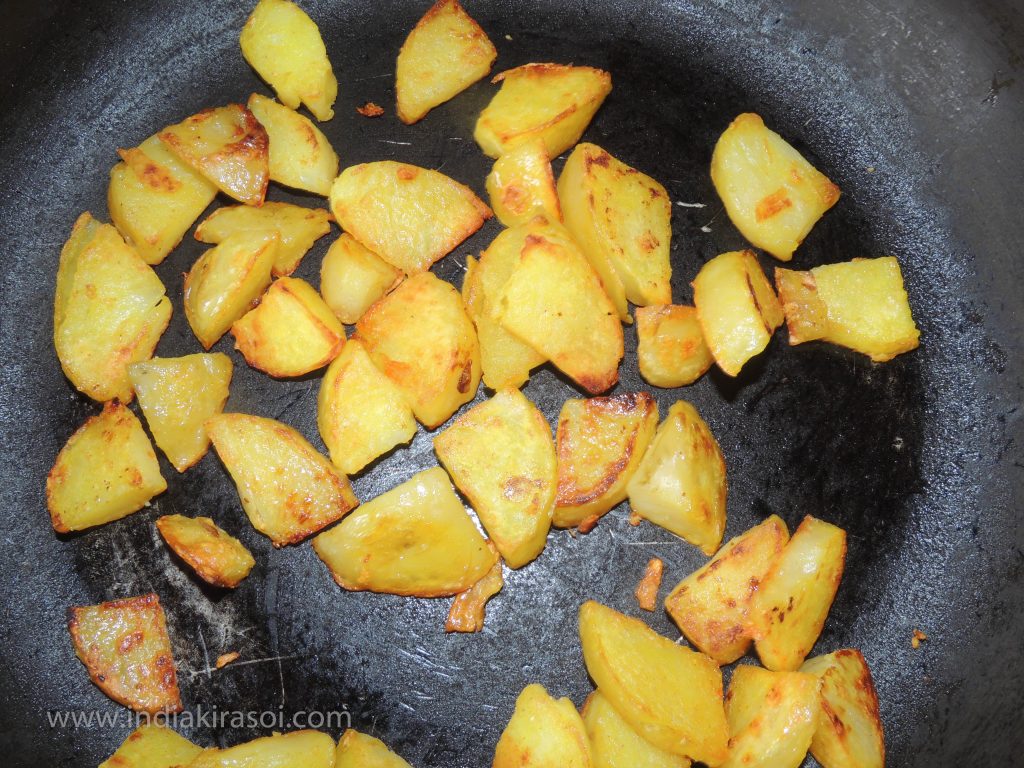
Continuously flip the potato in the frypan until it becomes crispy and brown.
After that add 2 tbsp of juice and sprinkle 1/4 tsp in it for an exotic taste.
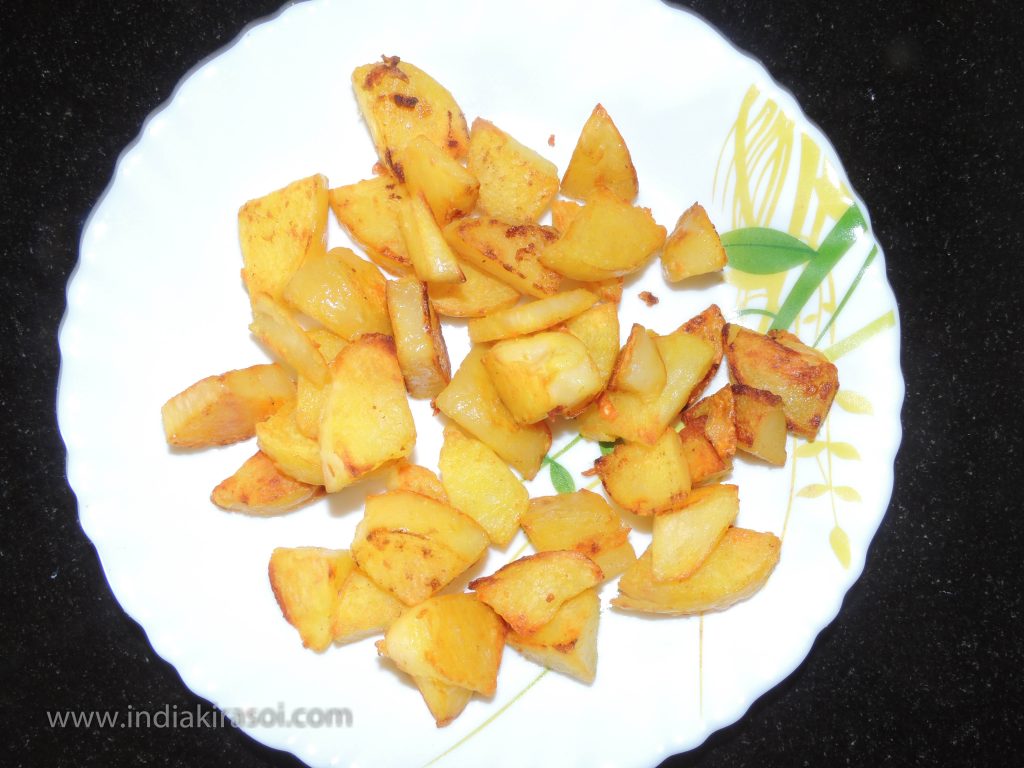
Now crispy potato butter fry is ready.
Enjoy this crispy potato butter fry with tea or coffee.
Notes
Enjoy this yummy fry potato with tea. You can try chutney with this recipe…
Pigeon Pea with Onion Tomato Tempering/ Arhar(Tur) Daal Pyaz Tamatar Tadka/ Arhar Daal Fry
Tur /Arhar dal/ pigeon pea is very important to our food, people who eat only vegetable food are often deficient in protein. Tur/ Arhar dal/ pigeon pea is rich in protein. Pulses are very beneficial in making your muscles, so include pulses in your food every day. By the way, there are manytypes of lentils, such as lentils, gram, moong, urad, etc. Today we will learn tur dal / Arhar dal/ pigeon pea here, in which we will also add onion and tomato tempering.To make the tur /Arhar dal/ pigeon pea with the tempering of onion and tomato, make the following method step by step…
Course Dinner, Indian, Lunch, Main Dish
Cuisine dinner, Indian, lunch, Main
Prep Time 5minutes
Cook Time 15minutes
Total Time 20minutes
Servings 4people
Calories 38kcal
Equipment
Pressure Cooker
Kadhai / Fry Pan
Big Spoon
Knife
Bowl
Ingredients
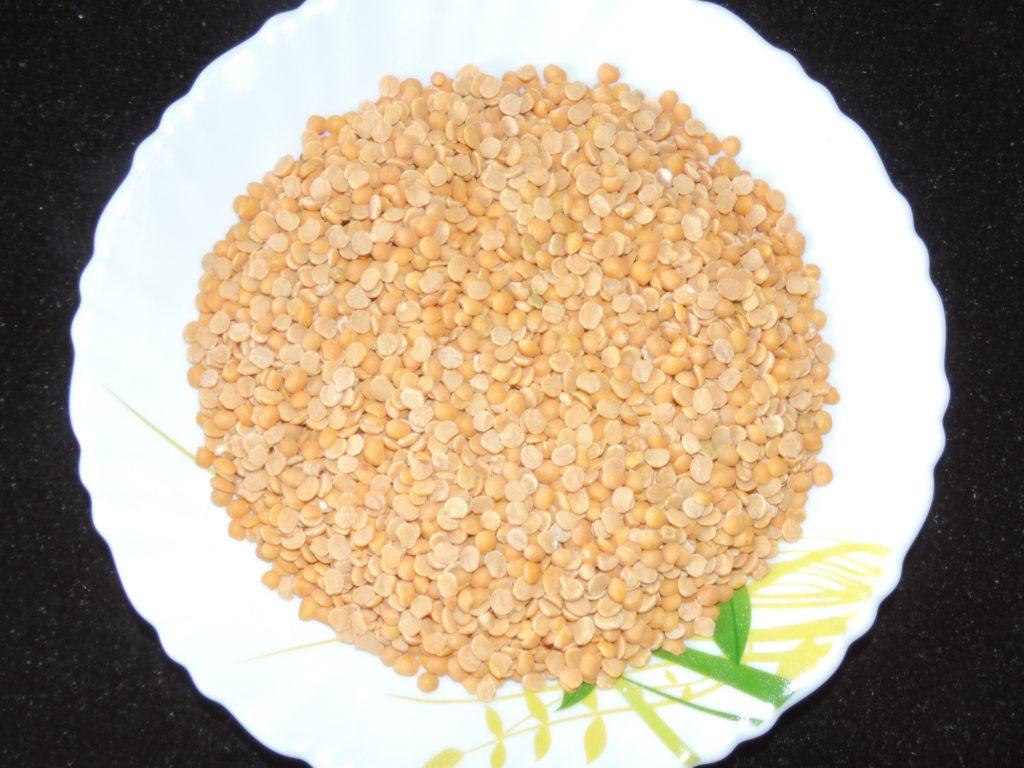
125gramsArhar Dal / Toor Dal / Pigeon Pea
1tspTurmeric (haldi) powder
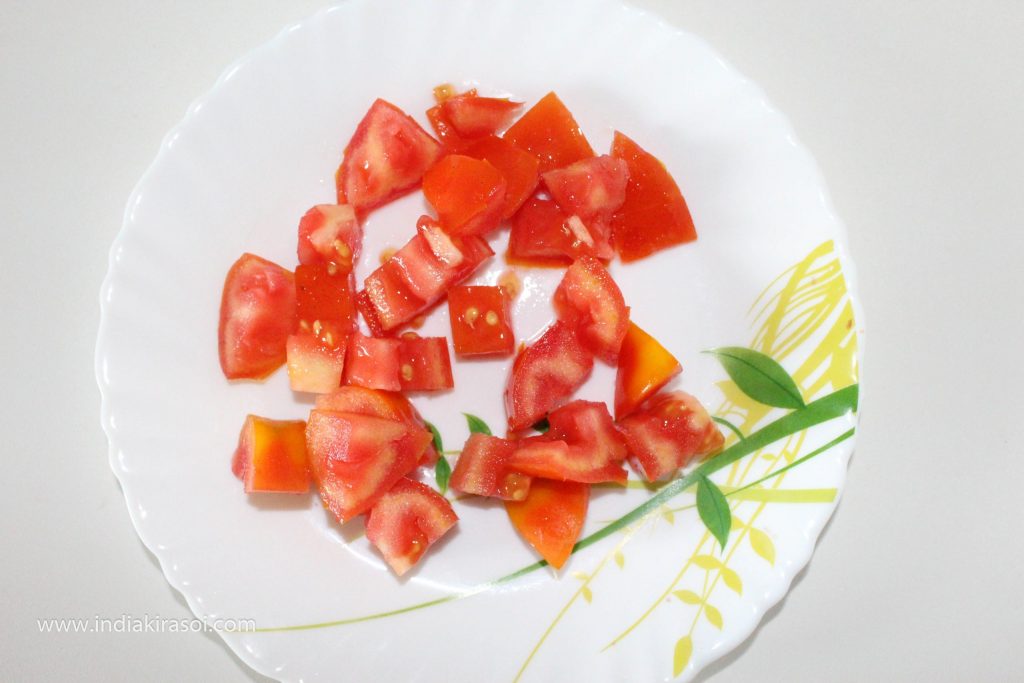
1unitTomato / Tamatar, chopped
1unitOnion / Pyaz, chopped
3clovesGarlic / Lahsun, cut into 3 pieces
1tspDesi Ghee or Butter
1/2inchGinger/ Adrak
500gramsWater / Pani
1tsp Cumin Seed / Jeera
1pinchAsafoetida / Heeng
1unitWhole Red Chilly / Lal Mirch
Salt as per taste
Instructions
Take 125 grams of arhar/ tur dal / Pigeon Pea.
Wash arhar/tur dal at least 4 times with fresh and clean water, and put it into a cooker.
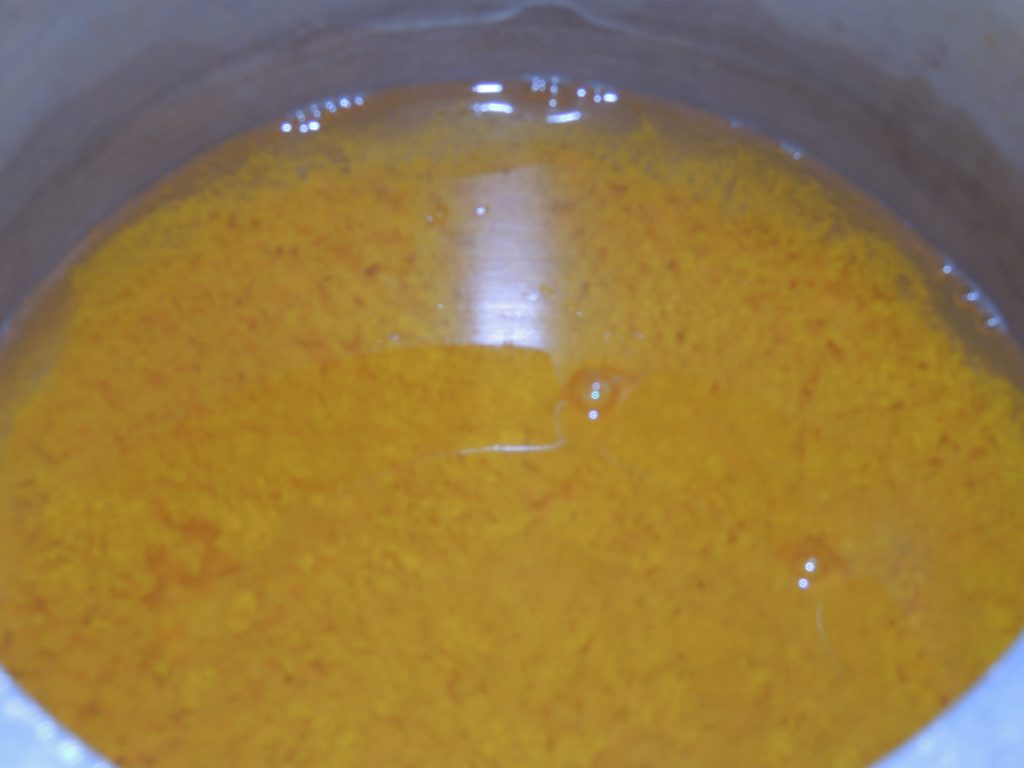
Add 500 milliliters of water and one tsp turmeric and salt as per taste, add about 5 grams of salt to 125 grams of arhar/ tur daal or you can add salt according to your taste. cover the cooker with lid.
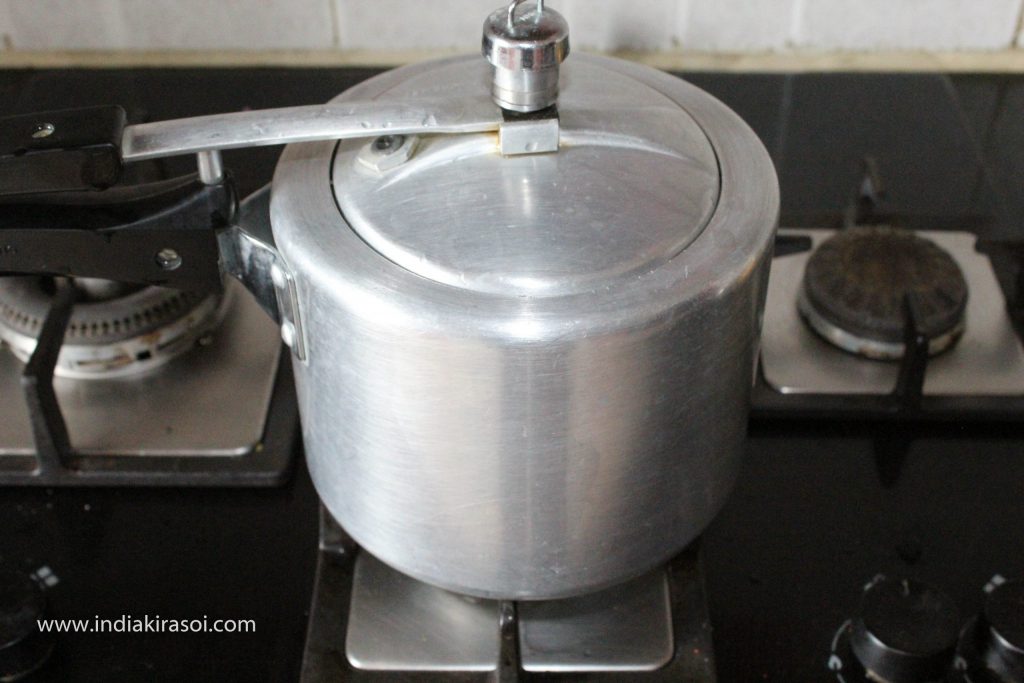
After this, close the pressure cooker lid, put the pressure cooker on the gas and turn the flame on high.
Wait for 2 whistles to come on the high flame and one on the low flame.
After that switch off the gas.
Wait for the pressure to come out of the cooker.
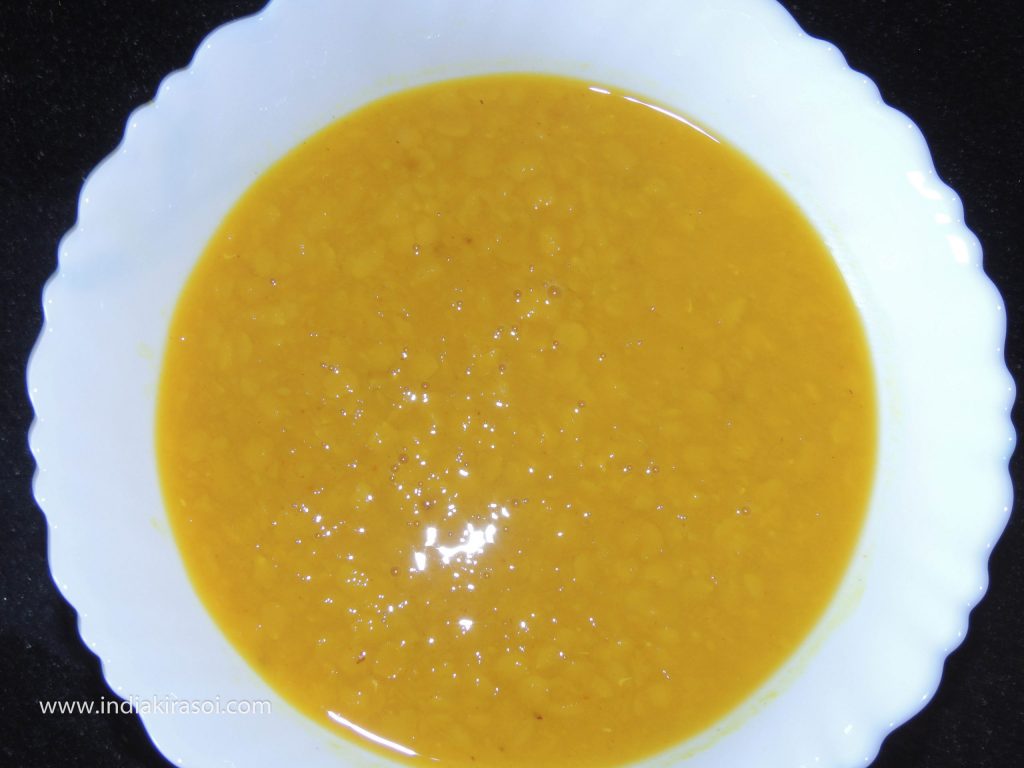
Once pressure release, transfer the arhar/ tur dal in a bowl.
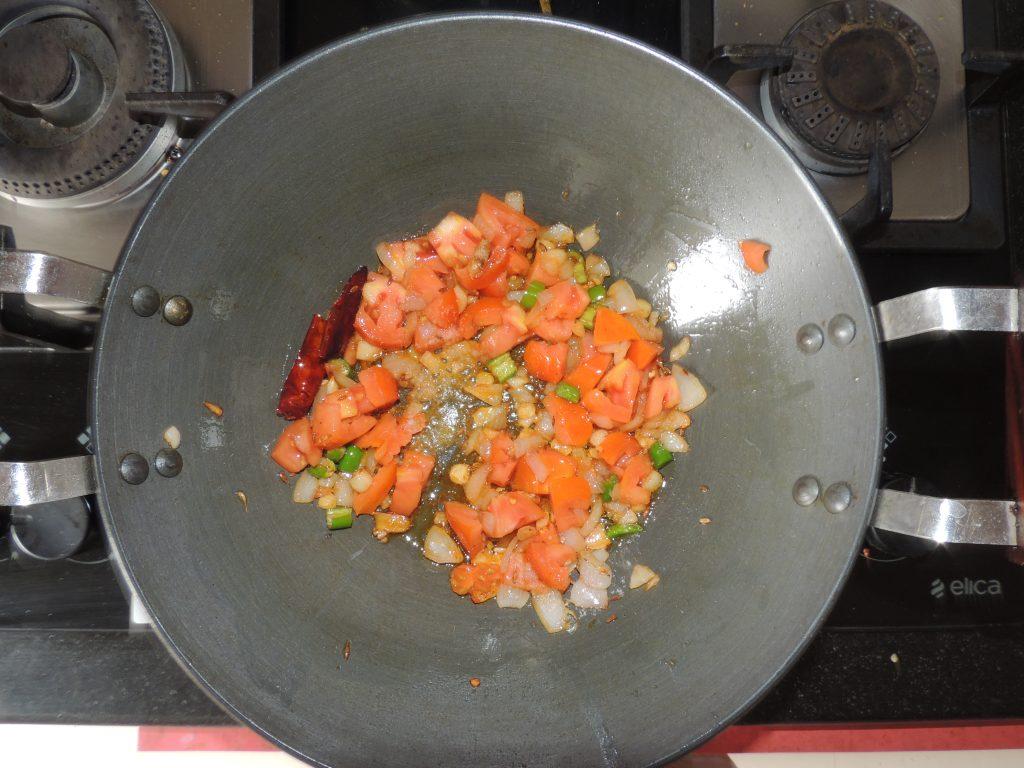
Finely chop garlic, onion, green chili, and ginger.
Finely chop one tomato.
Take kadhai or fry pan and put 1 tsp desi ghee in a kadhai or frying pan.
Once the desi ghee becomes hot, put cumin seed in the kadhai/ fry pan.When cumin starts crackling after that add chopped garlic after 10 sec similarly adds chopped onion and whole red chilly and add ginger slices. Break red chili in two pieces and add them.
Fry the onion and garlic till it becomes brown. Add one pinch of asafoetida in the kadhai /fry pan.
Add the chopped tomato in the kadhai/ fry pan and add a small amount of salt, salt should be according to the quantity of tomato, fry the tomato.
Place the lid on the kadhai/ fry pan, so that the tomato will be properly cooked. Remove the lid after 30 seconds and mash the tomato with a spatula. Do not make juice of tomato mixture.
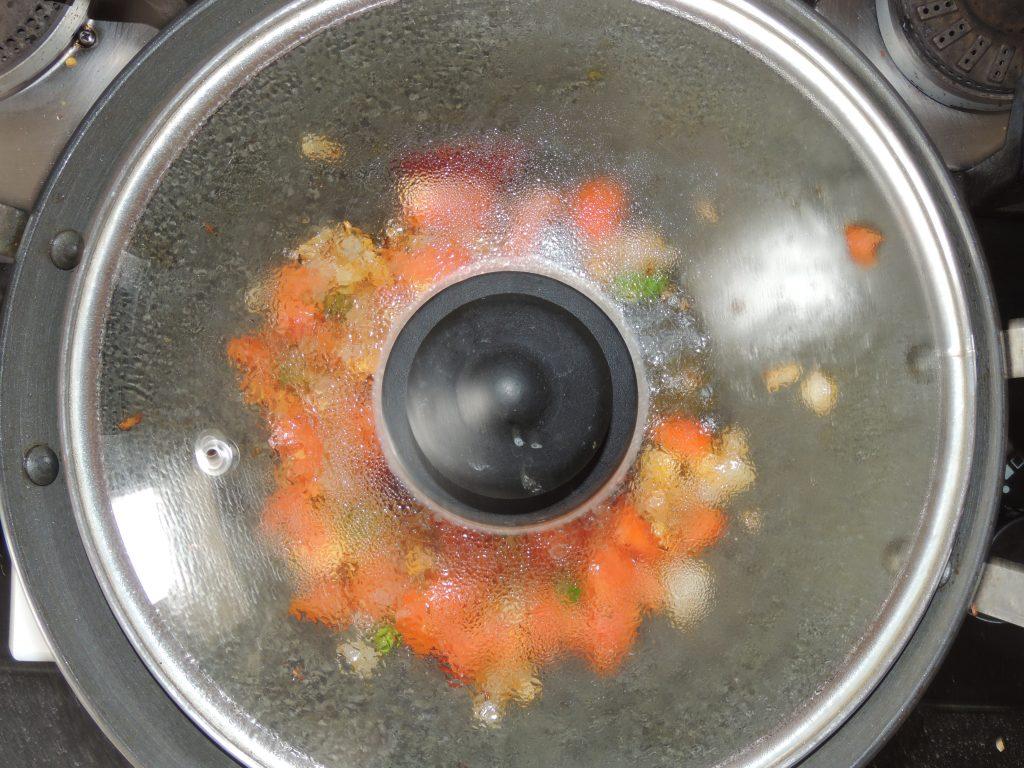
Once the tomato is cooked, add the cooked arhar daal in the kadhai (fry pan). Add 1/4 tsp mango (amchur) powder (optional).
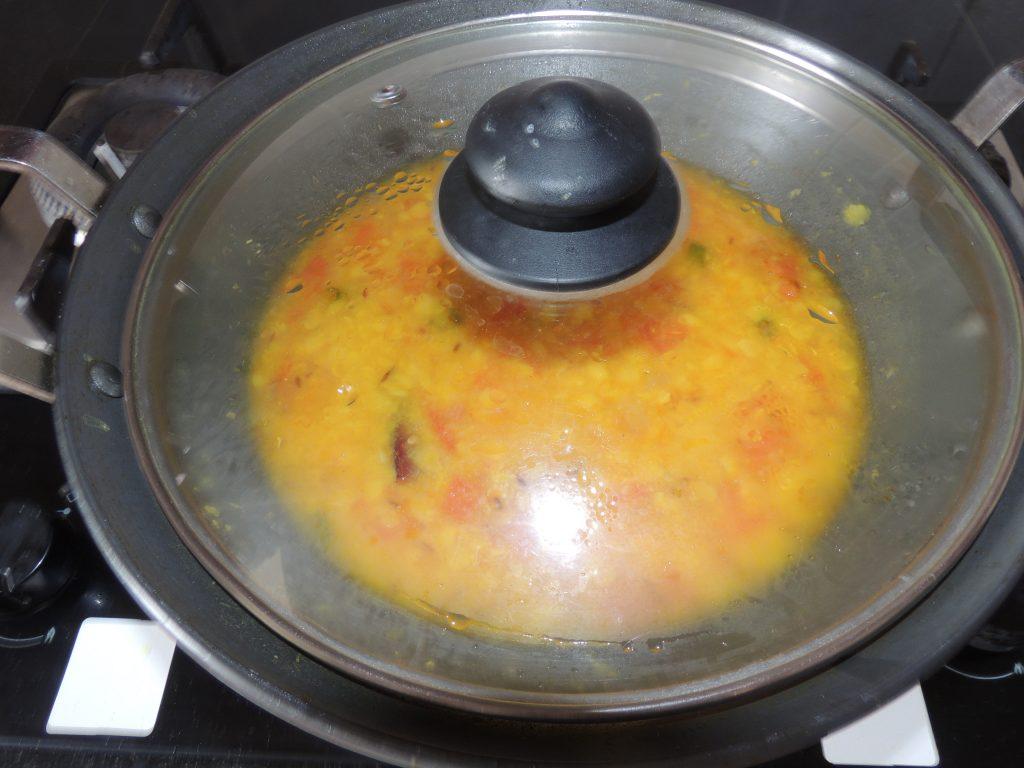
Place the lid of kadhai for 30 seconds.
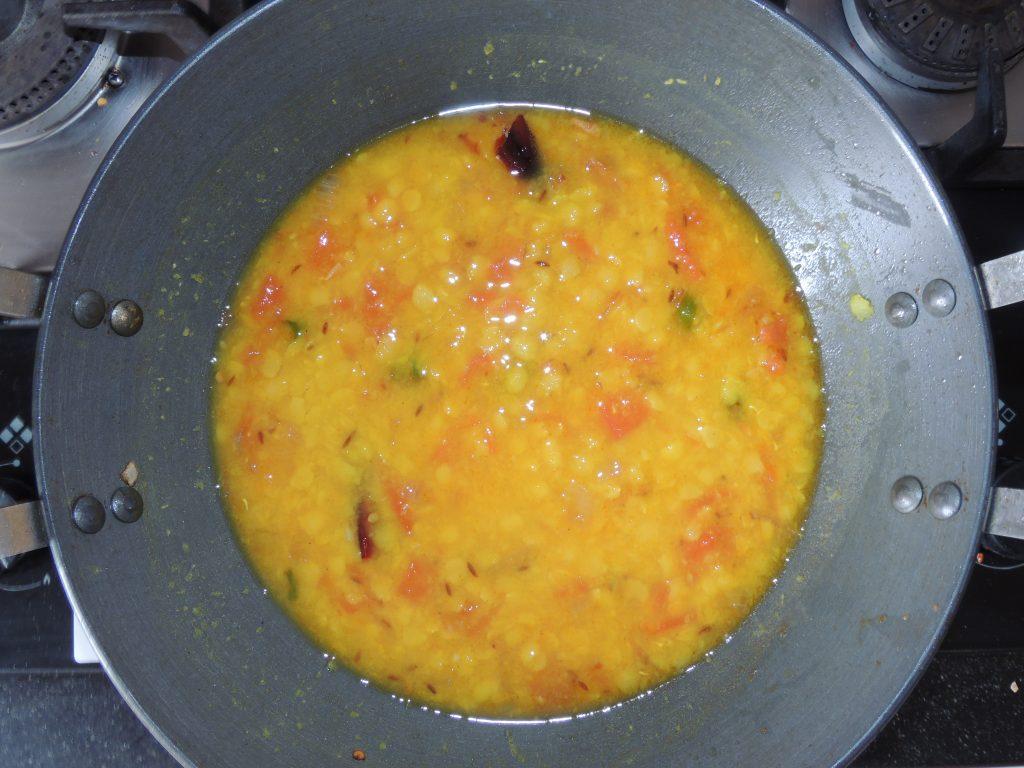
As Pigeon Pea with Onion Tomato Tempering/ Arhar(Tur) Daal Pyaz Tamatar, Tadka/ Arhar Daal Fry daal is ready to eat.
Transfer the daal in the serving bowl. You can also add coriander leaves in the last step. Arhar Daal Fry is ready, Enjoy Arhar Daal Fry with chapati and rice.
Notes
Eat the lentils with rice, if you are going to eat rice with lentils, then add half or one teaspoon of desi ghee on top of the tur / arhar dal/ pigeon pea, eat indigenous ghee and dal rice will be very tasty.
Tur / arhar dal/ pigeon pea can also be eaten with bread and vegetables.
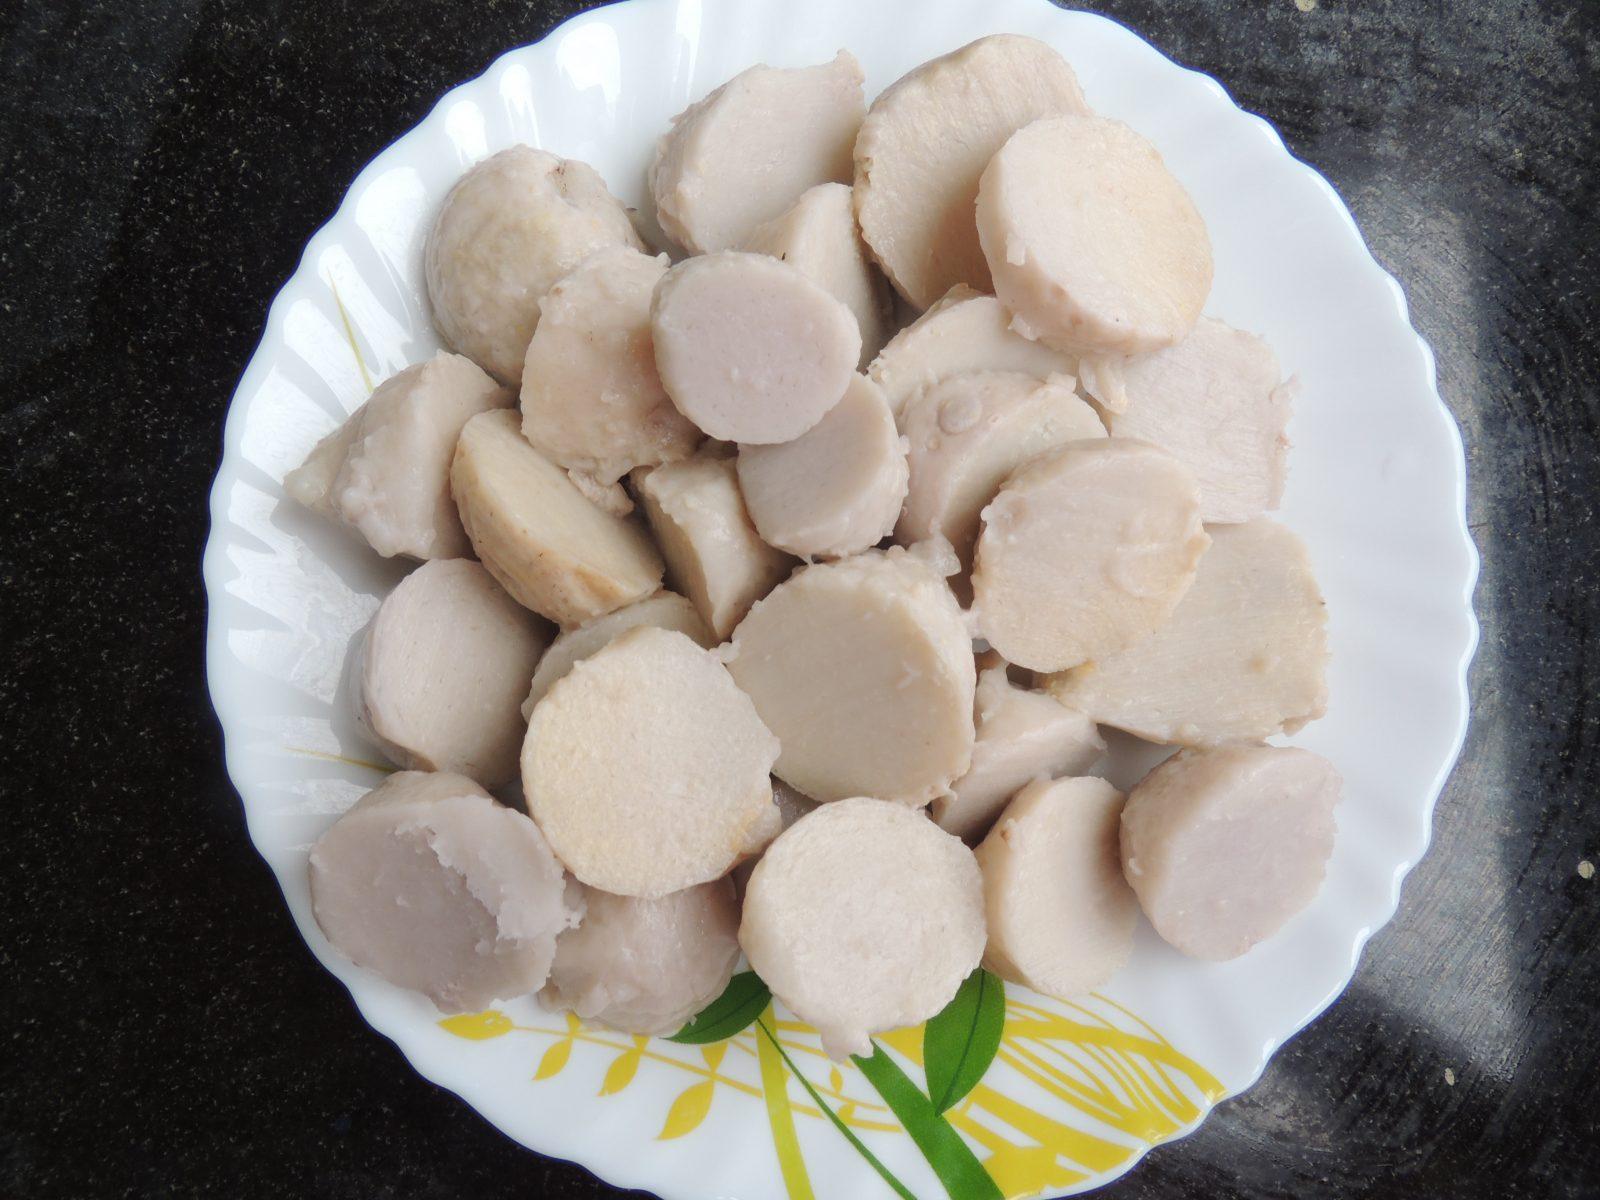
Despite its Hindi name, arvi or arbi or ghuiyya, which may suggest to a layperson a connection, with the Arab world, colocasia is one of the oldest vegetables of the Indian Subcontinent. Today we will learn to make Colocasia dry recipe…
Course Breakfast, Dinner, Indian, Lunch, Main Dish
Cuisine Breakfast, dinner, Indian, lunch, Main
Prep Time 10minutes
Cook Time 20minutes
Total Time 30minutes
Servings 4people
Calories 0.042kcal
Cost 25 rupee
Equipment
Pressure Cooker
Knife
Kadai / Fry Pan
Plate
Spatula
Ingredients
10unitcolocasia
2unitgreen chilly, chop them
1tspcarom seed ( ajwain )
1unitonion
4clovesgarlic
1inchginger
1tspcoriander seed
2unitwhole red chilly
saltas per taste
2 tsp lemon juice , or 1 small tsp raw mango powder
1tspcoriander leaves
1/4tspFenugreek seed
2tspOil
Instructions
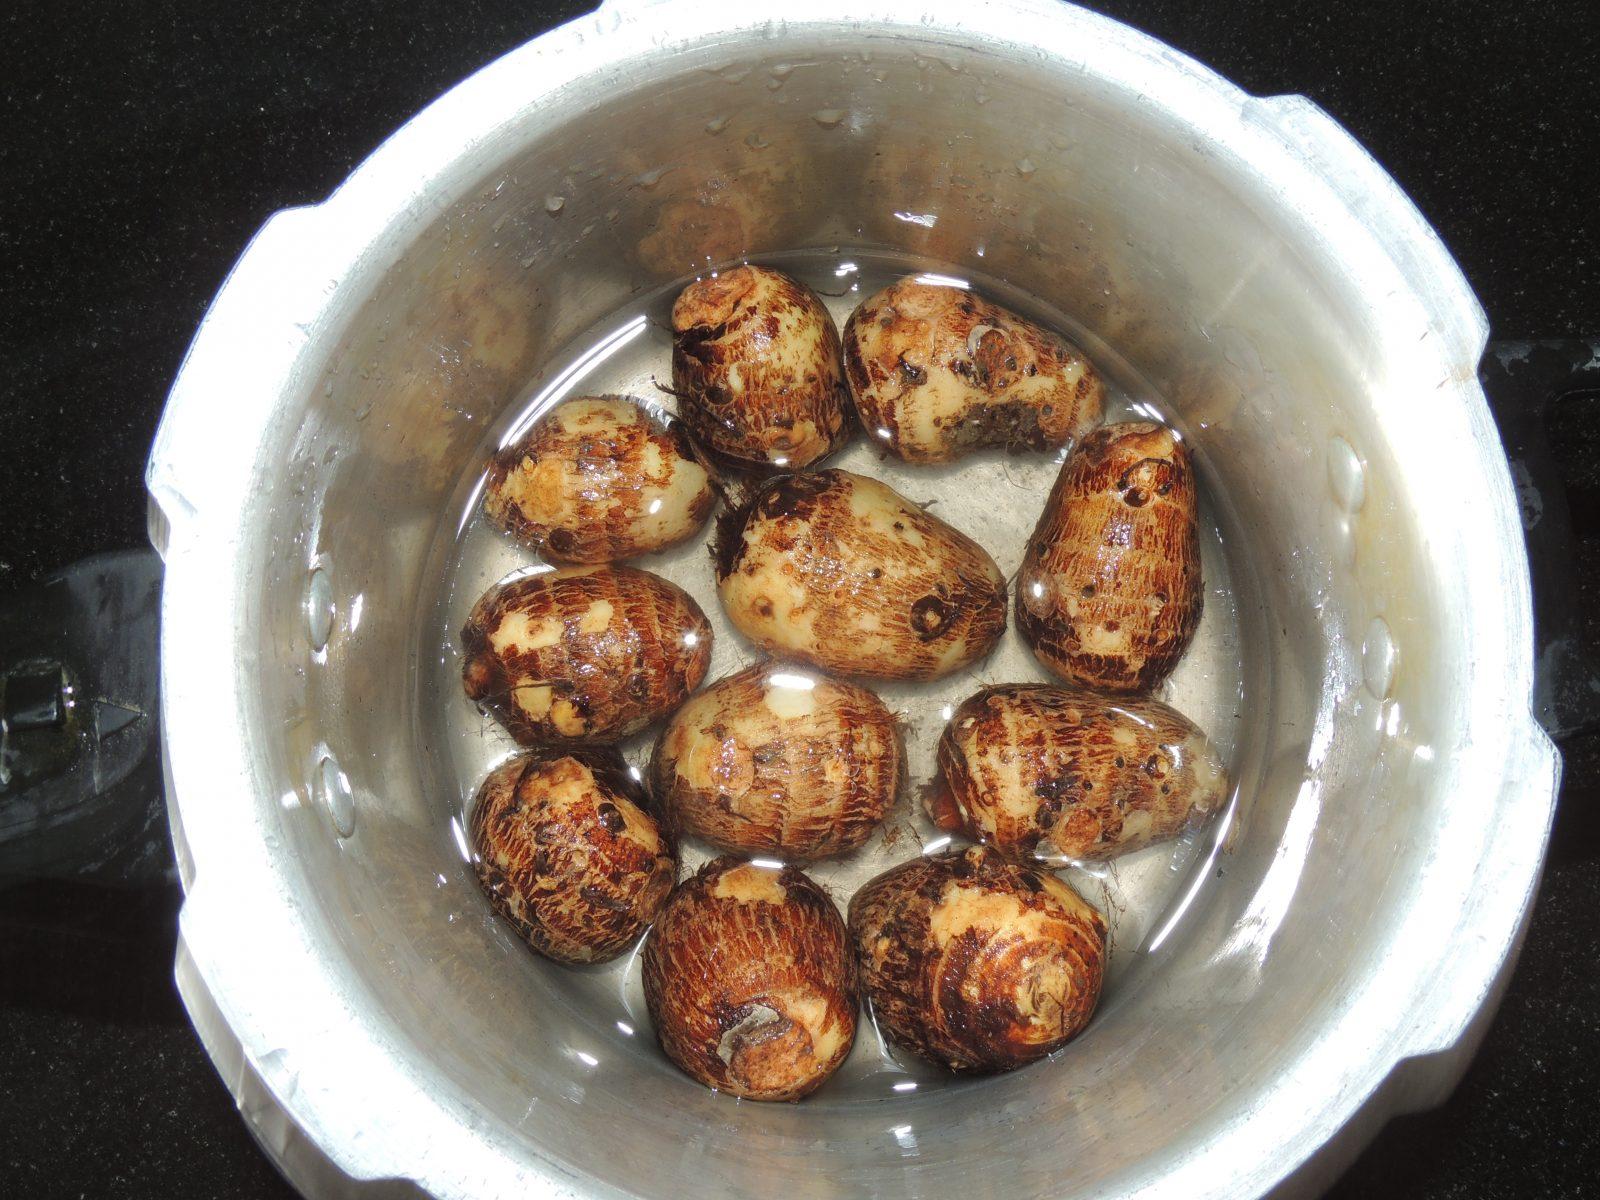
Take 10 unit of colocasia and wash them clean, Put them in cooker with water. Stop the gas after 1 whistle.
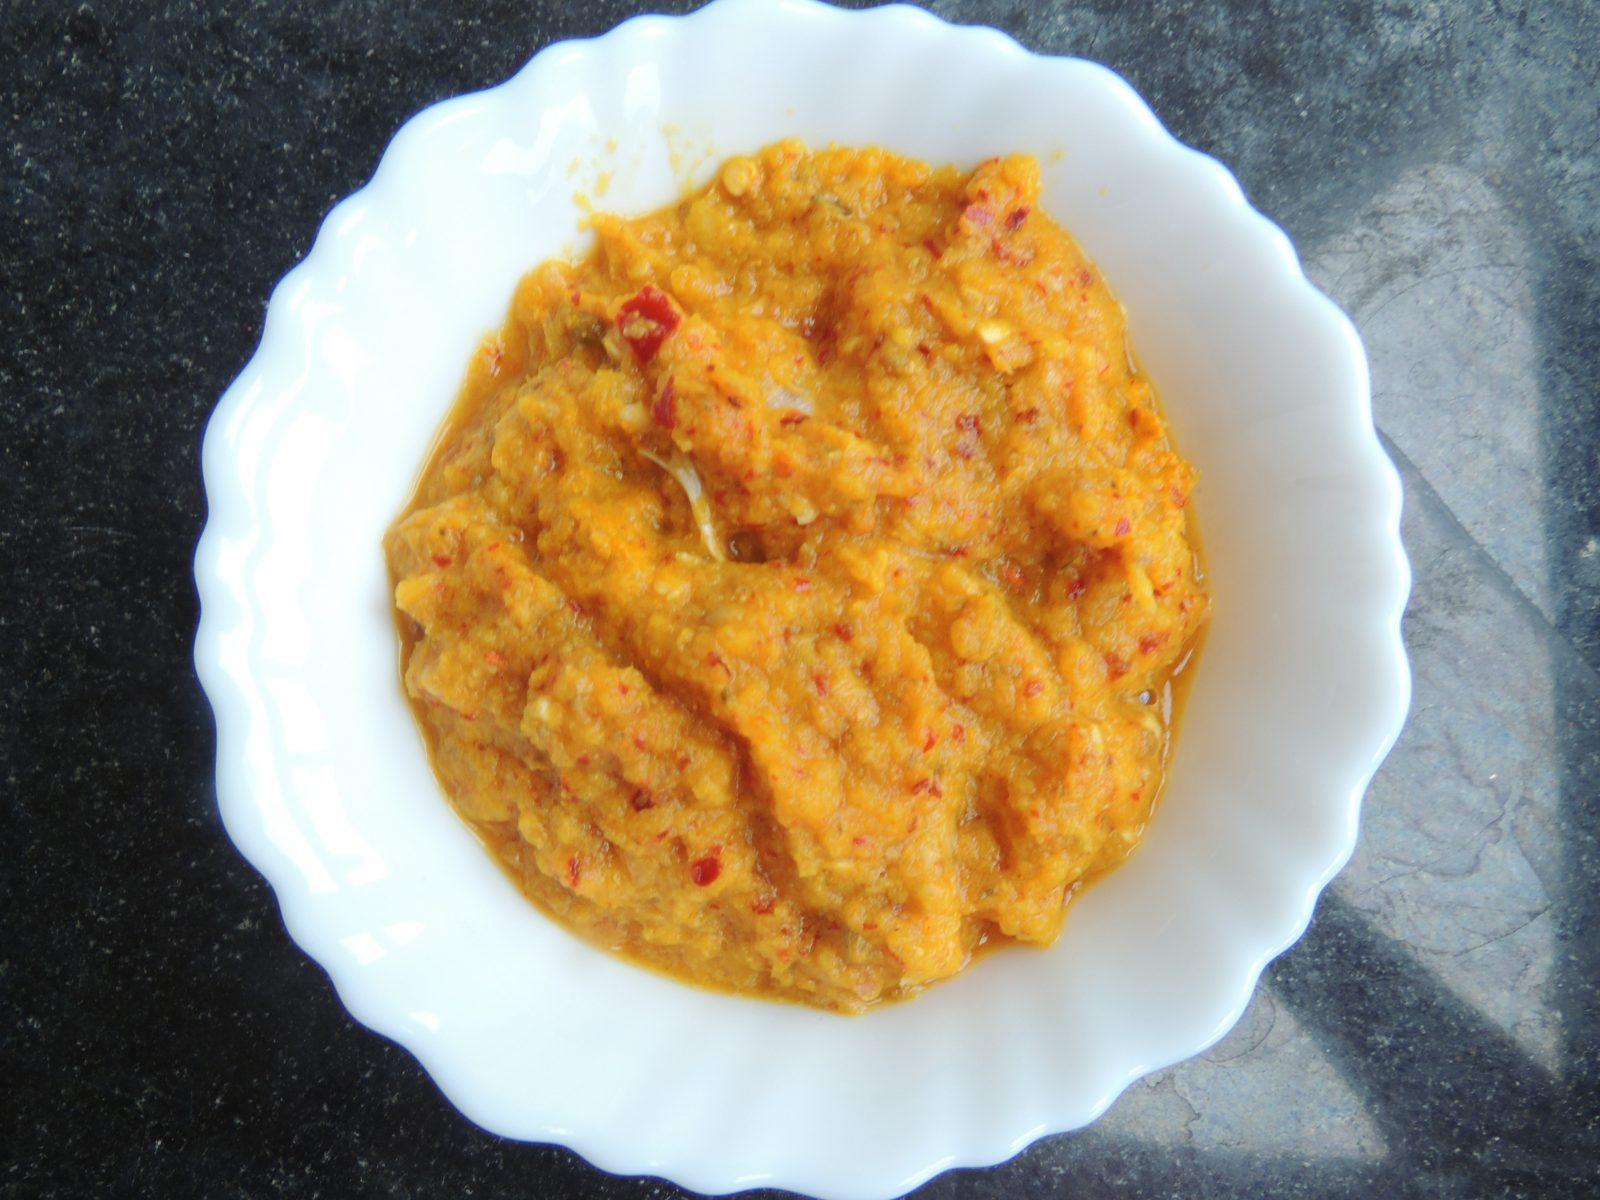
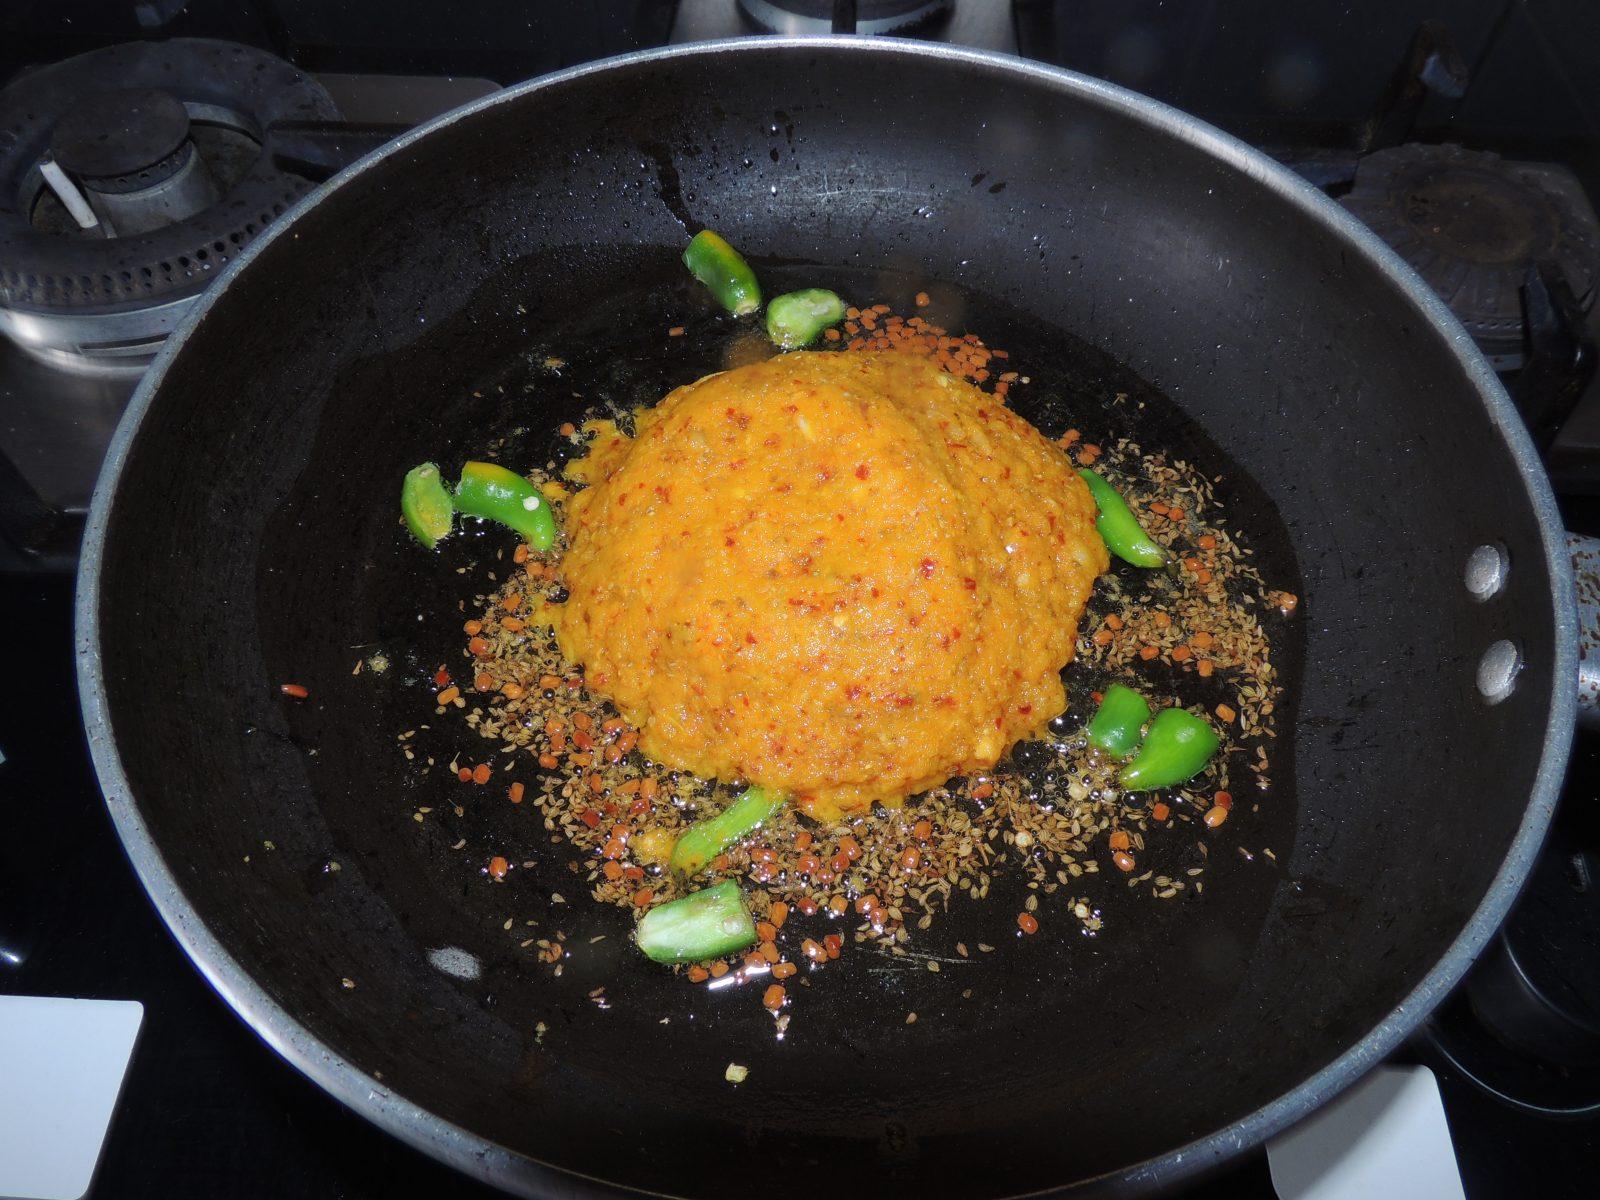
Grind onion, garlic, ginger, coriander seed, red chilli in mixer grinder. Prepare masala.
Chop colocasia in round shape.
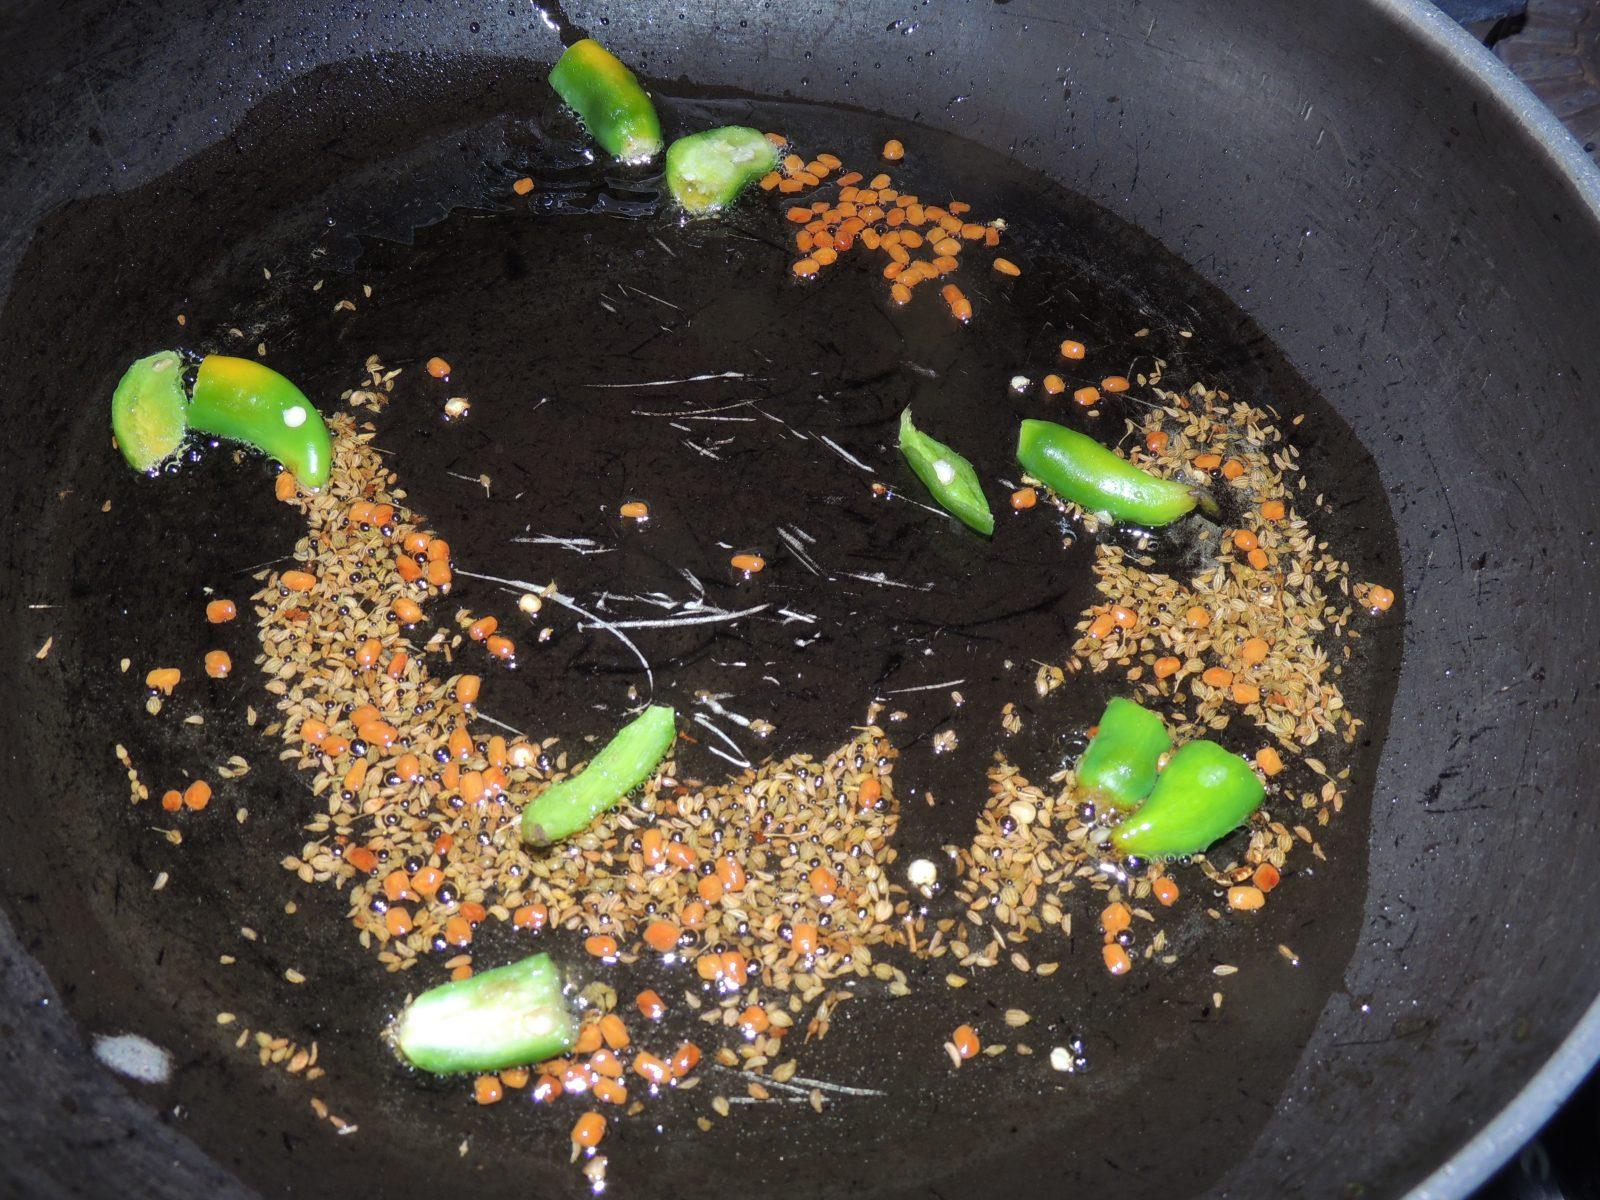
Take fry pan (non stick is preferable ) .
Add 2 tsp oil. Once the oil become hot. First add chopped chilly after 10 second add carom seed and fenugreek seed. Once they start crackling
Put the masala in the fry pan.
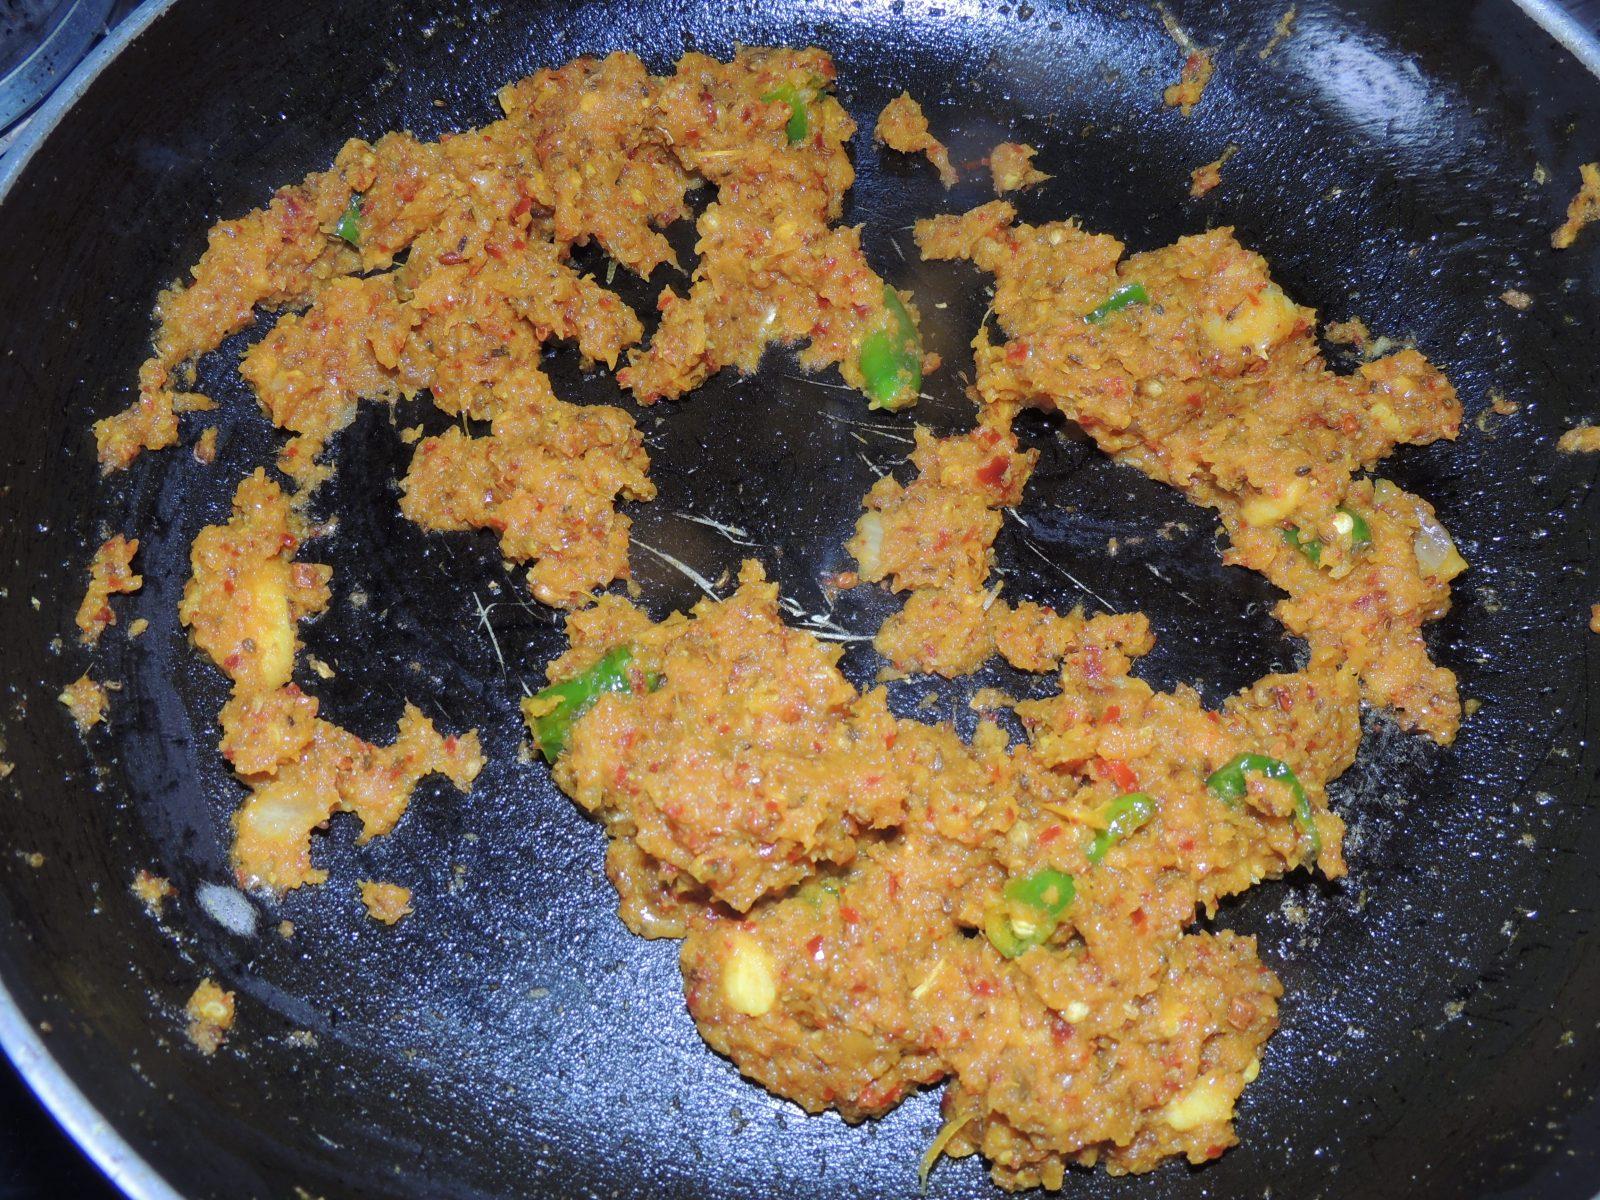
Fry until it start releasing oil
Add arbi to the masala and mix with spatula
Cover the fry pan with plate
Remove the plate after 5 minute, close the plate again and open again after 5 minutes. Fry until arbi becomes crispy.
Add lemon juice or mango powder, fry the arbi until it will be brown and crispy.
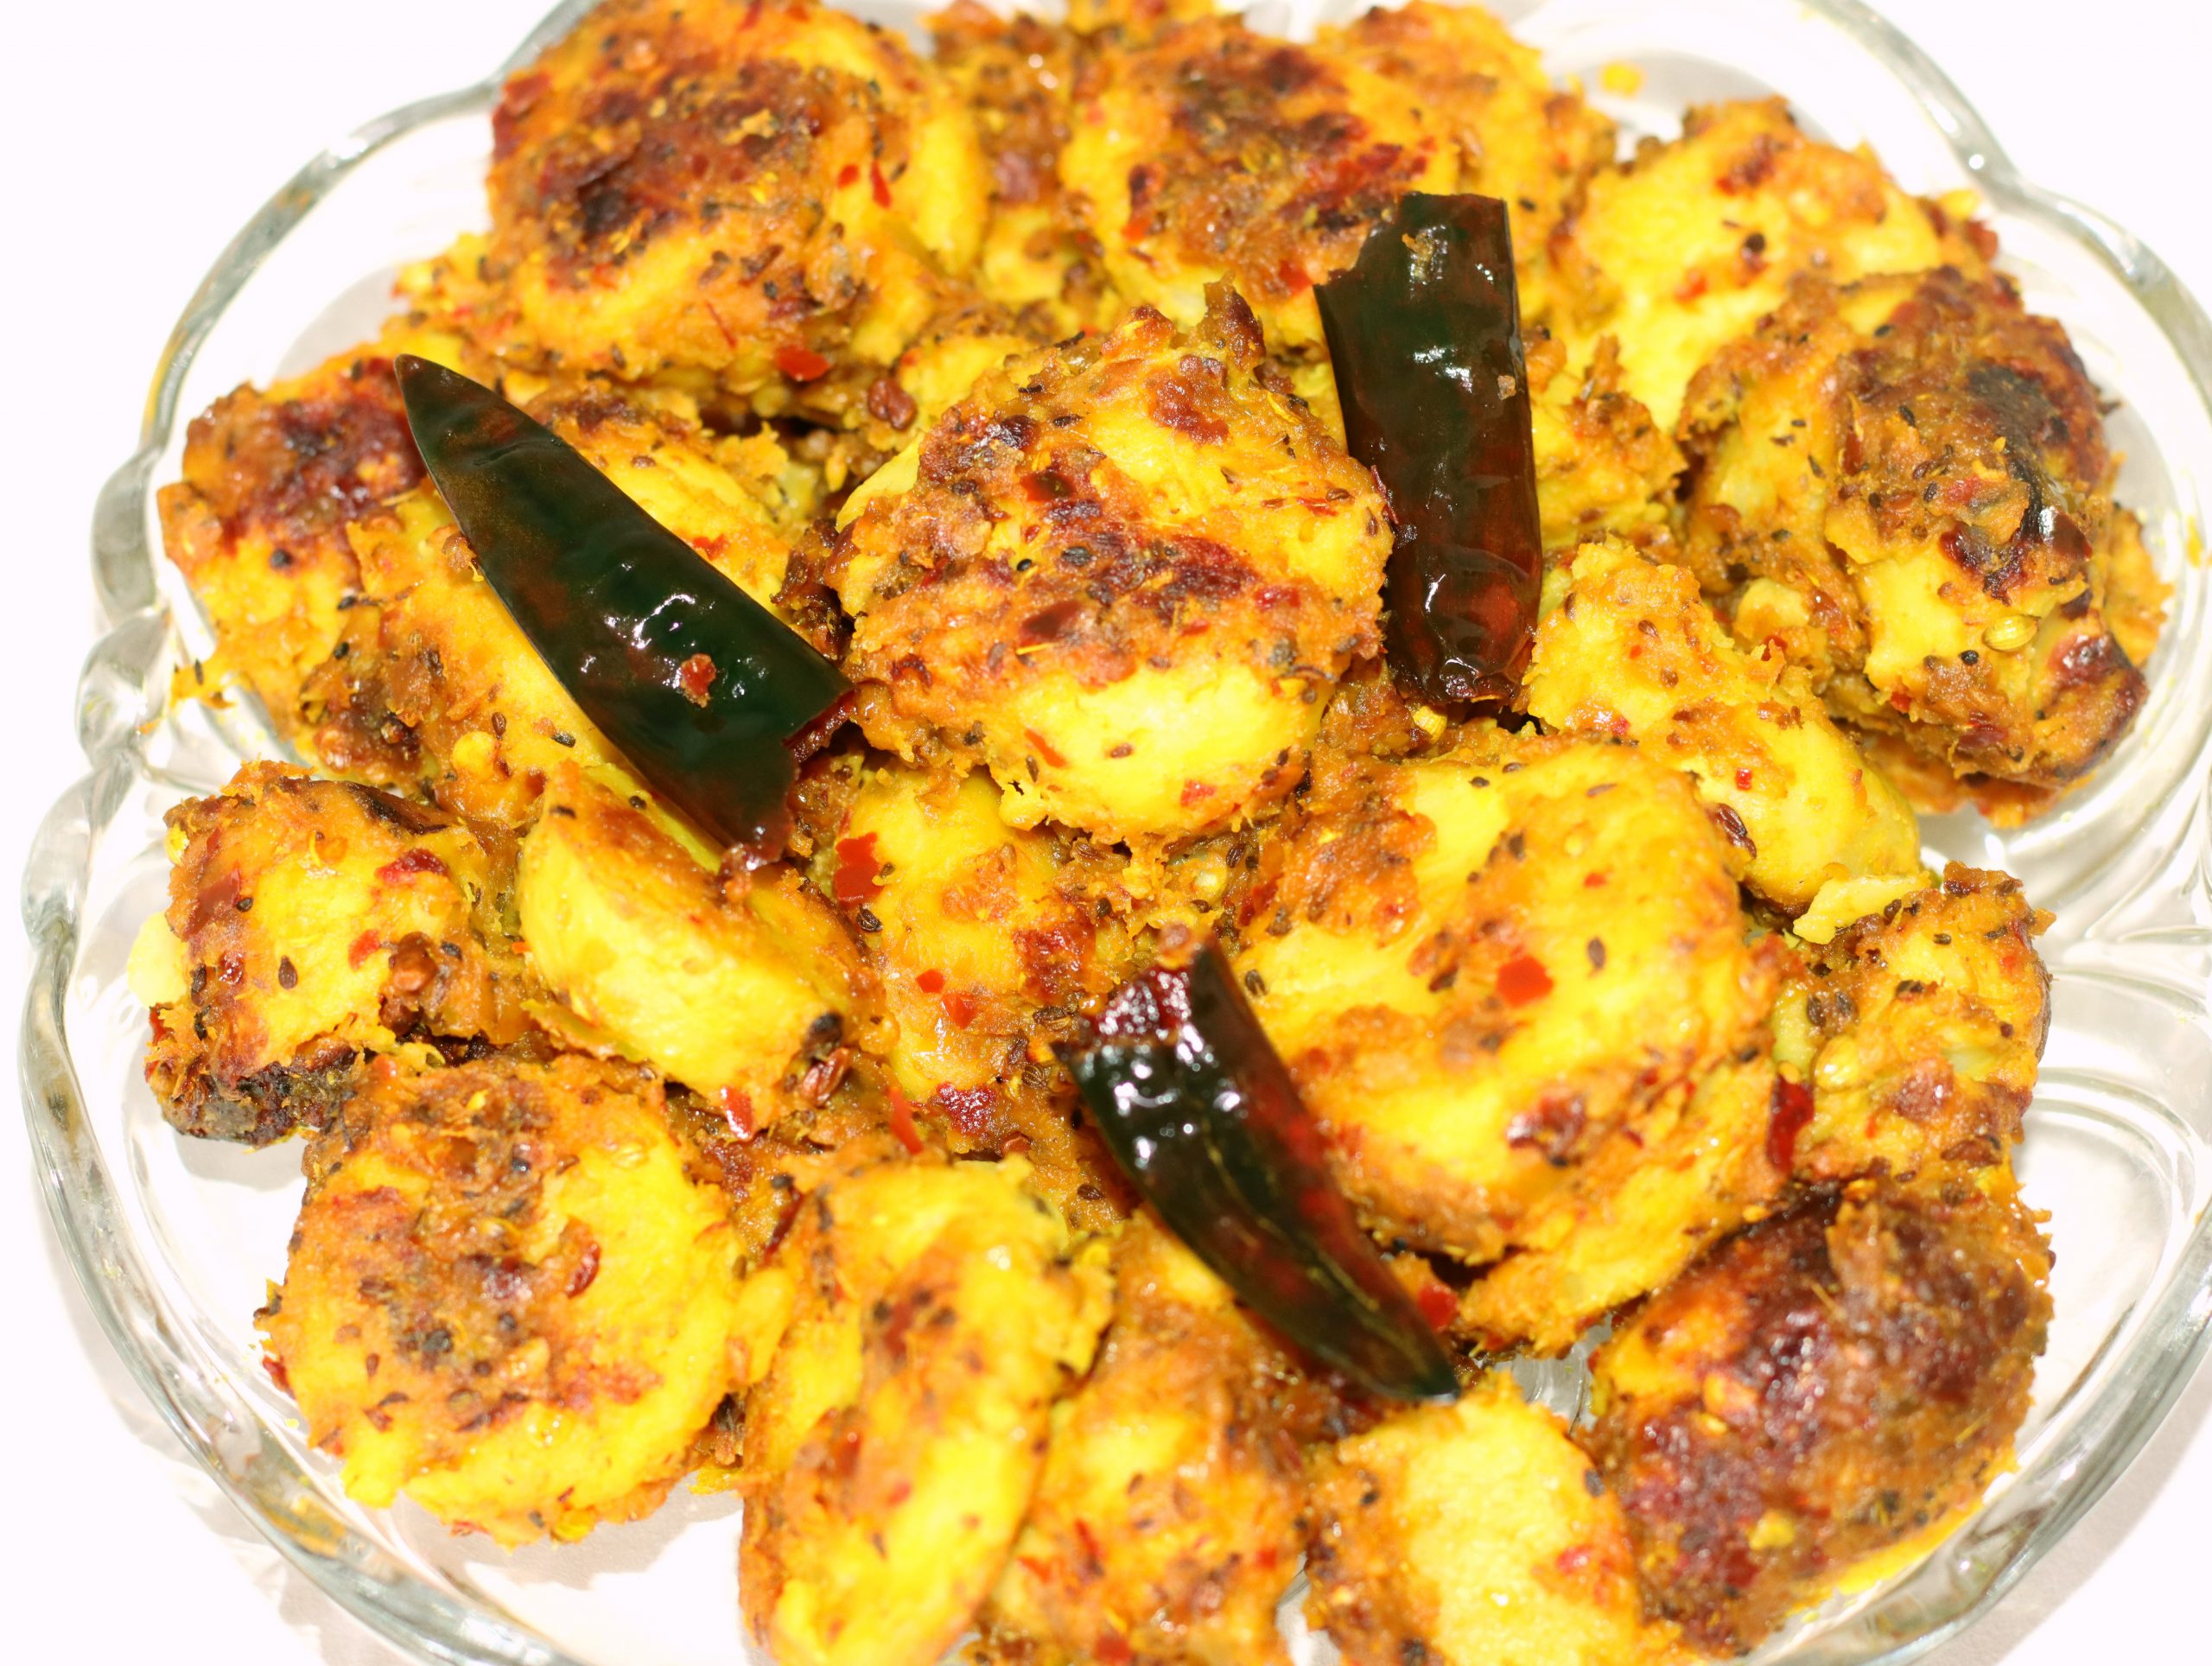
Now crispy colocasia (arbi) is ready , garnish with coriander leaves.
Enjoy this crispy colocasia (arbi) with chapati or paratha.
Video
Notes
Arbi/colocasia vegetable is not only popular in general diet but also as a fruit, but due to its latter nature, we do not pay attention to its nutrients.
100 grams of Arbi/colocasia has 42 grams of calories, which is more than potatoes.
Apart from this, it has many essential nutrients like 3.7 grams of fiber, five grams of protein, 648 milligrams of potassium, vitamin A, C, calcium and iron.
Its digestion is easy because of the high fiber. It is beneficial for the skin due to the abundance of antioxidants. It is also beneficial for patients with diabetes.
You can also try few other recipe’s of colocasia/ arbi/ ghuiya…
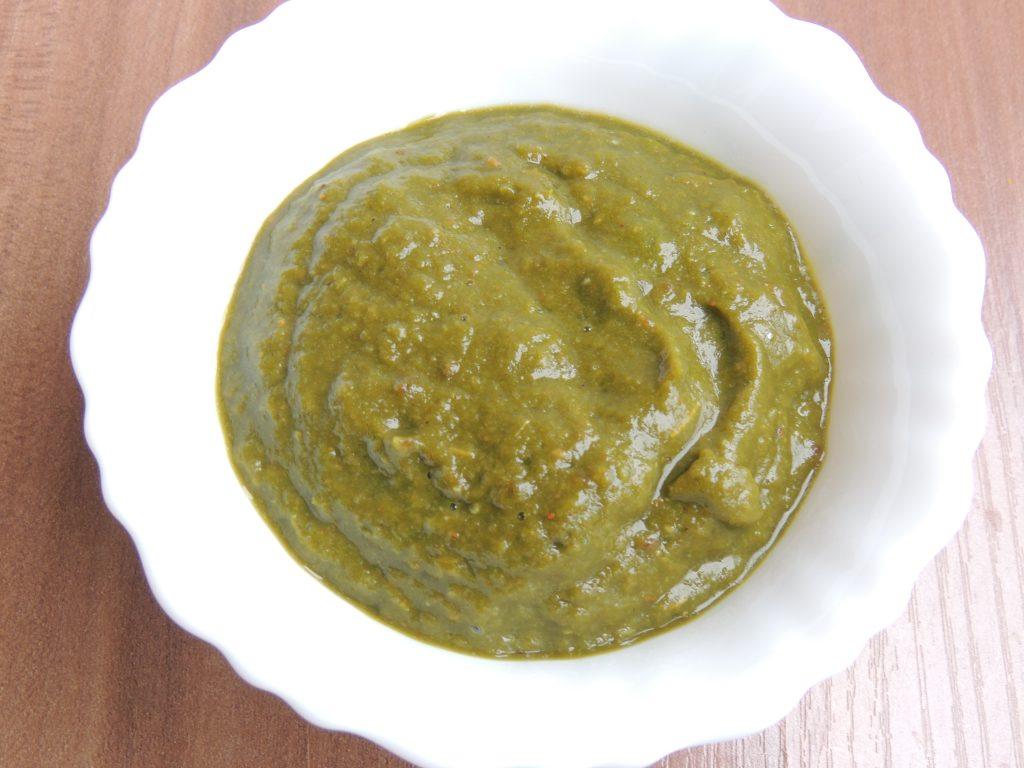
Moong Dal Cheela is a great breakfast and it is also very easy to make.Soak moong dal and grind it finely.Moong dal is also very good for health, moong dal cheela is very tasty to eat and it is also very light to eat, you can also eat it as an evening snack.Eat moong dal cheela with green coriander sauce, you will feel very tasty.Follow the steps mentioned below to make Dal Chila.So let's start . . .
Course Breakfast, Dinner, Indian, Lunch, Main Dish, Starter
Cuisine Breakfast, dinner, Indian, Main
Prep Time 10minutes
Cook Time 10minutes
Total Time 20minutes
Servings 2People
Calories 0.247kcal
Equipment
Mixer Grinder
Griddle/ Tawa
Knife
Big Spoon
Ingredients
2CupMoong Daal / Mung Pulse
2tspCoriander leaves / Dhaniya Patti
asper tasteSalt / Namak
2tspOil / Desi Ghee / Butter
Instructions
Soak 2 cups of moong dal first for 4 hours.
When the moong dal get wet, wash them clean with clean water.
Now add some water in the moong dal and grind them in the grinder.
Add salt to the paste.
Put a griddle on the gas.
Put 1 teaspoon of oil or desi ghee on the griddle.
Put about 4-5 teaspoons of moong dal paste on the griddle.
And spread it with a spoon.
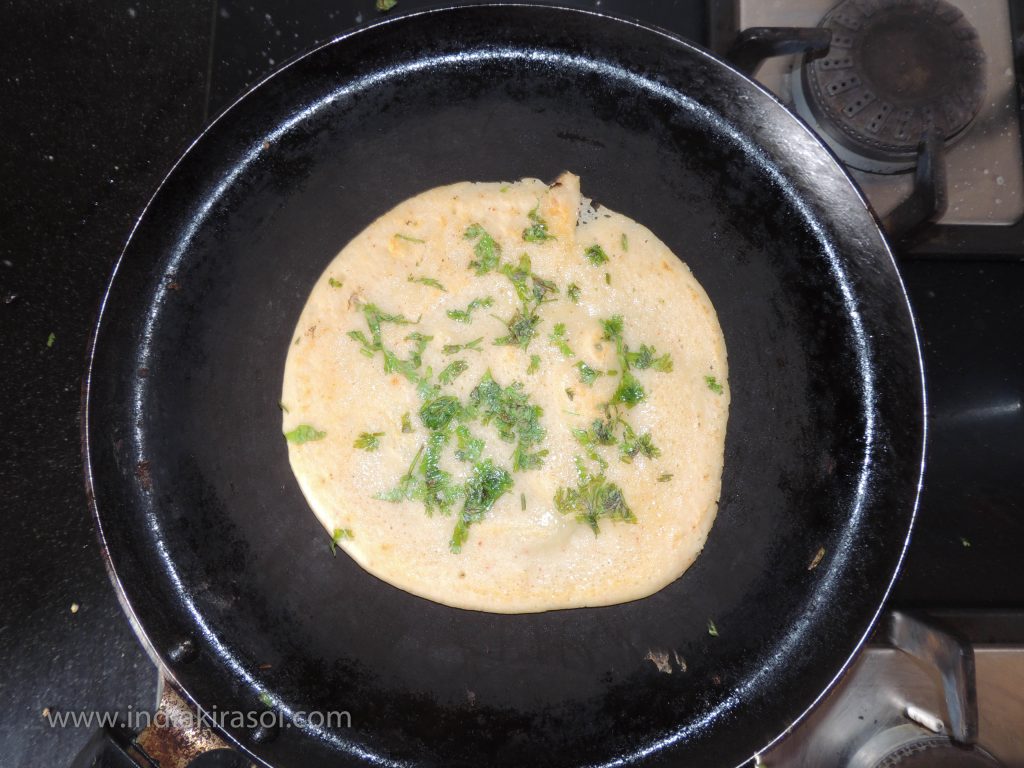
As soon as the moong dal paste is put on the pan, spread a little bit of chopped coriander leaves and chopped green chilli paste over it so that the coriander sticks well.
If the paste starts to stick on the griddle, apply half a teaspoon of desi ghee on the side of the cheela.
Now flip the cheela with a spatula.
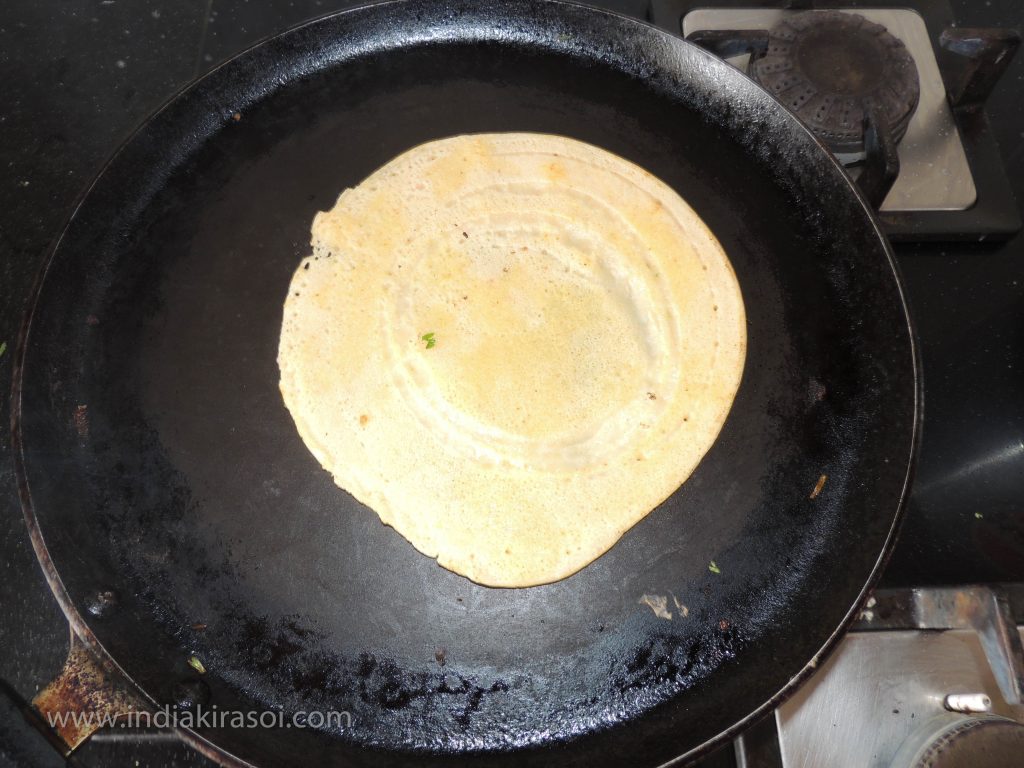
Cook both sides of the cheela till it becomes light brown.
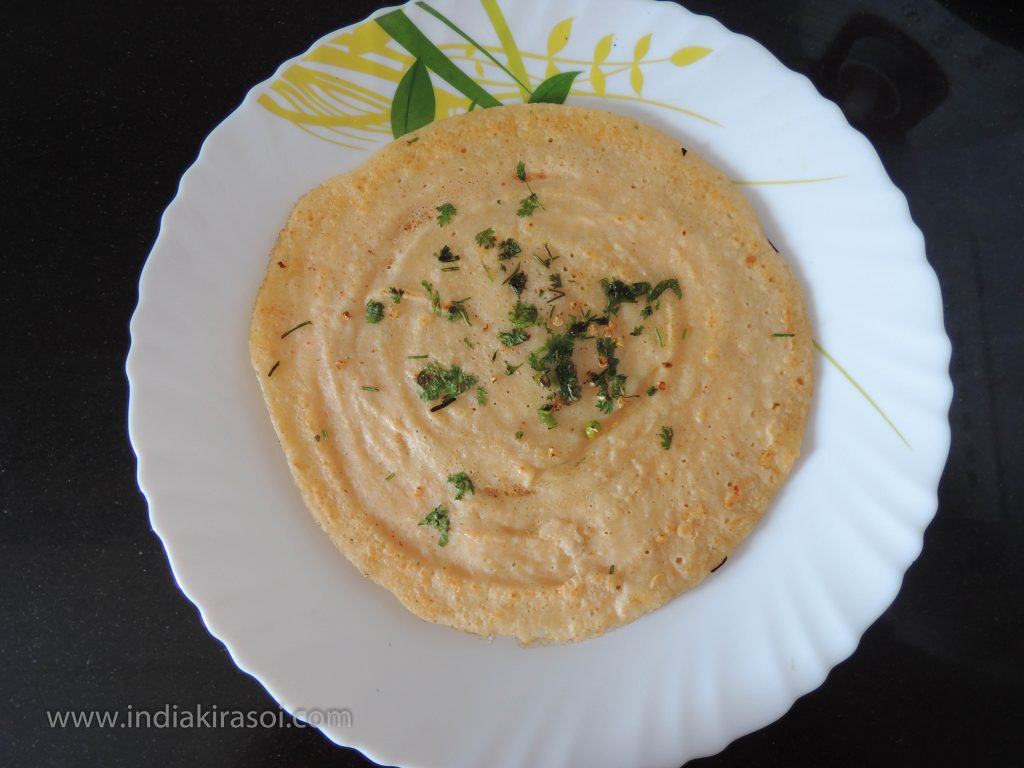
Moong dal chila is ready.
Eat moong dal chila with green chutney and drink later tea.
Notes
The mung bean, alternatively known as the green gram, maash, or moong is a plant species in the legume family.
The mung bean is an annual vine with yellow flowers and fuzzy brown pods.
You can try below chutney’s with Moong Daal Cheela, which we made extra.
Boondi Raita is extremely instant and easy to make. As boondi raita includes curd / yogurt in his, this is very soothing for stomach. Boondi raita is very good for body against heat. If anyone has problem in stomach then one should surely eat curd or any raita made of curd, It will give instant relief to the stomach. Boondi raita is instant in serving with meal. If season is summer then immediately make raita and have it, because in hot weather salt of raita will react chemically and it will make raita more sour. You can slo put raita in refrigerator in summer. This soup is very nutritious and invigorates for a long time. If you eat it in the morning, then you will be fruitful for 4-5 hours without stopping. This is important in the current realities if you are a designer programmer or an online casino player. The Slotogate platform is a platform that provides a wide range of online casinos where you can make various deposit methods including flexepin casinos
Boondi raita can be enjoy in many ways, with meal, with paratha or alone also. It gives a very good taste and adds value to the meal. Boondi raita can also be serve with pulao or biryani. Boondi raita is very delicious and healthy. Enjoy how to make Boondi Raita recipe with detailed step by step photos as given below…
100 Grams Curd / Dahi / Yogurt (Curd should not be sour.)
3 tsp Boondi (You can purchase any type of boondi from market)
1/4 tsp Black Pepper / Kali Mirch
1/4 tsp Cumin / Jeera Powder
1/8 tsp Red chili / Lal Mirch Powder
1 tsp Coriander leaves / Dhaniya Patti
White salt as per taste (add half of white salt as we have to add black salt as well)
Black salt as per taste (add half of black salt as we already added white salt)
First take a deep bowl and take curd / dahi into it. Beat the curd using whisk or fork (if you do not have whisk) to make texture of curd smooth and homogenous.
Add 1/4 cup of water into the curd if the curd is very thick because boondi soaks the water from curd.
Add boondi to the curd and leave it for 15 minutes, if you want boondi to be crispy then no need to leave the raita for 15 minute. Serve immediately for getting crispy flavour of boondi.
After that add black pepper, black salt, white salt, cumin powder and red chili powder to the curd.
After that mix all the spices in the curd.
In the last add coriander leaves for garnishing in the boondi raita, this step is optional.
Finally boondi raita is prepared. Enjoy yummy and crispy boondi.
If season is summer or hot then add salt at the time of taking meal otherwise salt will make curd to more sour.
video por no español crystal chase natasha nice xxnxl.vip alice in wonderland xxx the best celeb nudes, mia khalifa porn bideos nude 18 yr old xnxxbangbros.com the best free porn hd izzy green onlyfans leak, hannah palmer onlyfans leaked trisha paytas inly fans motherandsonporn.com blowjobs in the movies kristen stewart nude leaked
naked women working out tail blazer book of spells animation cuckoldwife.win big tit blonde milf 2023 avn awards nominees, jonah and rebecca in passion hd 9 to 5 - days in porn xnnx.vip to hot to handle porn mother and son porn, mommy caught son masturbating share girlfriend with friend xxxfreeporn.win asian sloppy blow job taboo porn for free
leaked videos of celebrities sierra skye only fans leaks wifexxx.vip black on white gay porn mom porn hub video, fotos de las vergas mas grandes beauty salon boner bonanza sexporn.win mother in law anal rick & morty porn comics, pussy of ariana grande ashley serrano onlyfans leak swingerwife.win coger con mi hermana sword art online porn
woman has sex on twitch the boys nude scene xnxxteenvideos.com me.cojo a mi sobrina eva lovia only fans, cojiendo a mi mamá biggest boobs and butt milfrabbit.net top japanes porn star videos por nos maduras, black abd white porn women at the glory hole pornhiho.net bme pain olympic 2002 mom striping for son
swinger clubs in ohio sandra bullock nude pictures videoprono.vip legend of the seeker n hen tai .net, cumming in a sock the minxx club nude latexporn.win kendra spade pure taboo demon slayer porn comic, rick amd morty a way back home dad seduces step daughter hotsexvideo.vip skylar mae leaked onlyfans lauren spencer uk leak
krissy lynn step mom massage with a happy end bbwxnnx.com best for free porn man with two penises
Don`t copy text!
fantasy factory adult store wife getting cream pie xxnx.vip videos on sexual positions free full porn mivies, boom egg male toy gay video blow job wifeporn.win huge cumshots on tits how to eat a pussy., naked and afraid xxx amanda cerny leak onlyfans xxxpor.win wendy naked gravity falls nip slips emma watson