Today we will see how to make chickpeas of Bhature Chhola is a major recipe of eastern part of Uttar Pradesh. Chola is also very much eaten in Punjab. Chhole bhatura can be made in many ways such as simple Chhola Punjabi Chhola. Chhole is also available as white chickpea and it is called Chickpea in English.
Today, whatever I tell you to make chickpeas, it is very easy and it can be made very quickly, although we eat chickpeas with bhatura but we can also eat chickpeas with puris. You can also eat it, it is a very tasty recipe and if you are bored of eating rice of dal every day, then chickpeas are a very good way to change your taste.
By the way, it seems that it is very difficult to make chickpeas and it is very time consuming, but tell me from the recipe, you can make chickpeas very easily, very quickly and in very tasty ways. Follow the steps given below and also give feedback how you like this chickpeas Let’s start …
Course Breakfast, Dinner, Indian, Lunch, Main Dish, Starter
Cuisine Breakfast, dinner, Indian, lunch, Main
Prep Time 10minutes
Cook Time 15minutes
Total Time 25minutes
Servings 5People
Calories 87kcal
Equipment
Kadhai / Fry Pan
Big Bowl
Big Spoon
Pressure Cooker
Ingredients
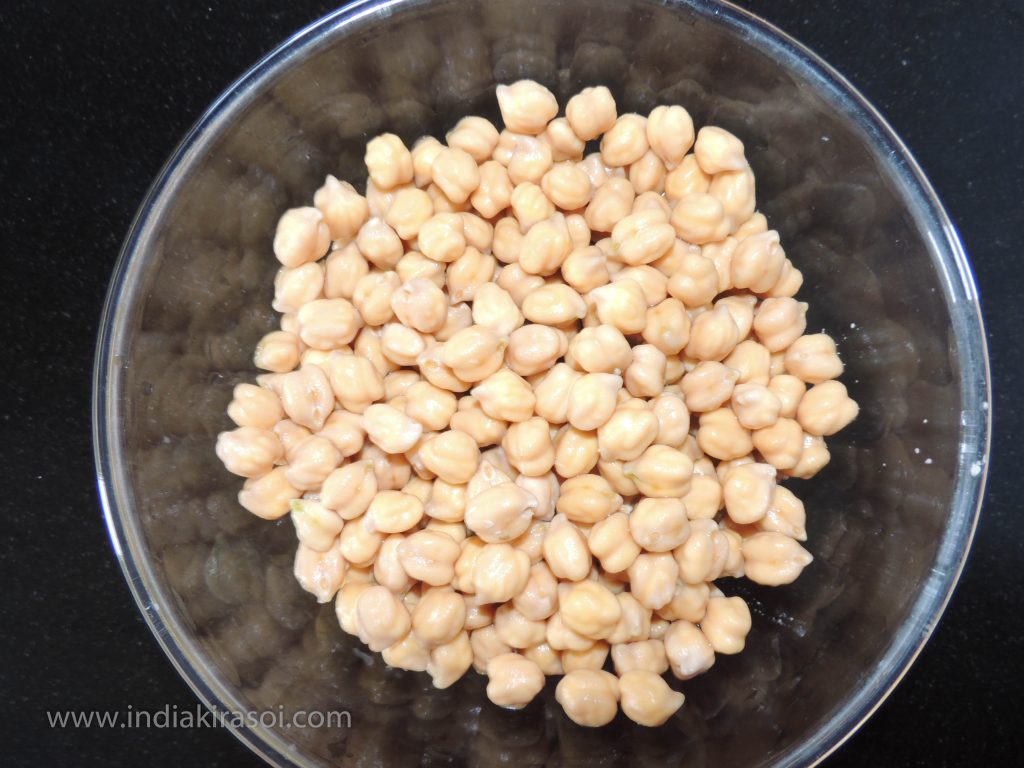
200GramsChickpea / White Chhola, Pour water into Chickpea for 6 – 8 hours
1UnitBig Onion / Bada Pyaz, Finely Chopped
6UnitClove / Laung
1UnitBig Cardamom / Badi Elaichi
2UnitBay Leaf / Tej Patta
7UnitBlack Pepper / Kali Mirch
1tspCumin Seed / Jeera
3UnitSmall Cardamon / Chhoti Elaichi
1UnitGreen Chili / Hari Mirch, Finely Chopped
3UnitBig Tomato / Bade Tamatar, Finely Chopped
1tspTurmeric (haldi) powder
1.5tspCoriander / Dhaniya Powder
2tspChhola Powder, If chhola powder is not present, then take 1 tbsp Garama Masala Powder
asper tasteSalt / Namak
2tspBlack Tea / Chai Patti
1/2tspRaw Mango / Amchur Powder
1/2tspRed chili / Lal Mirch Powder
3tspOil
Instructions
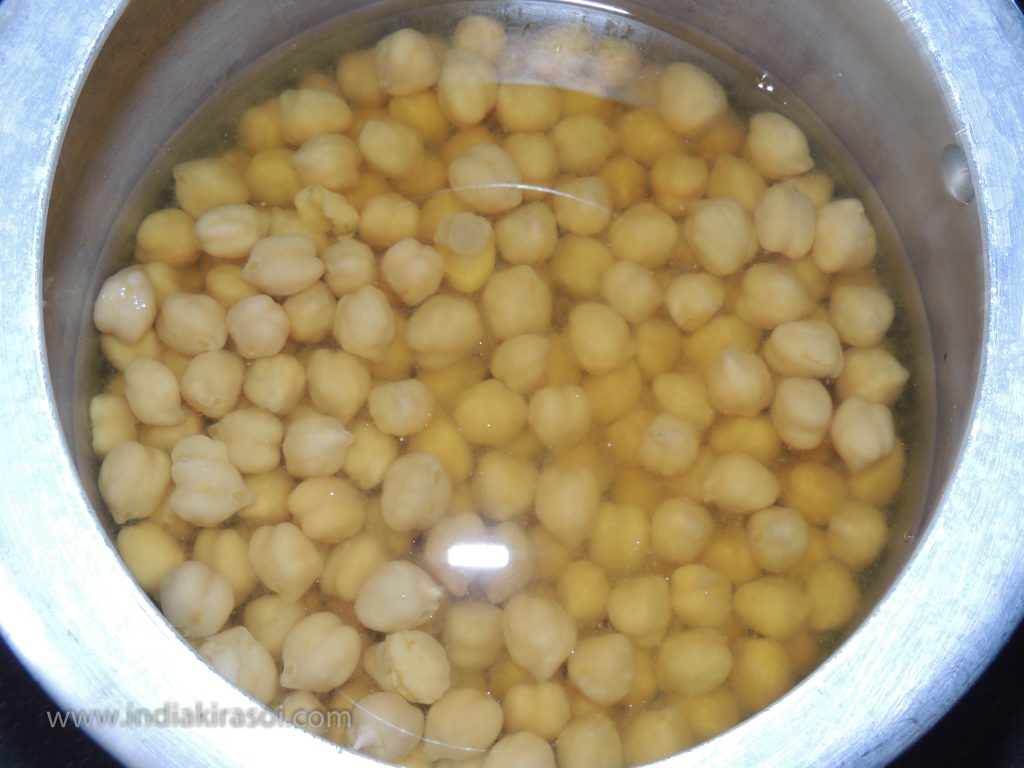
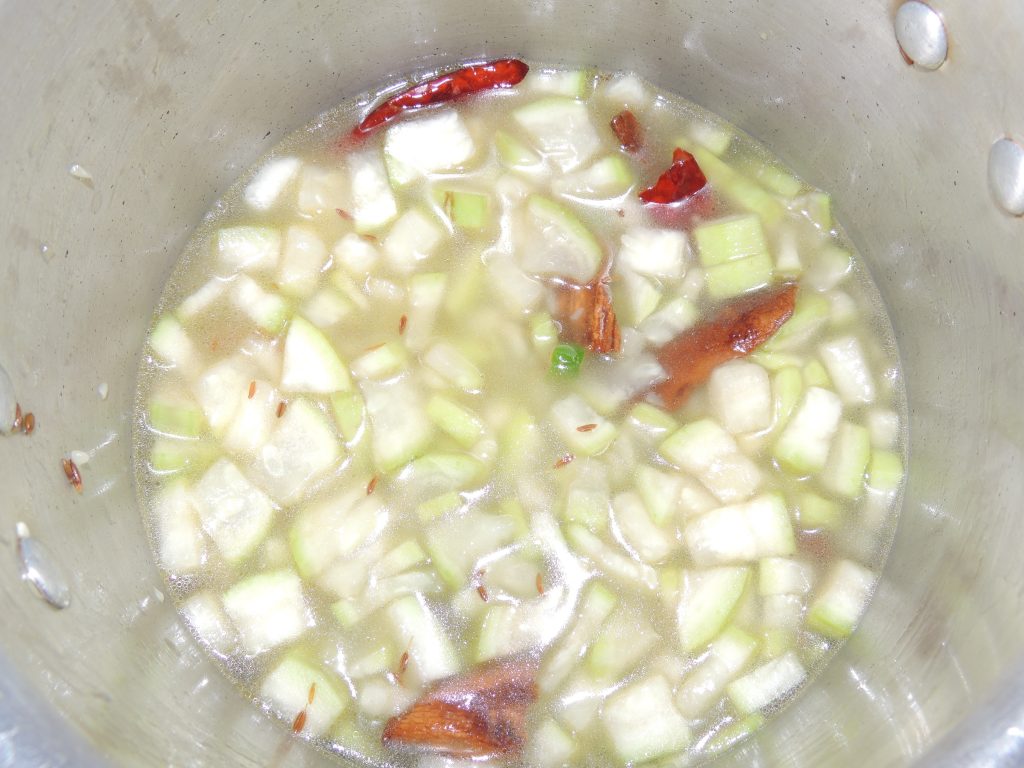
Soak the chickpeas in water for 8 hours.
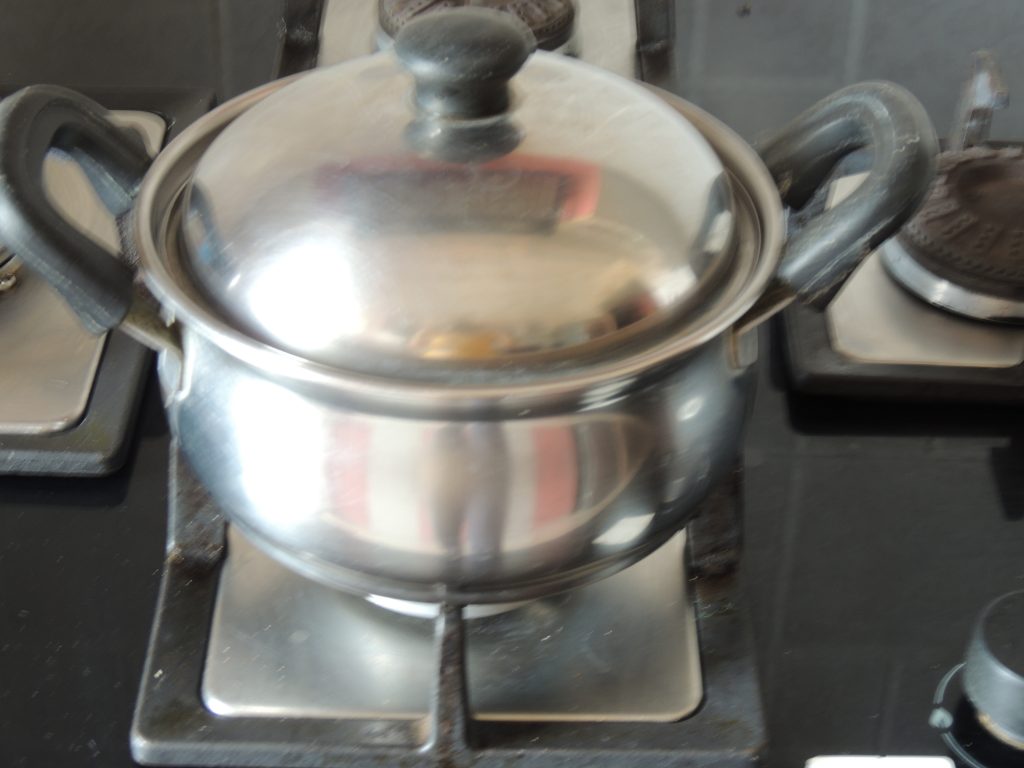
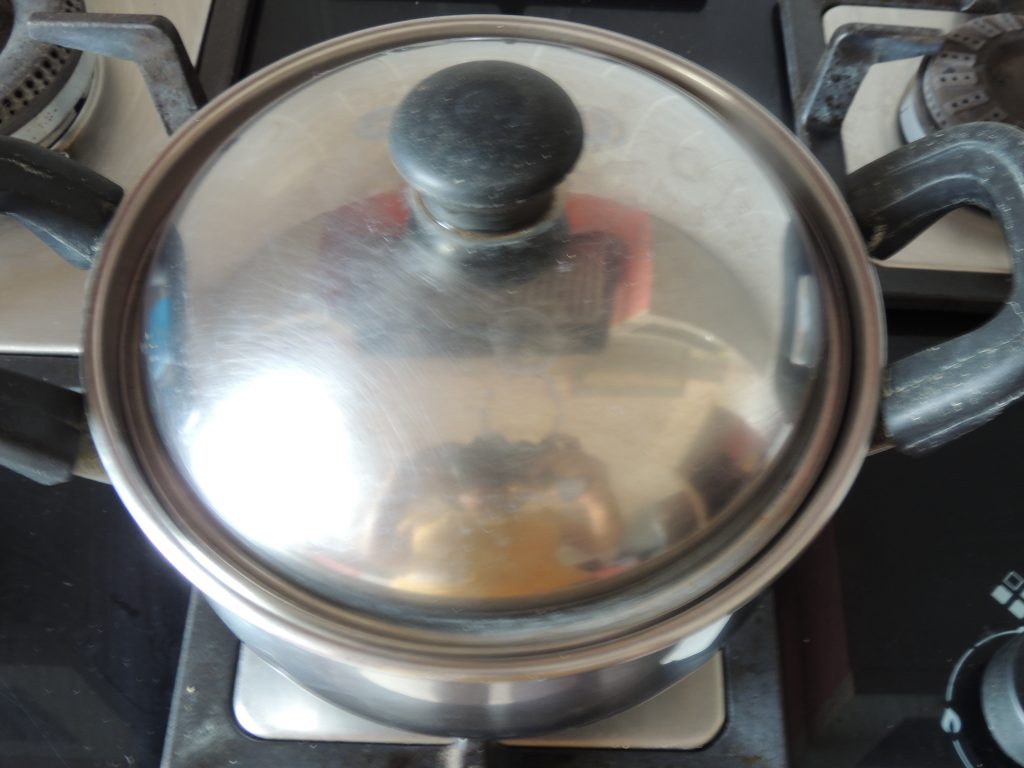
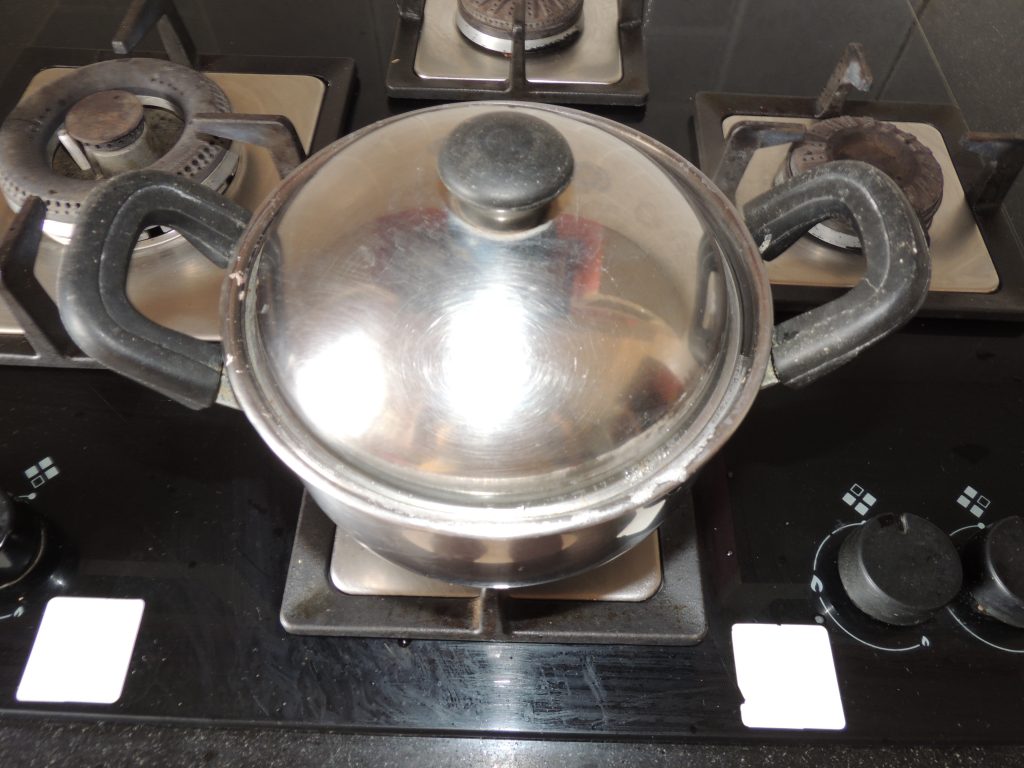
Wash the chickpeas with water, add them to the cooker, and also add salt.
Whistle in the cooker, 3 whistles on high heat and 2 whistles on low heat.
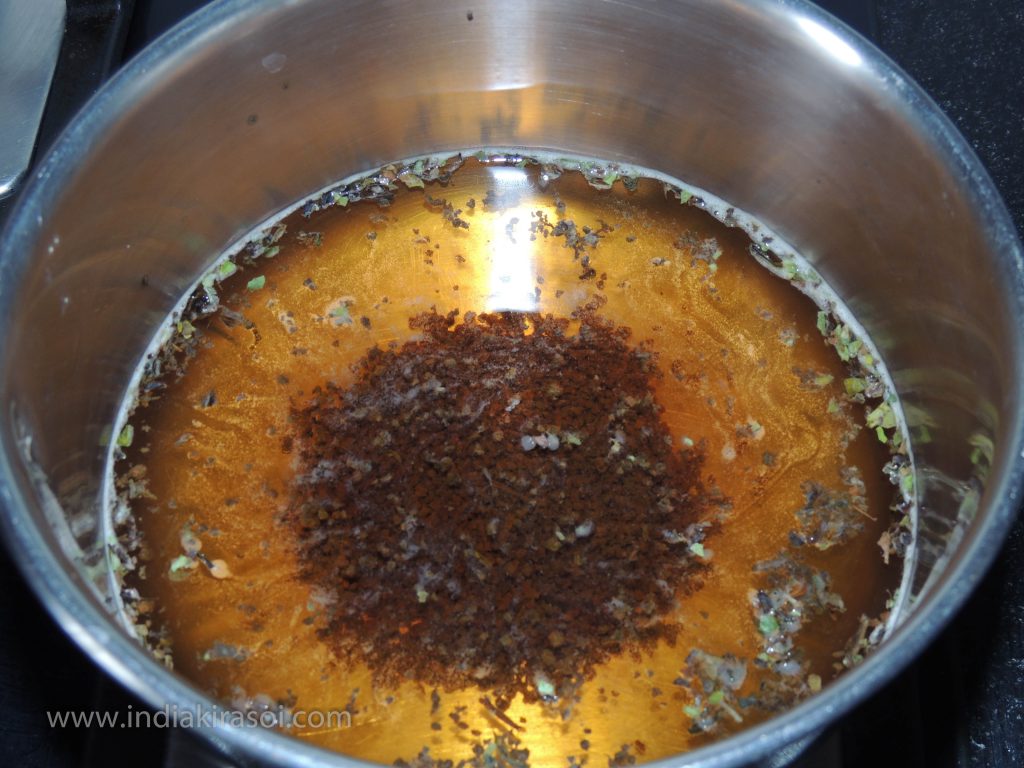
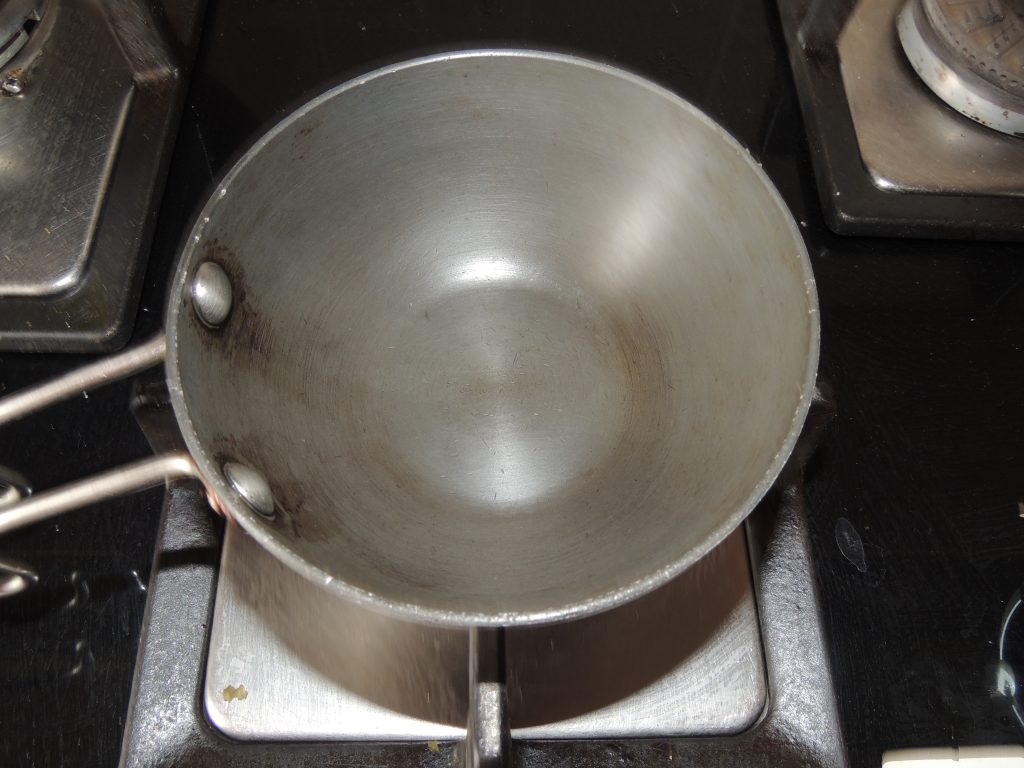
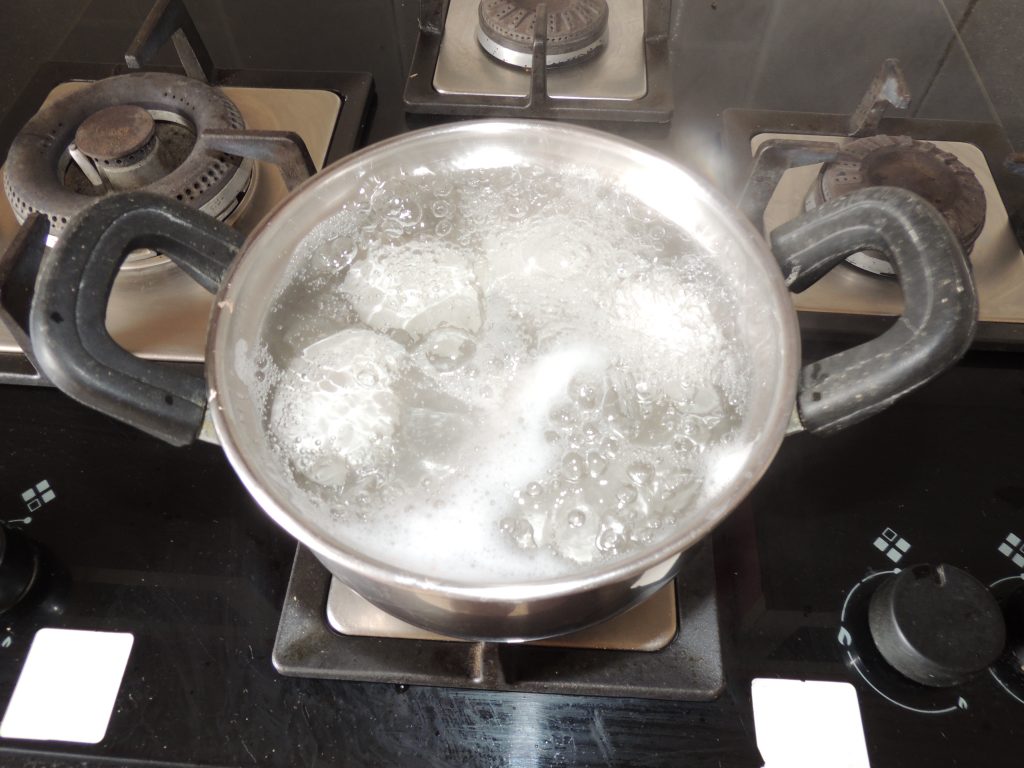
Put 2 teaspoons of tea leaves and half a glass of water in a pan and give it to the gas.
Boil tea leaves.
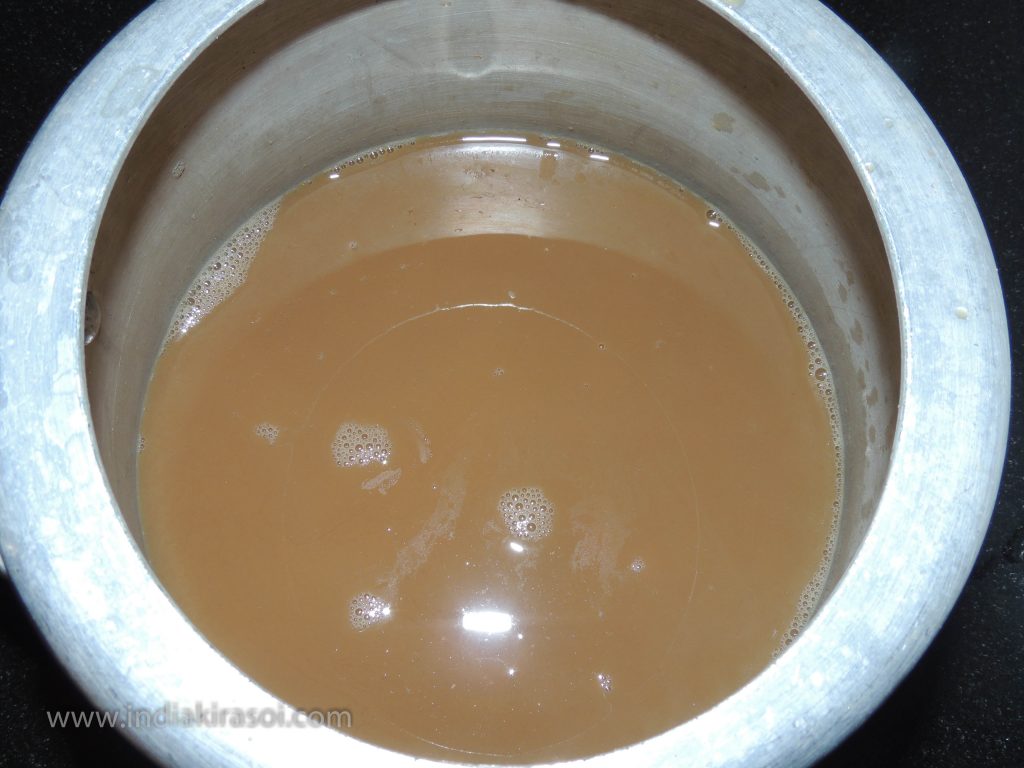
Sieve the tea water with a sieve
And pour that water into the cooker.
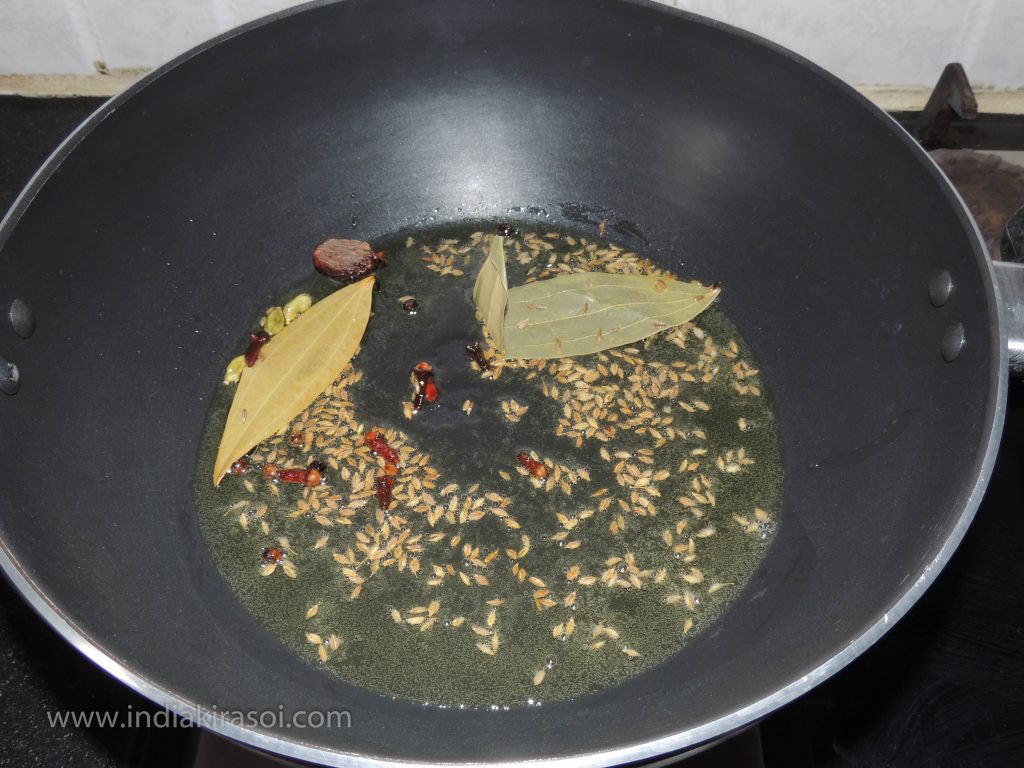
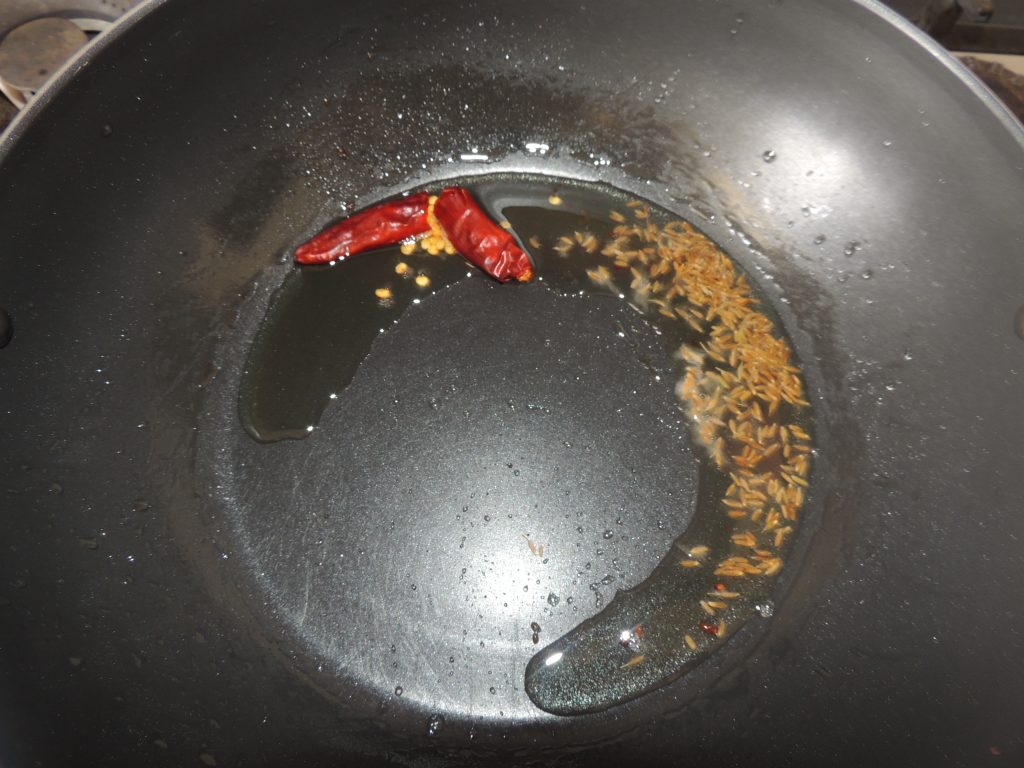
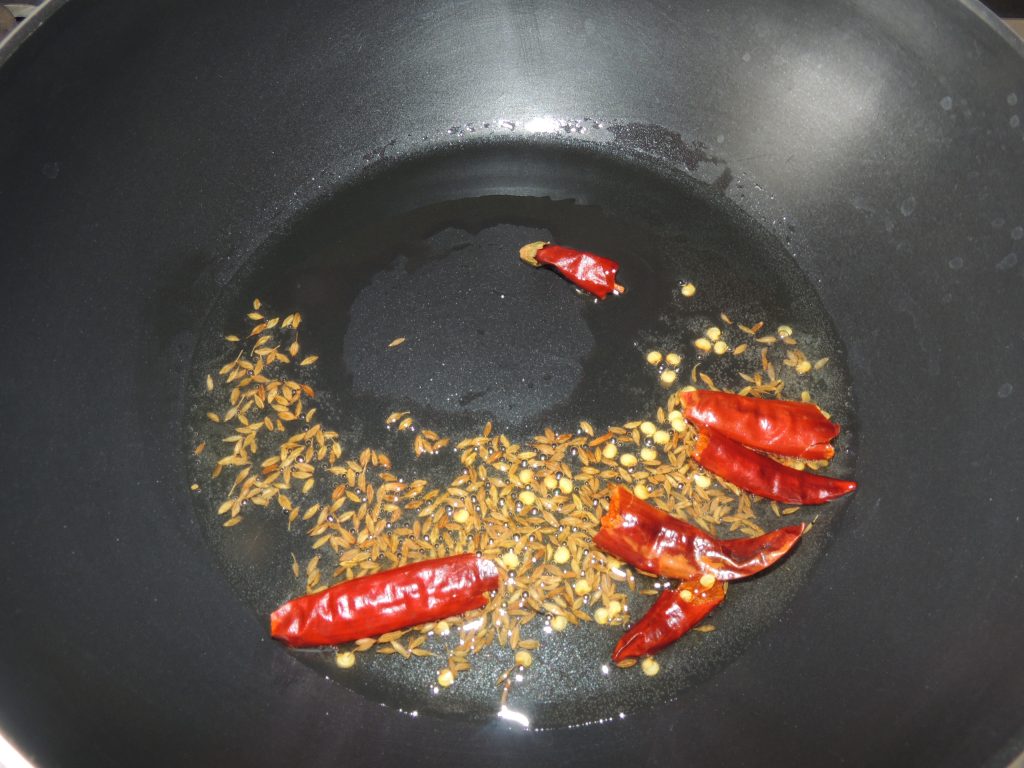
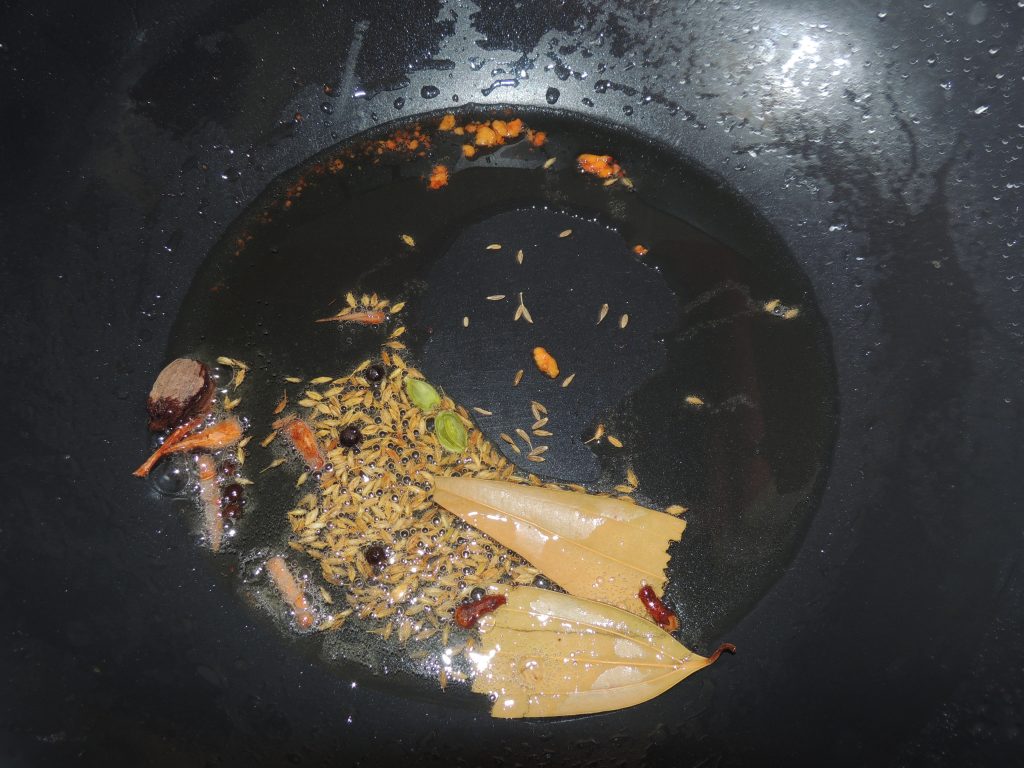
Now take big cardamom, black pepper, bay leaves, cloves, green cardamom.
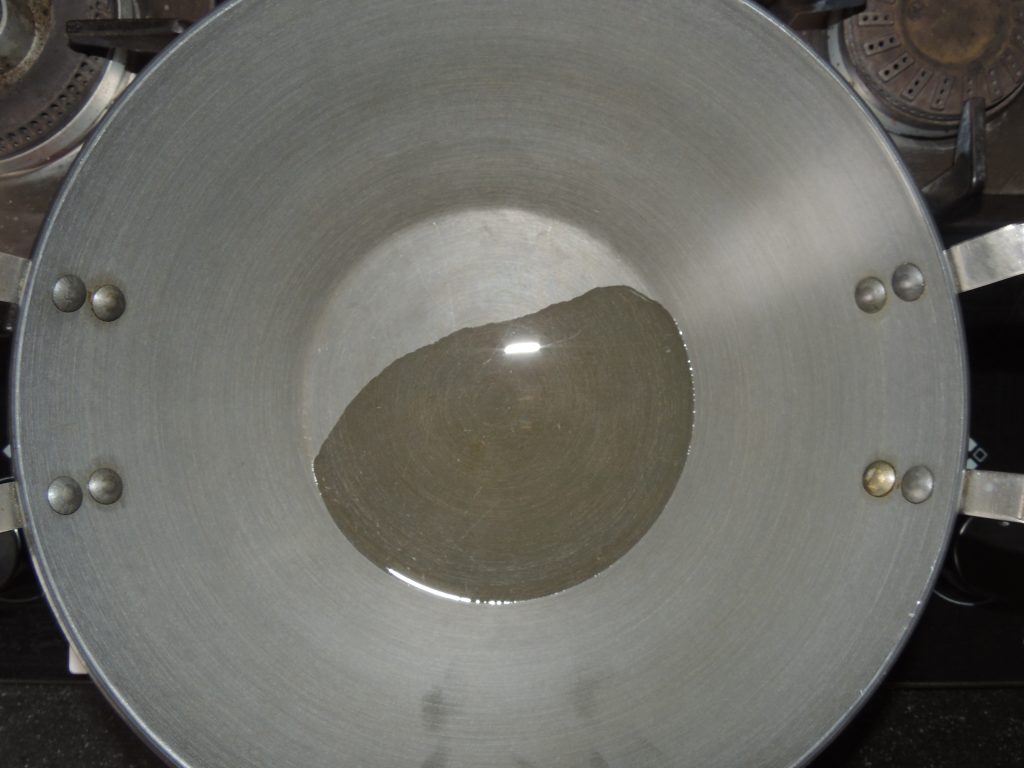
Put gas on the pan.
Add 3 tsp of oil.
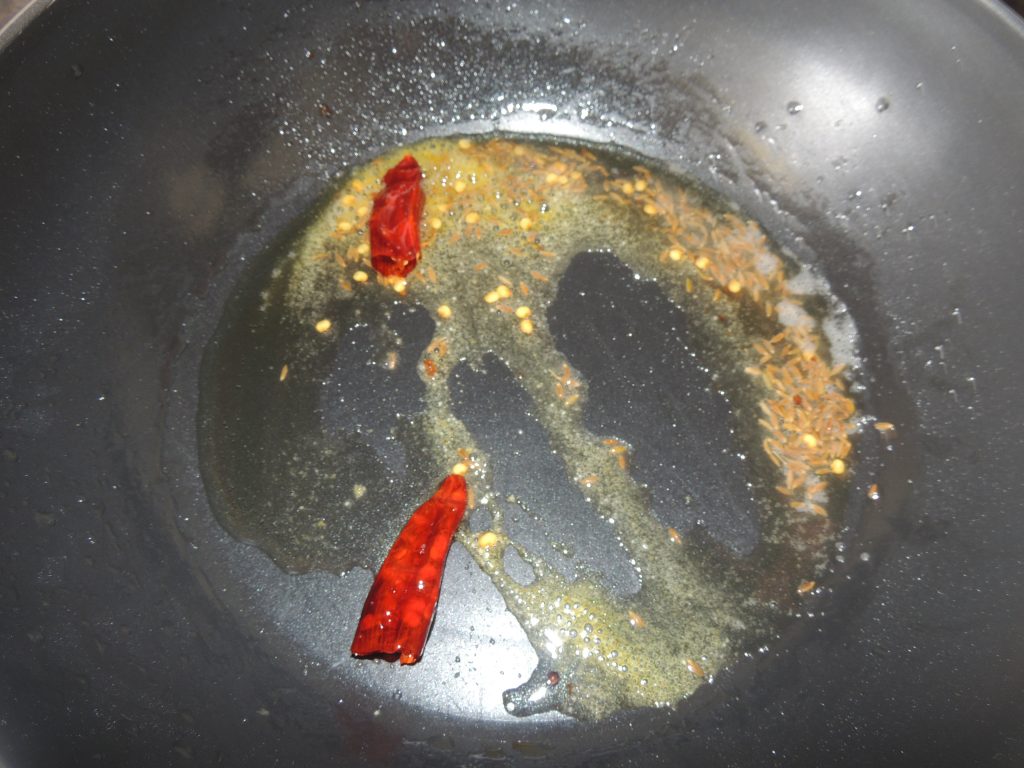
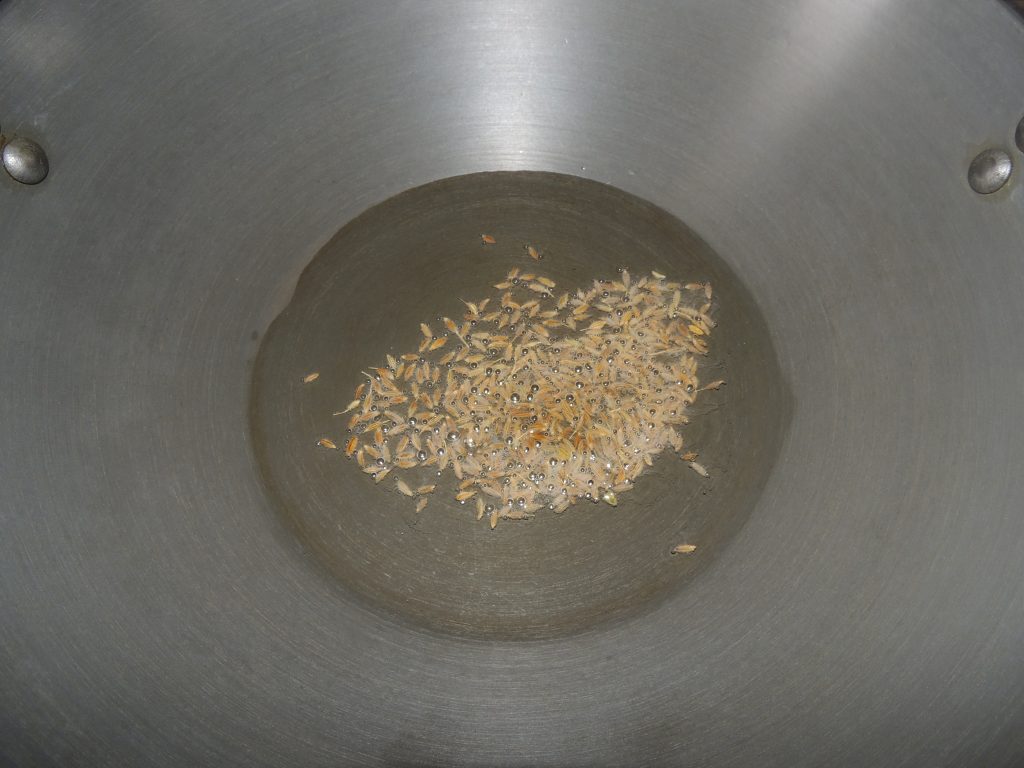
Now add cumin seeds and when the cumin starts crackling, add black pepper,
Green cardamom,
Add bay leaves and big cardamom.
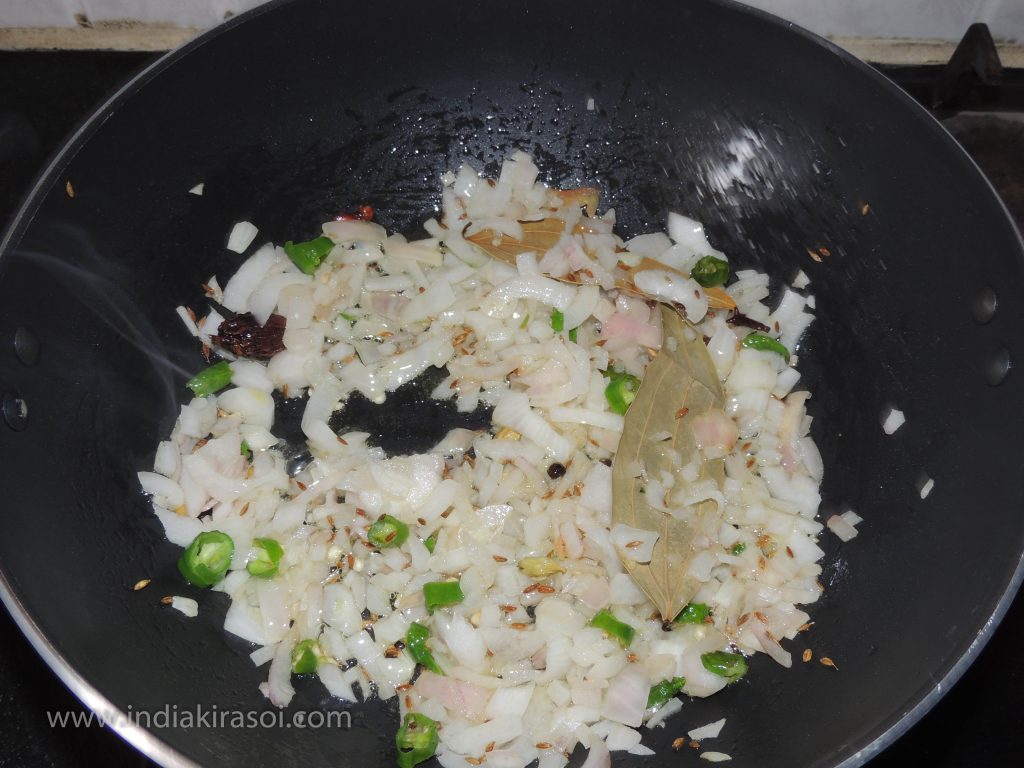
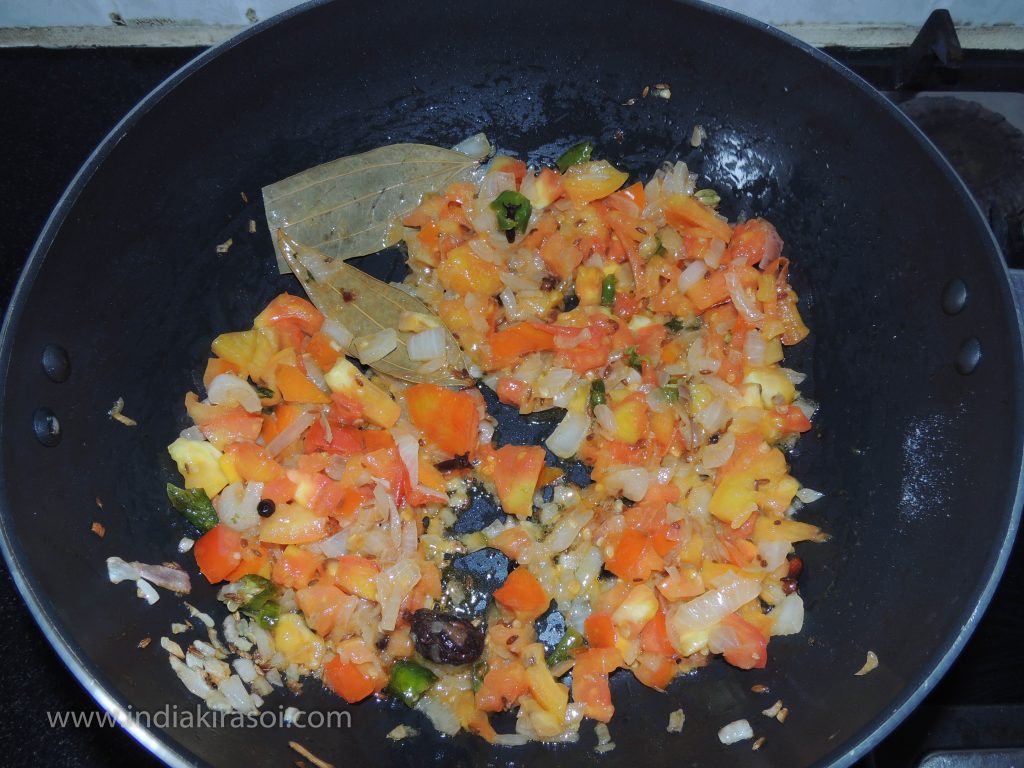
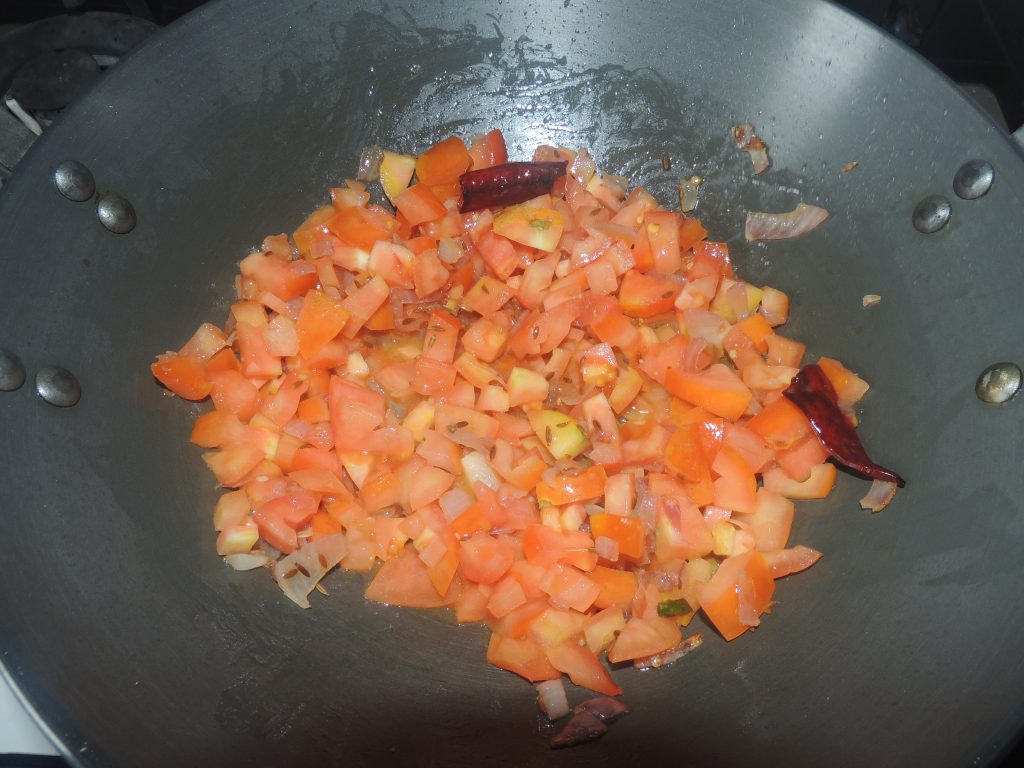
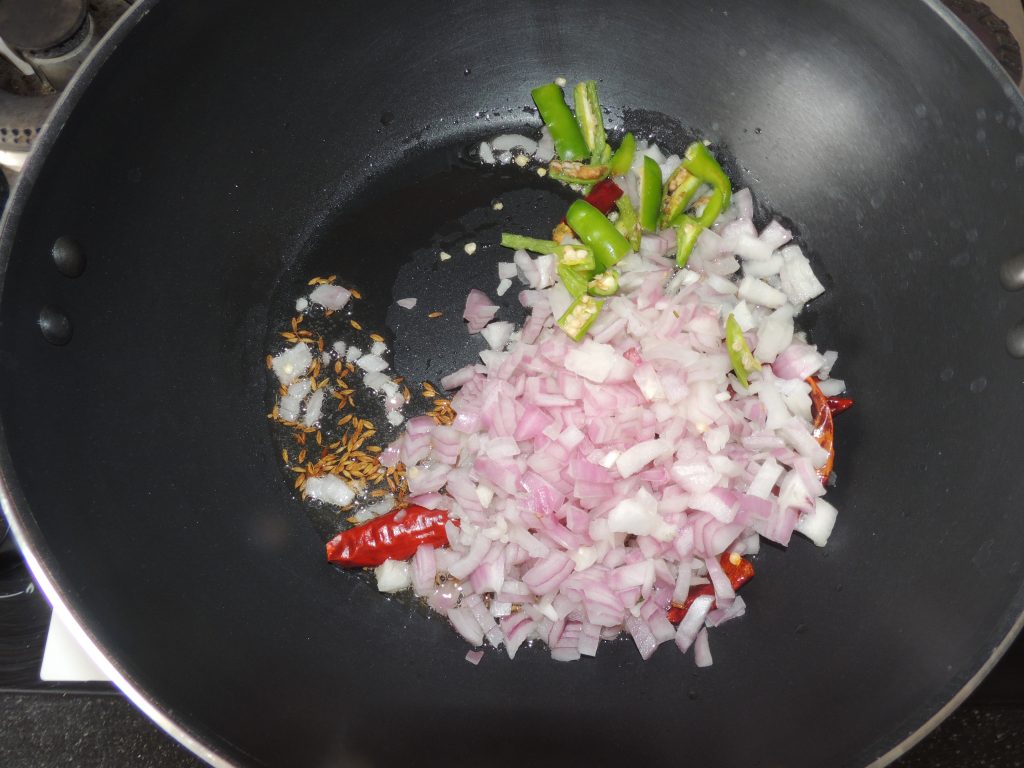
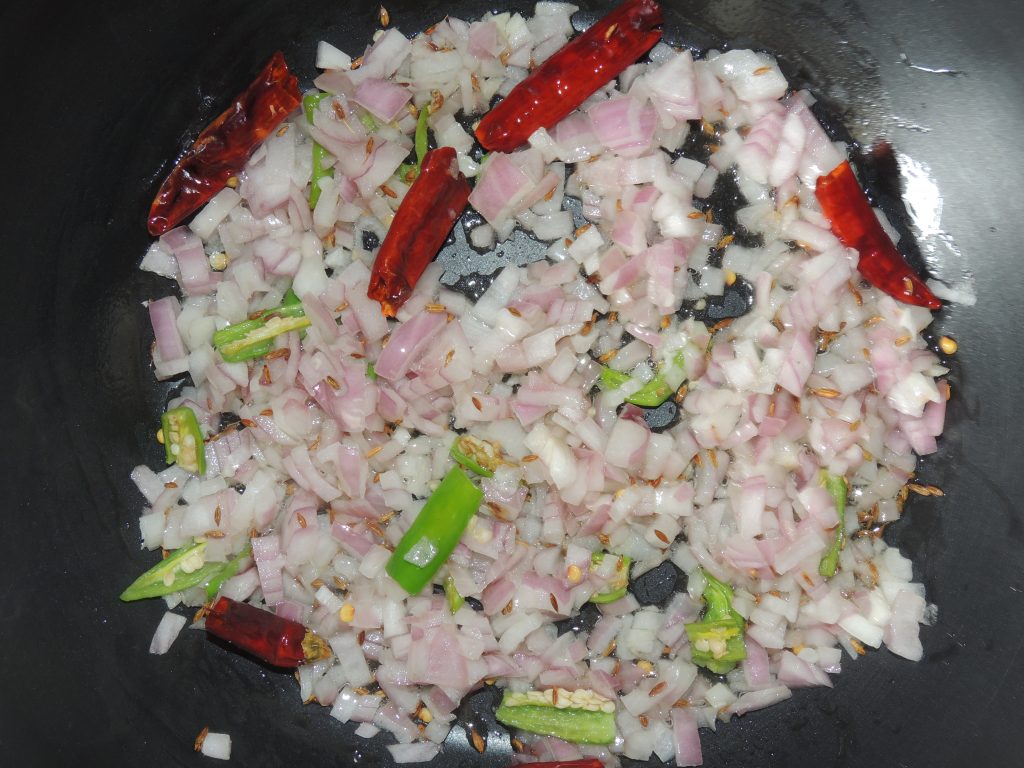
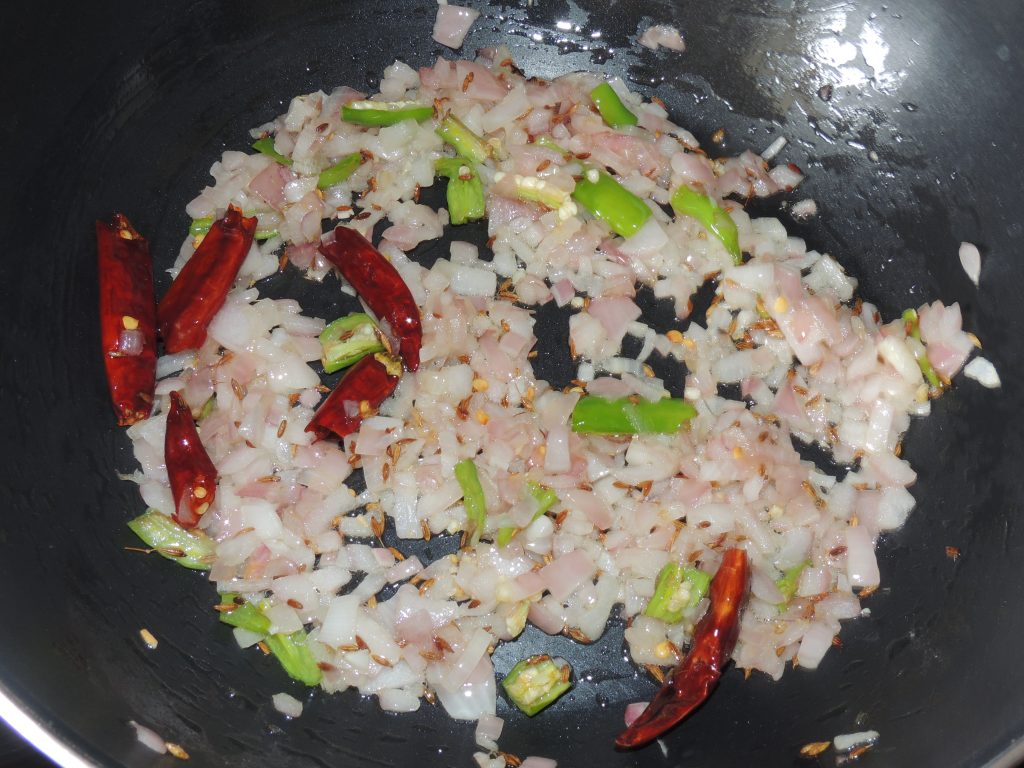
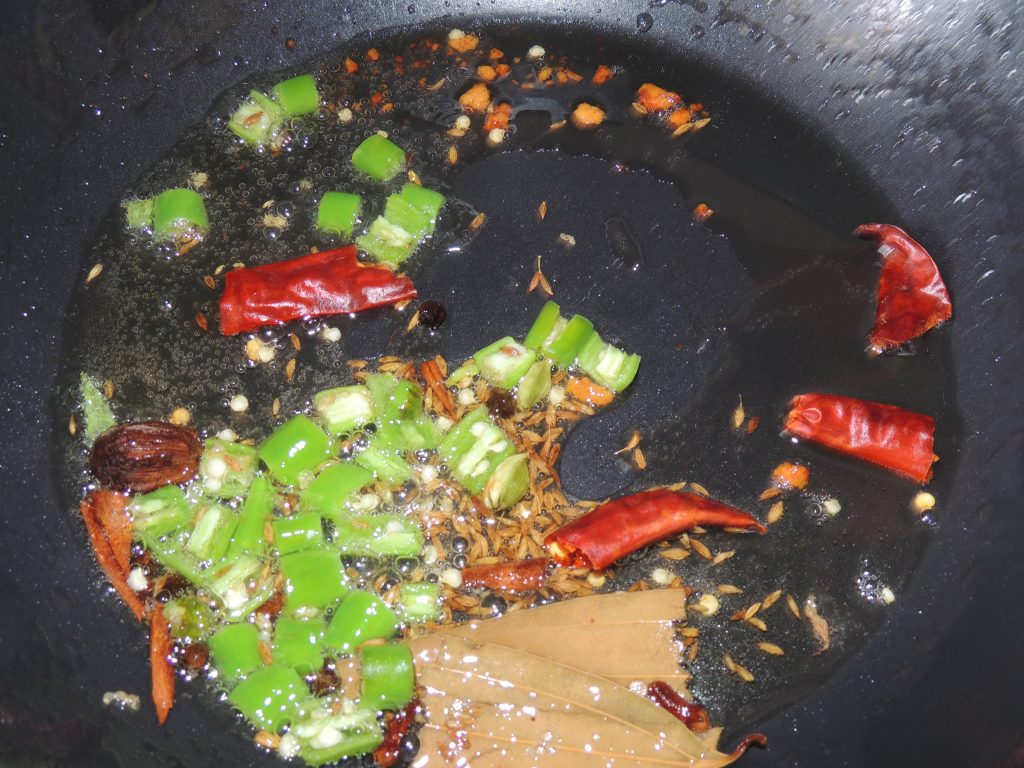
Add chopped onions and green chillies to the kadai / pan.
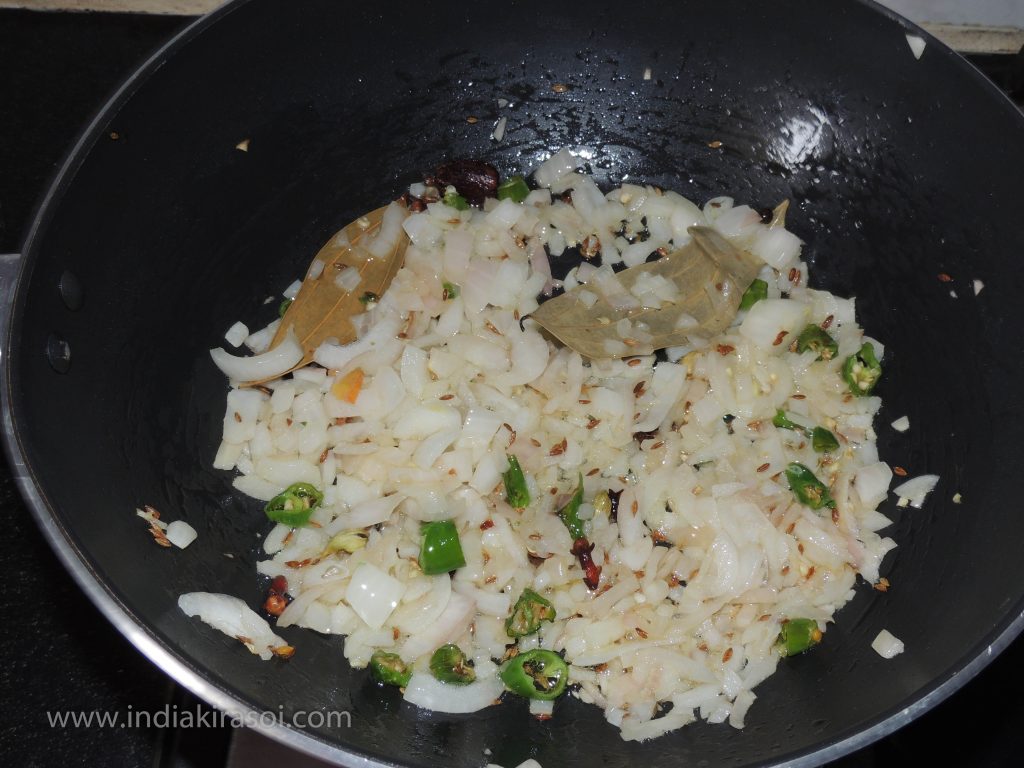
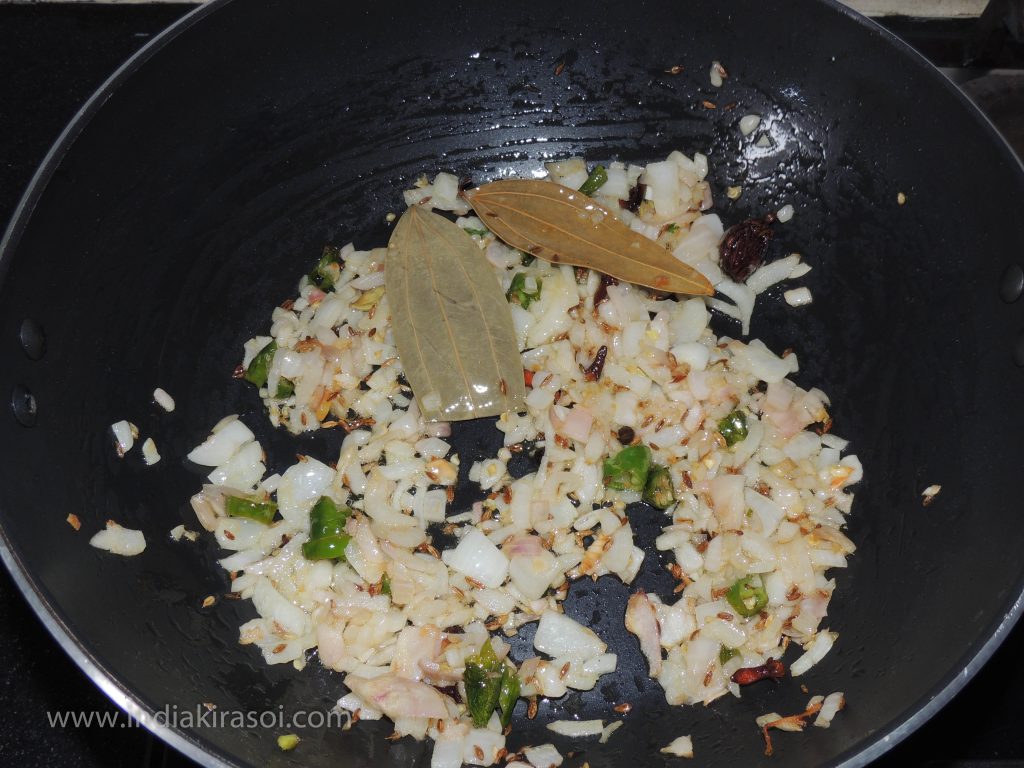
Fry the onion until light brown.
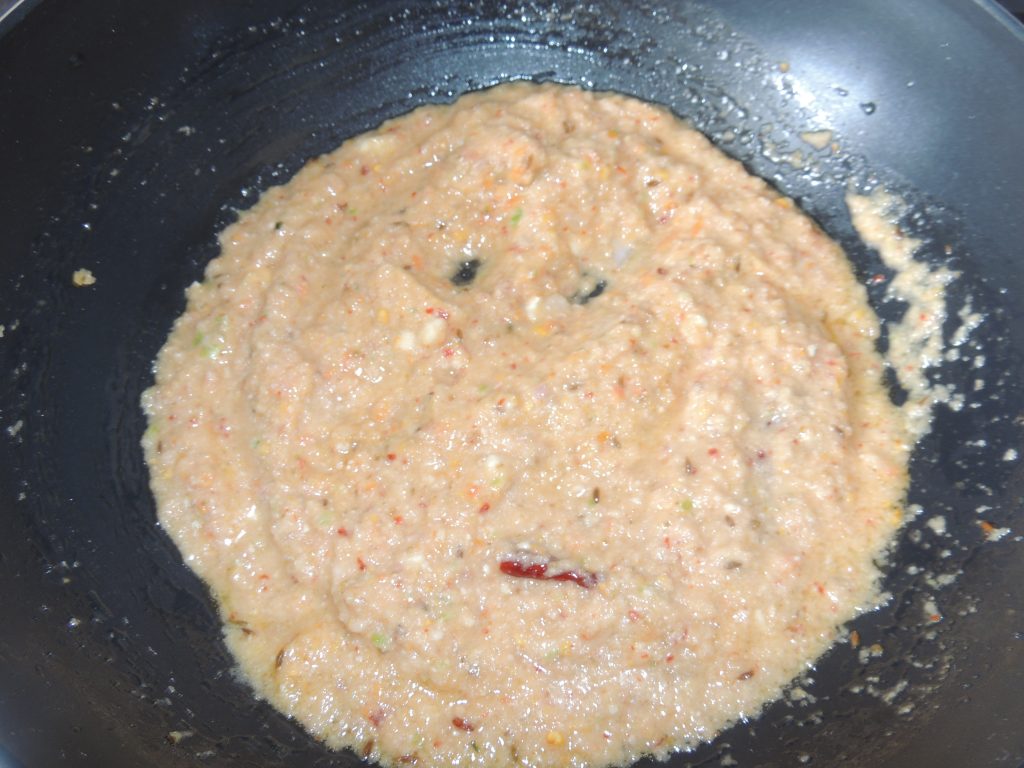
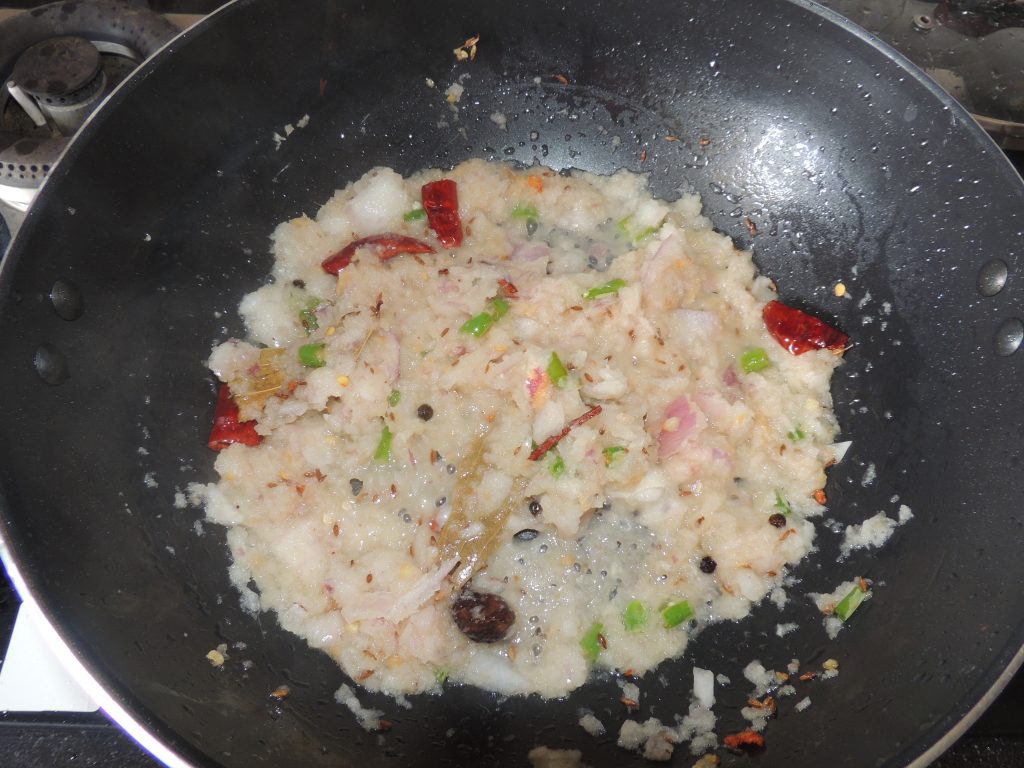
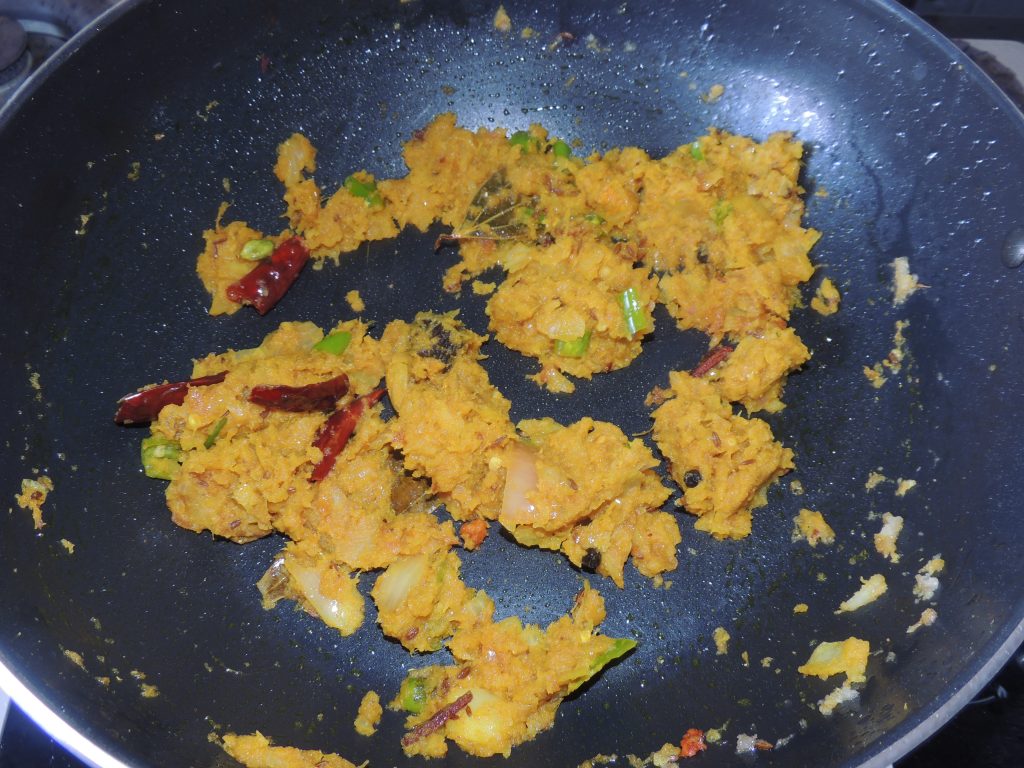
When the onions are roasted add chopped tomatoes and turmeric powder.
Add some salt and stir,
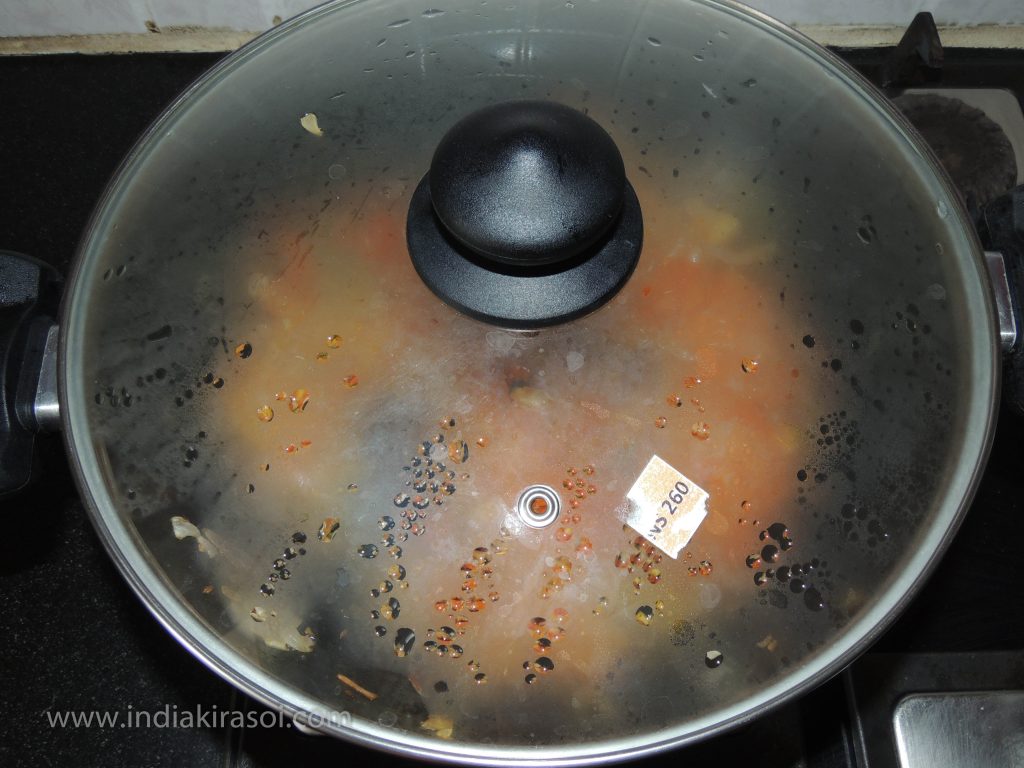
Then put the lid on the Kadai / pan.
Cook tomatoes.
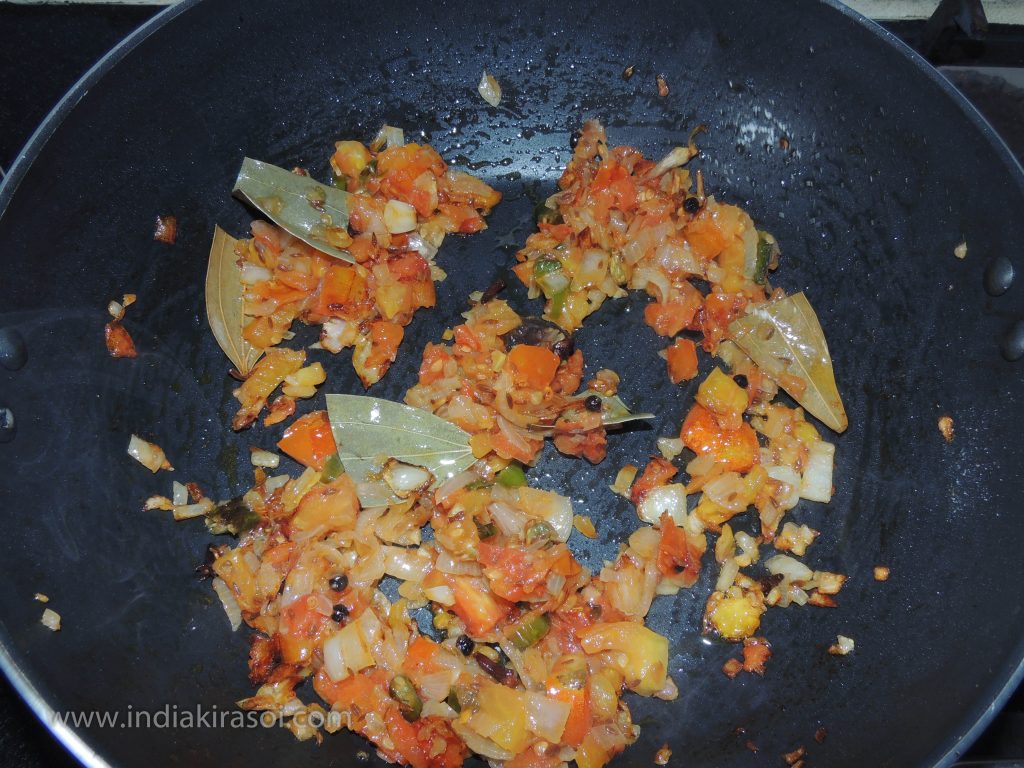
When tomatoes are cooked,
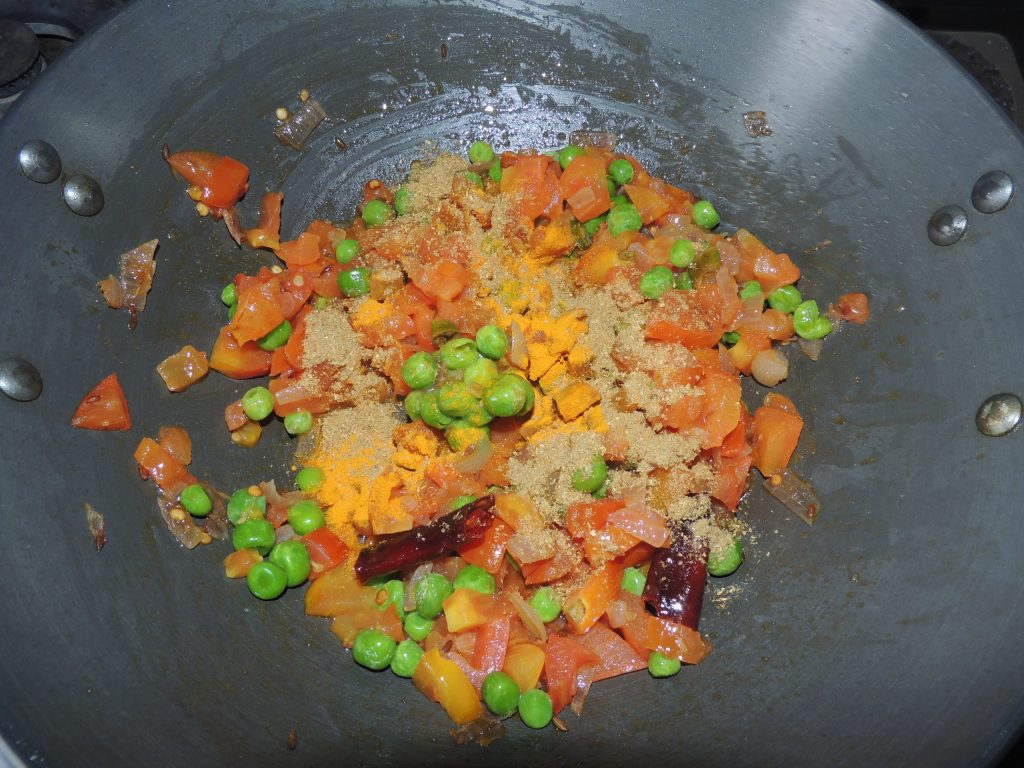
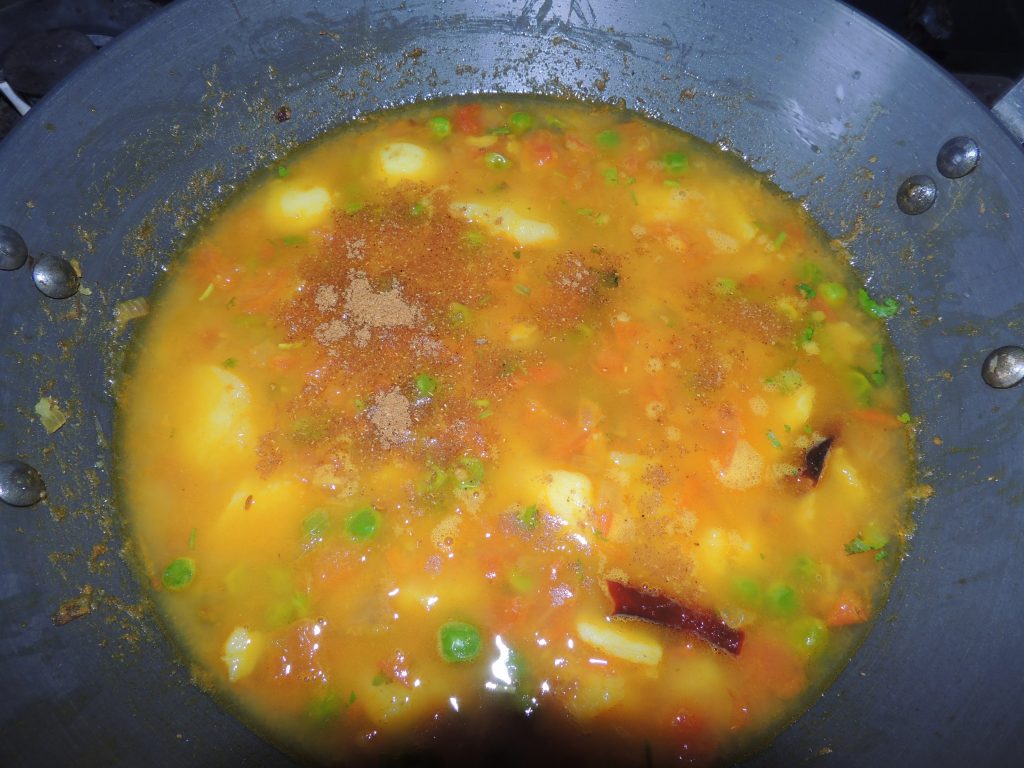
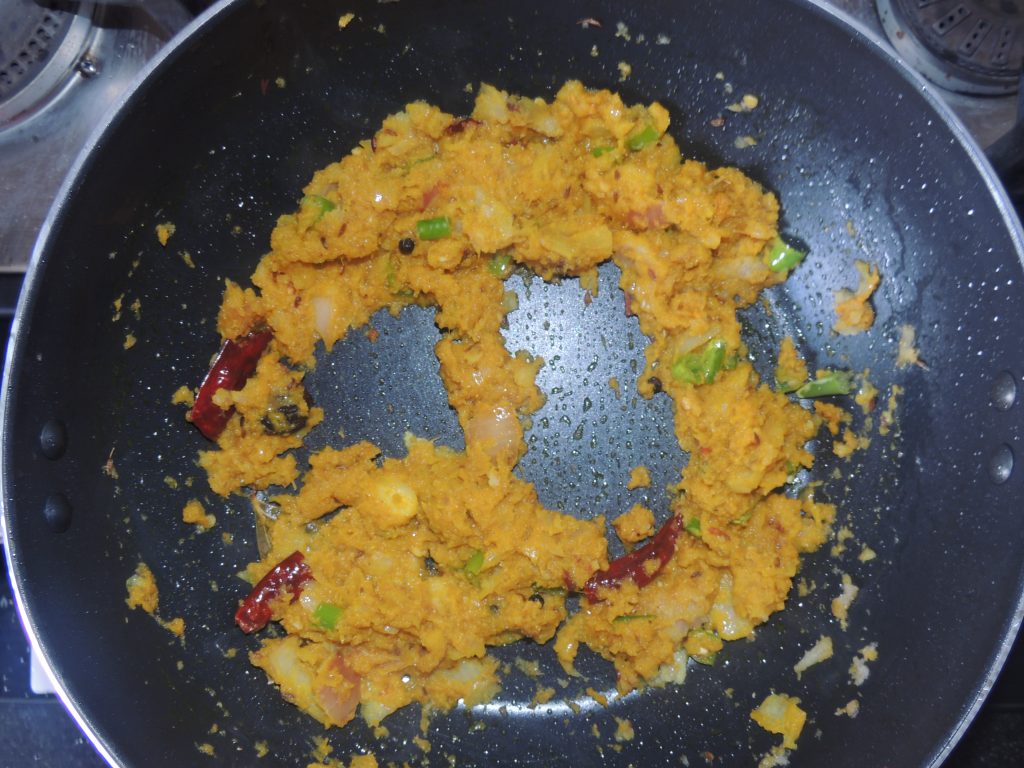
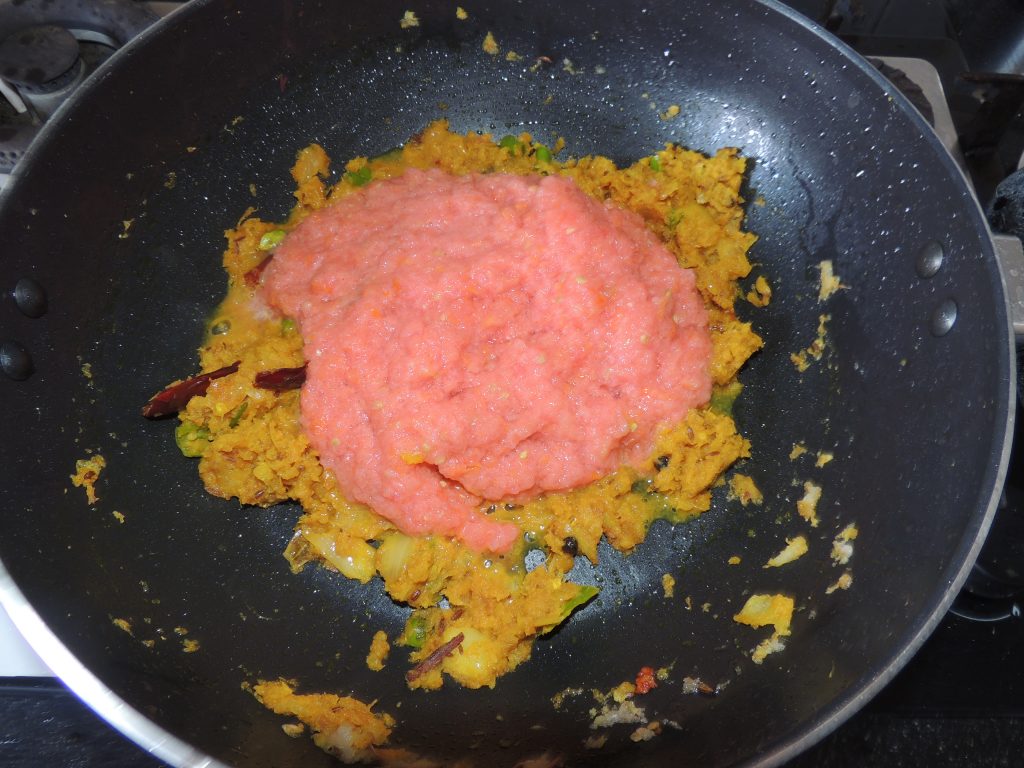
Then add coriander powder and chhola masala and grama masala to it.
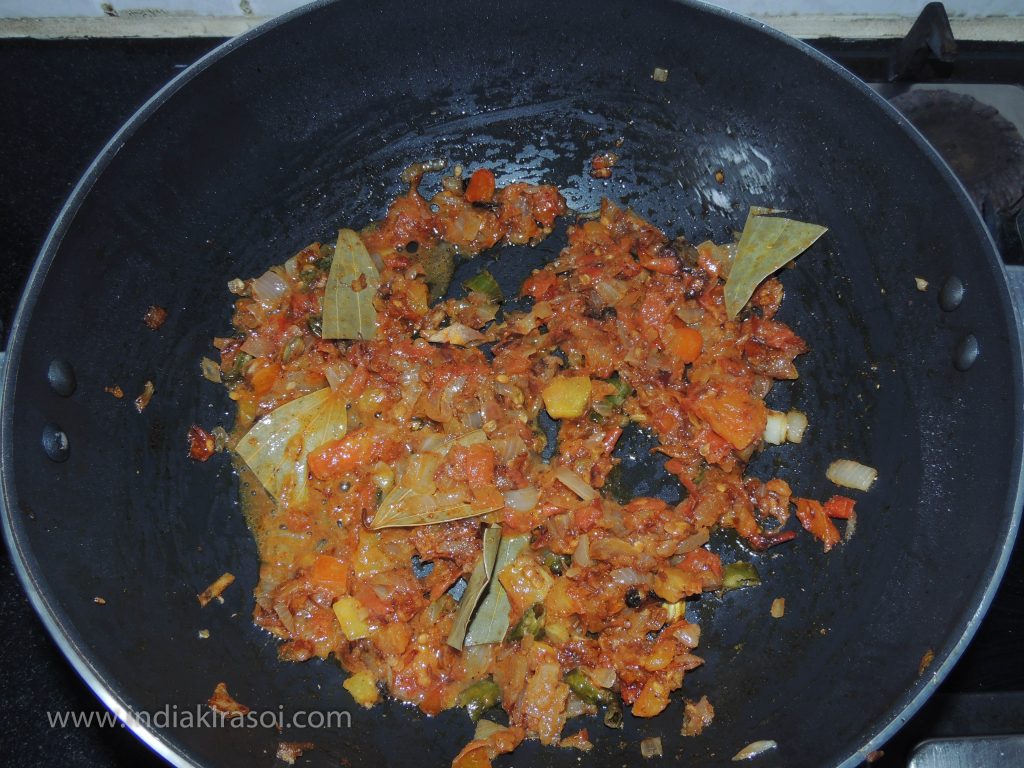
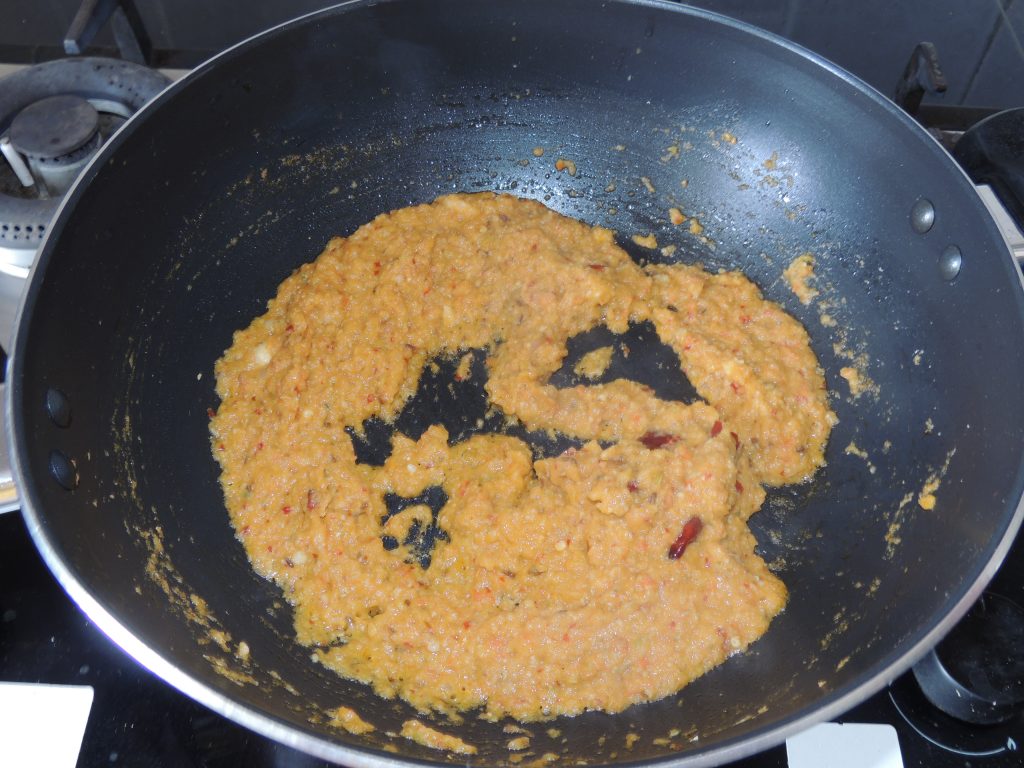
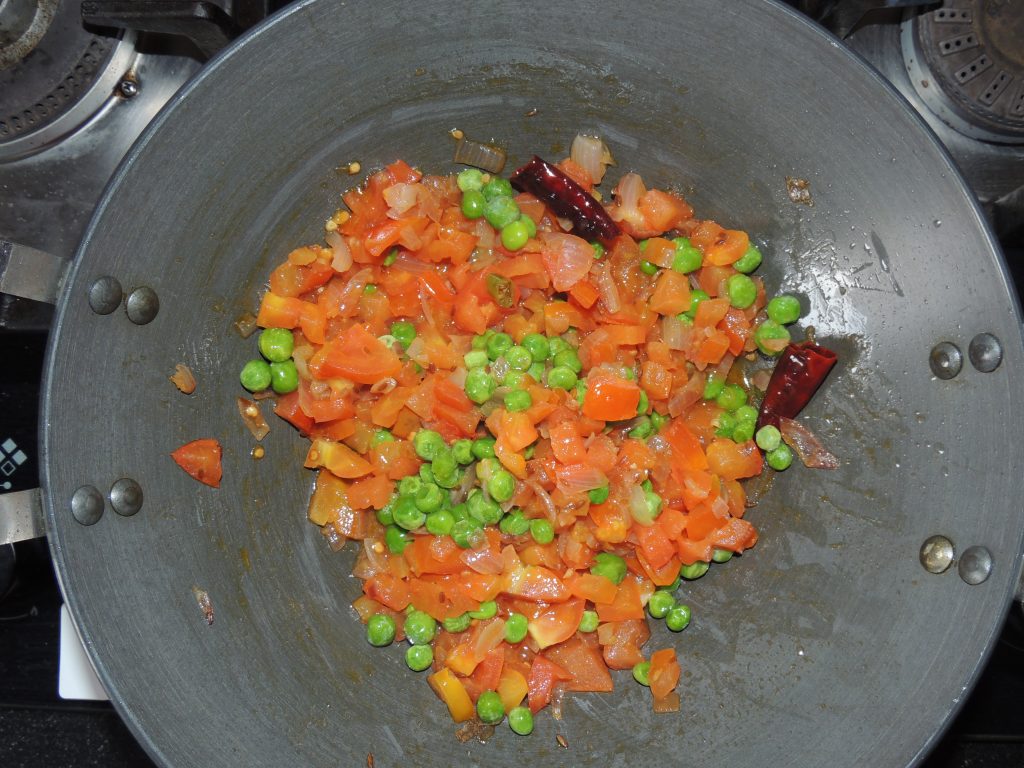
Cook the spices and if the spices are too dry in oil, then cook the spices by adding 4 teaspoons of water to cook the spices.
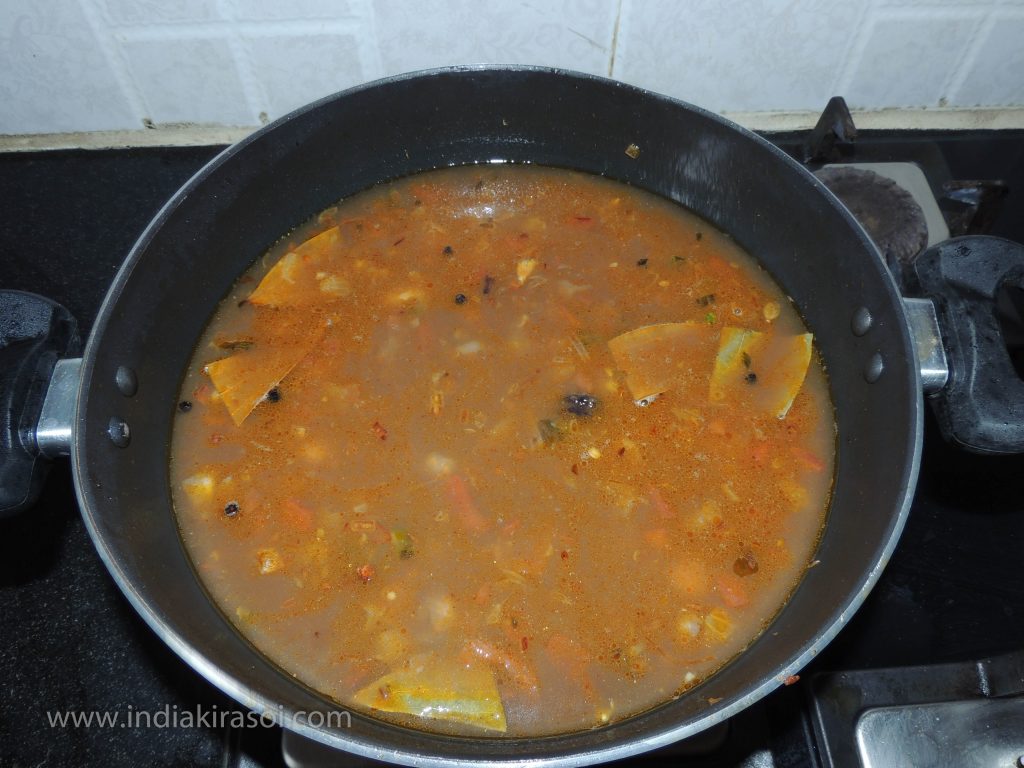
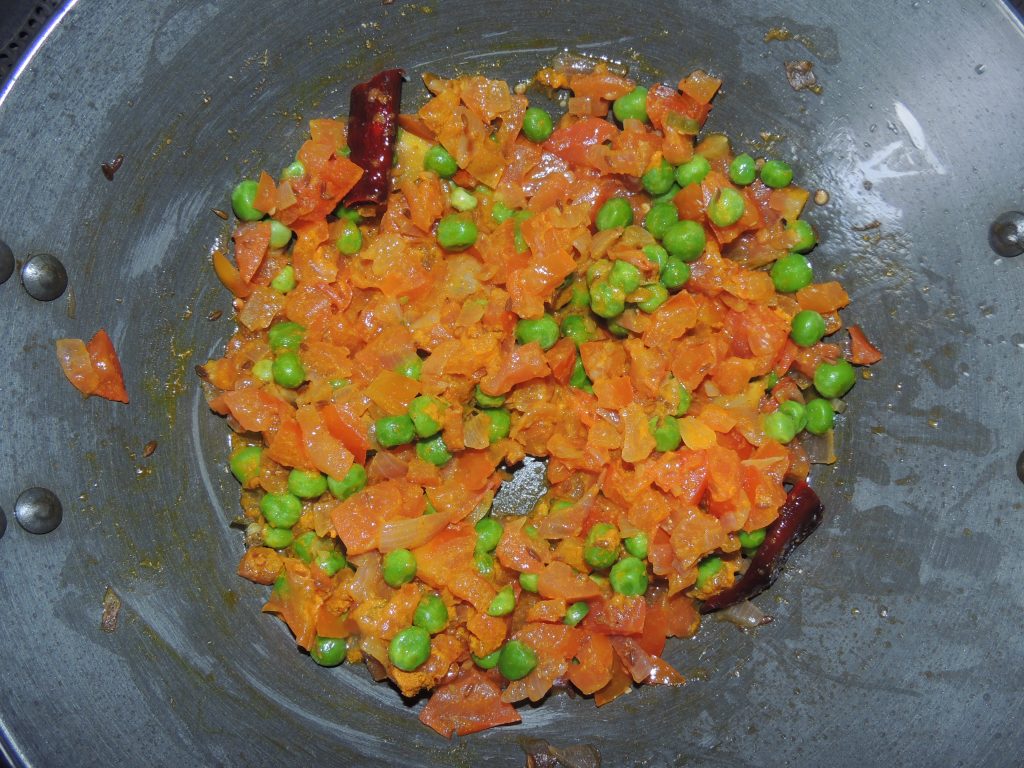
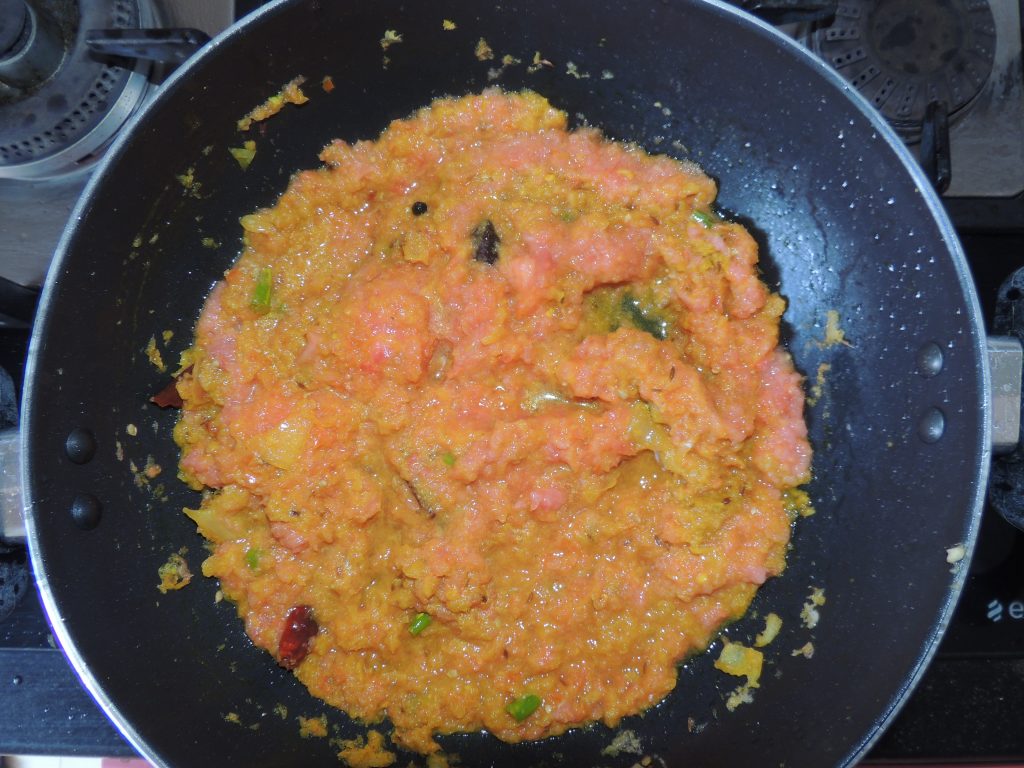
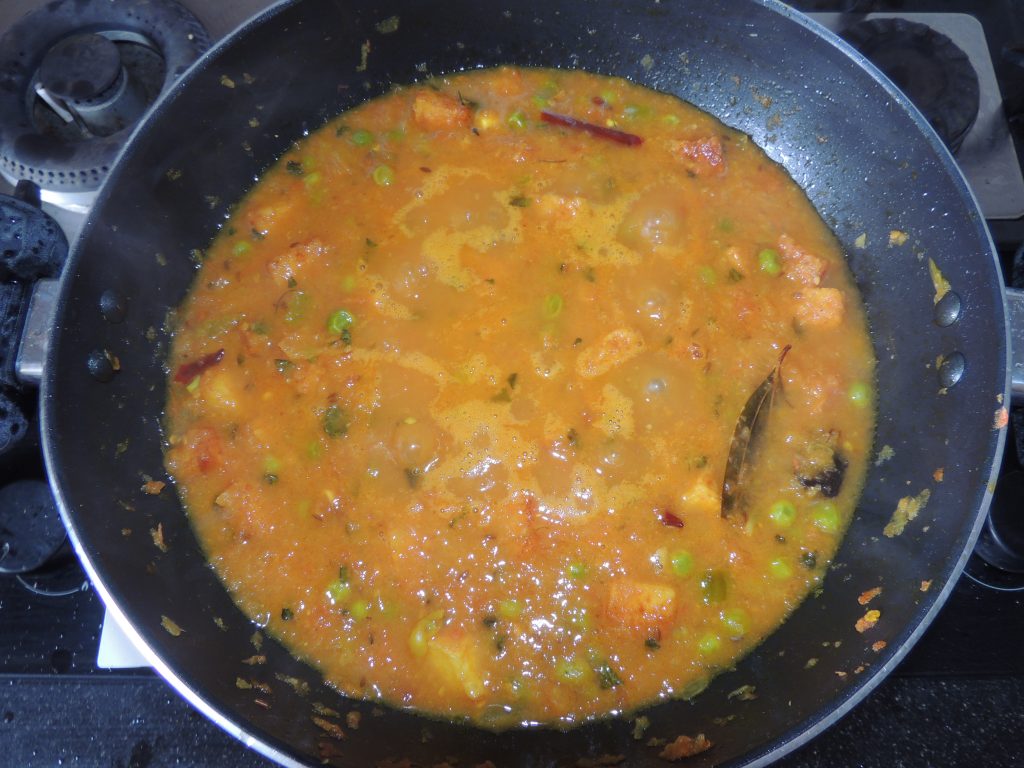
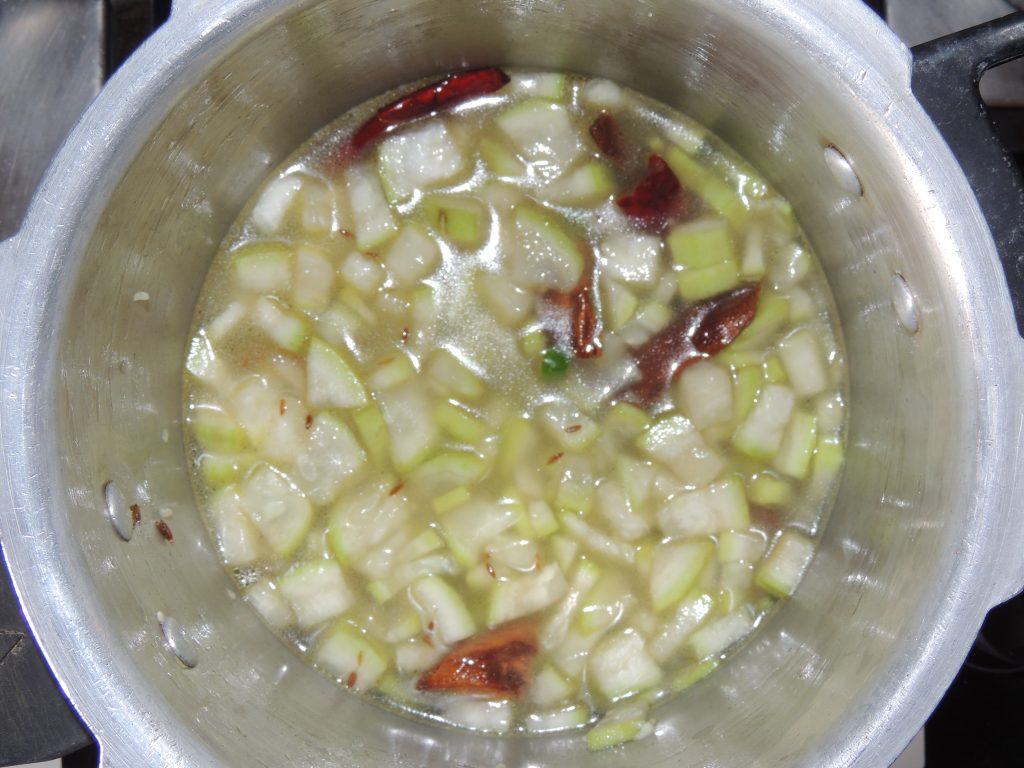
Add 1.5 glasses of water and salt as per taste.
Let the vegetable boil.
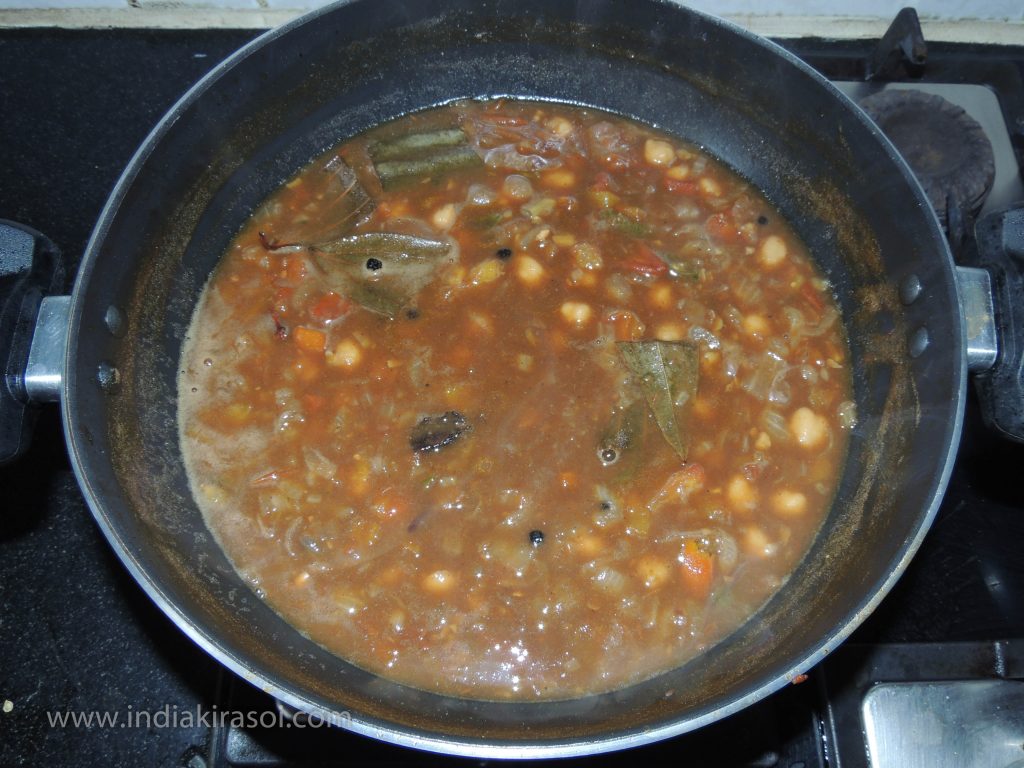
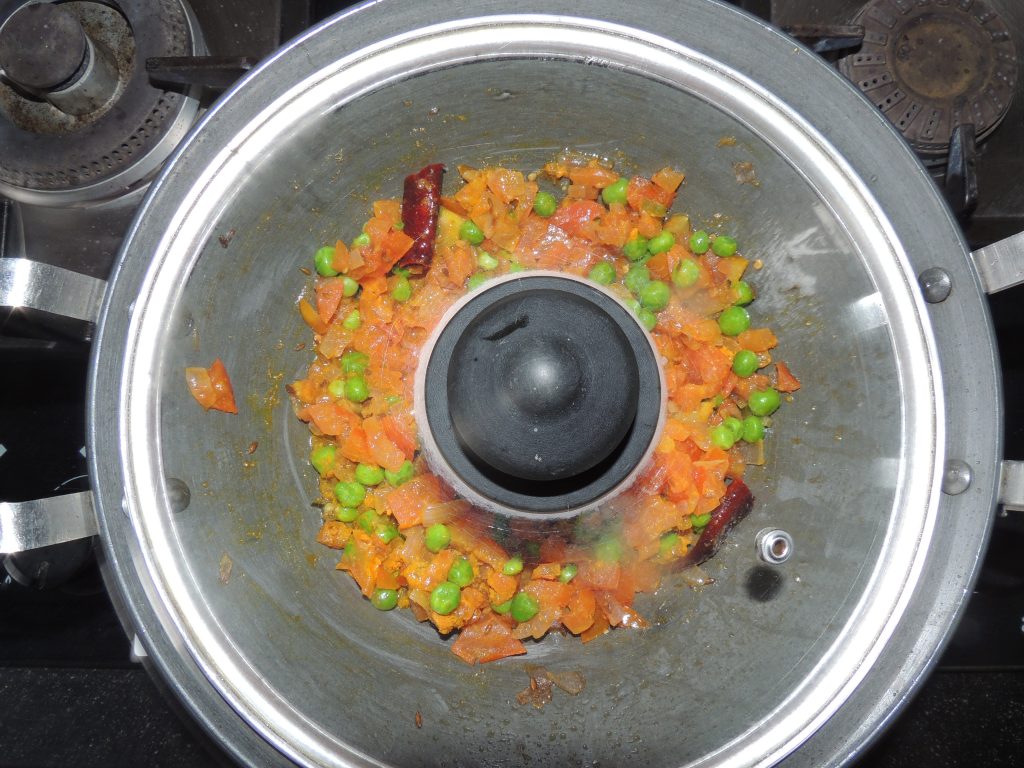
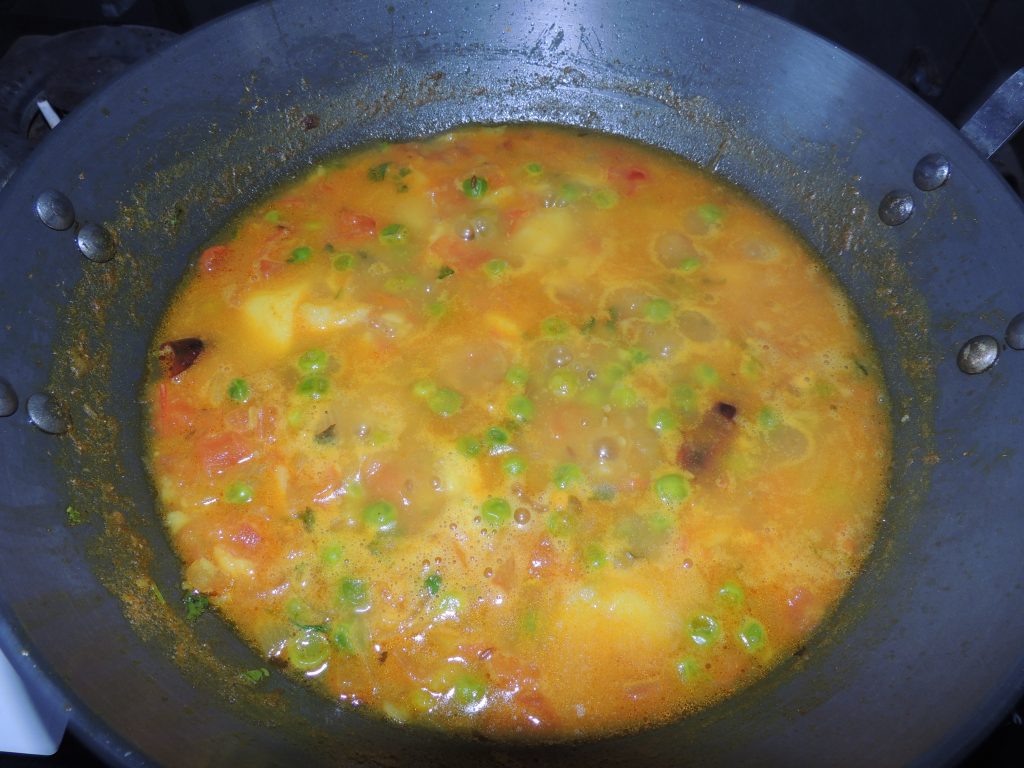
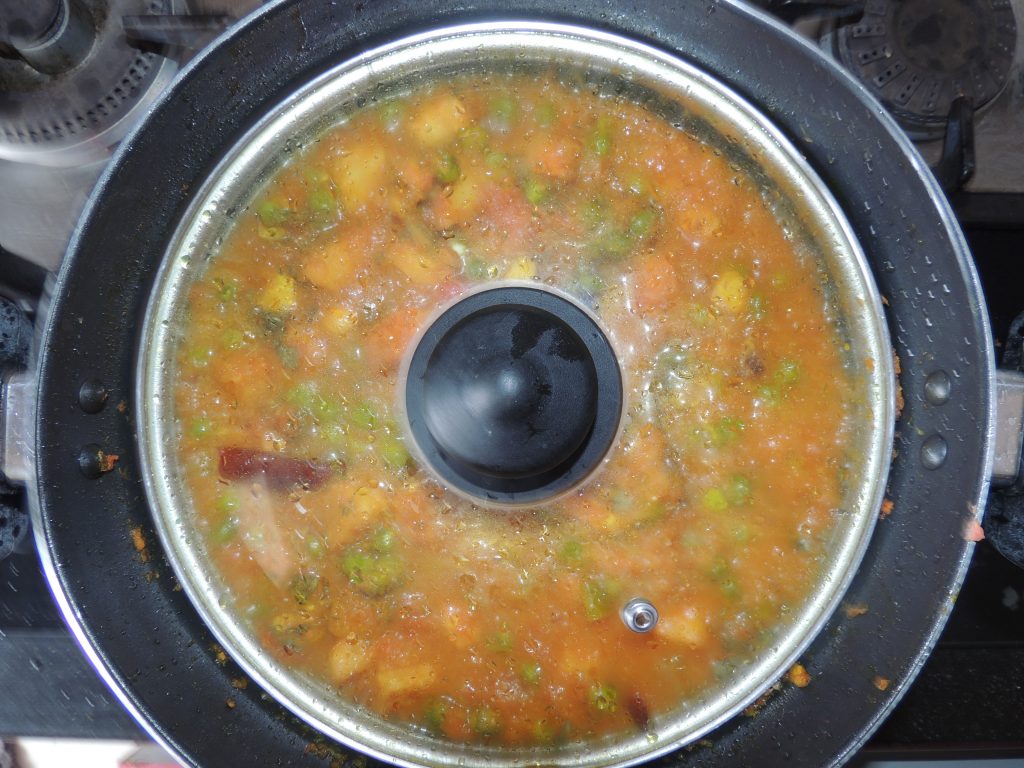
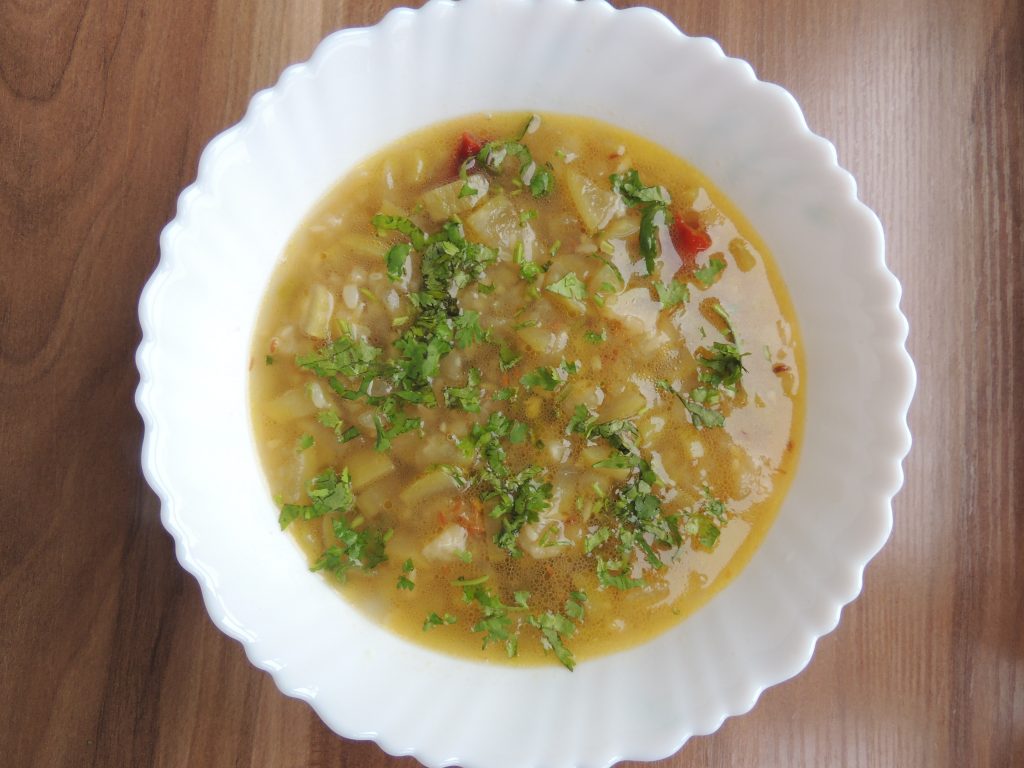
Add half a teaspoon of Amchur powder and half a teaspoon of red chili powder to the vegetable and allow the vegetable to cook on low heat for 7 minutes.
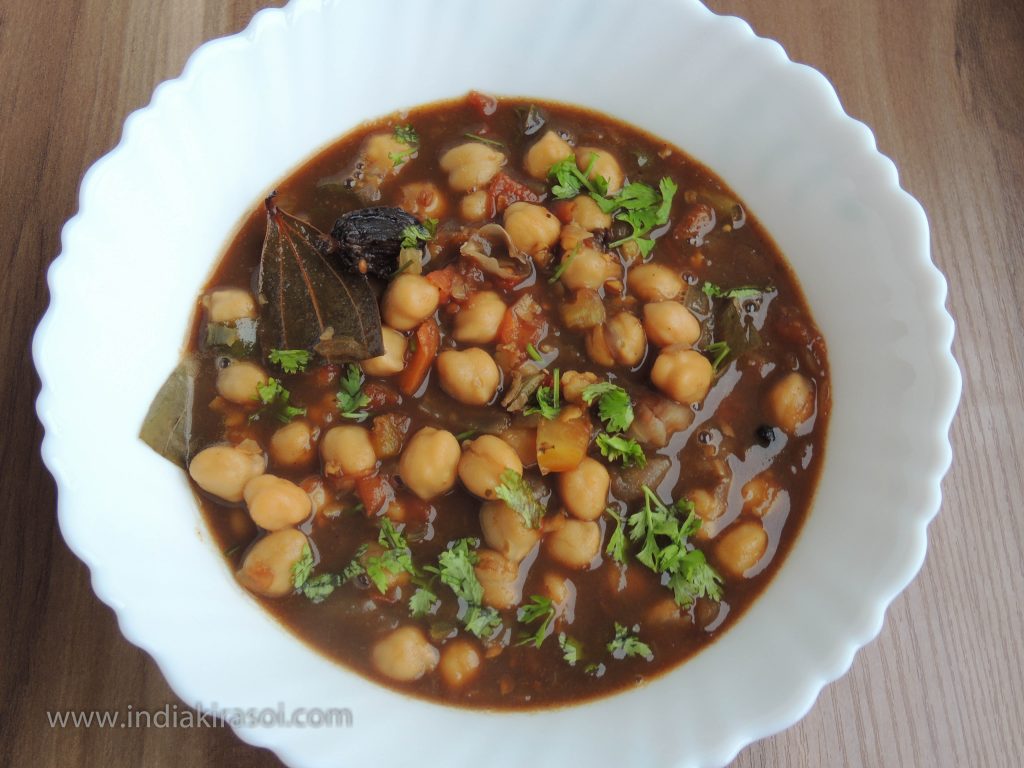
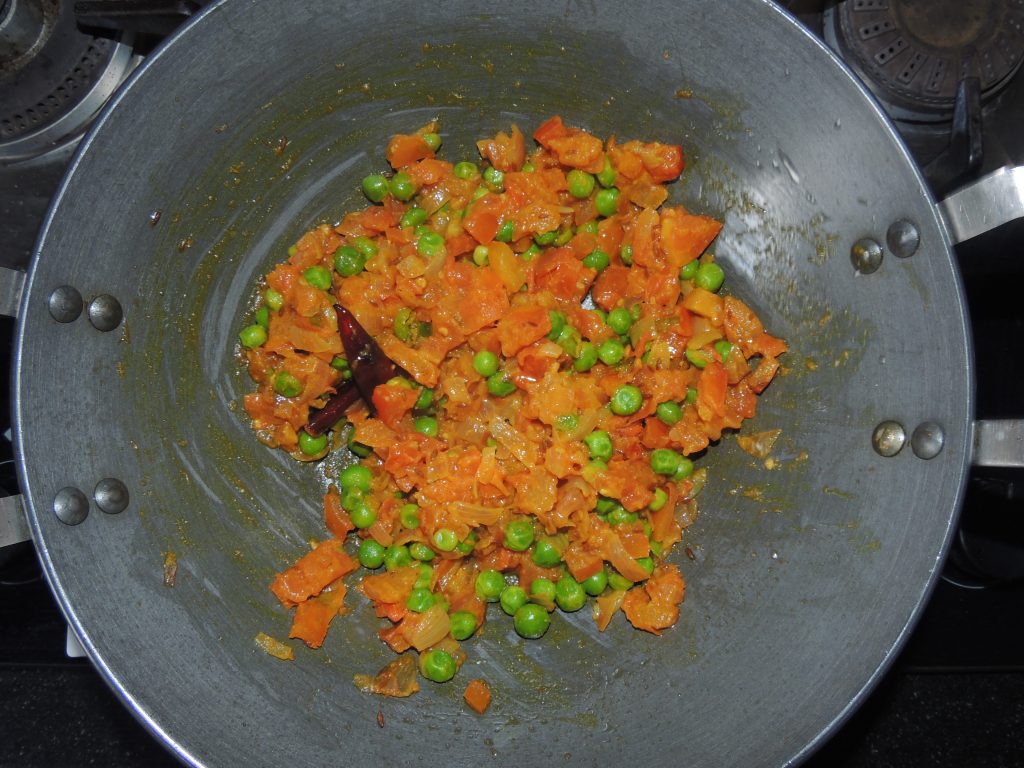
Turn off the gas after cooking the vegetables,
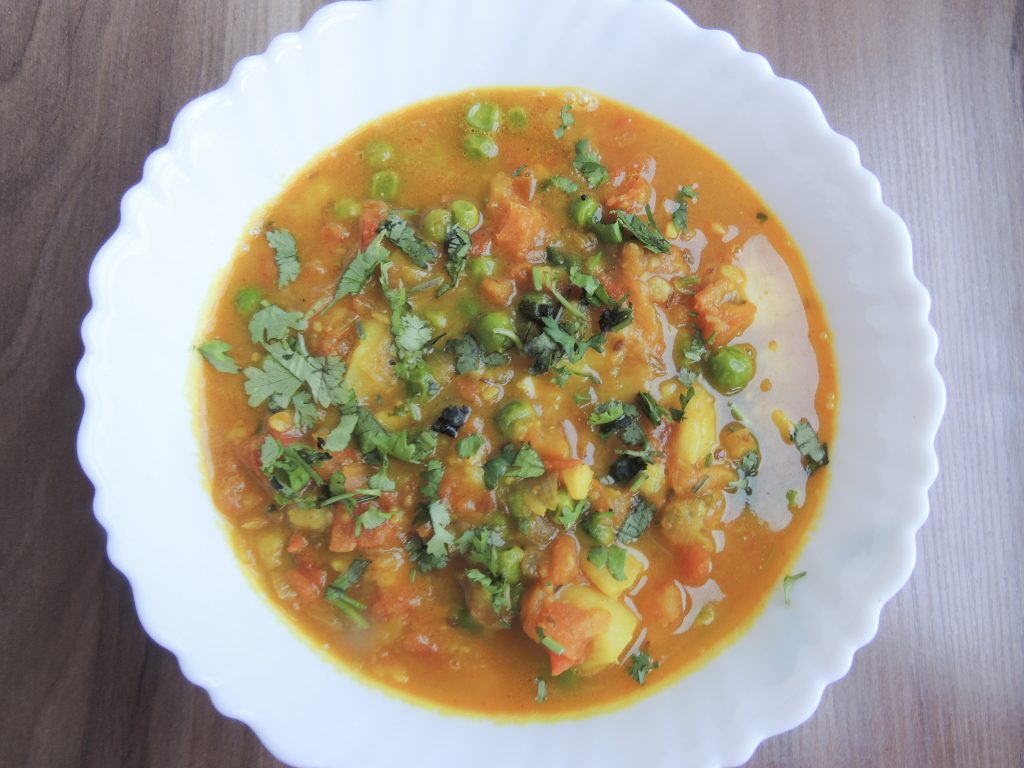
Add green coriander leaves over the vegetable.
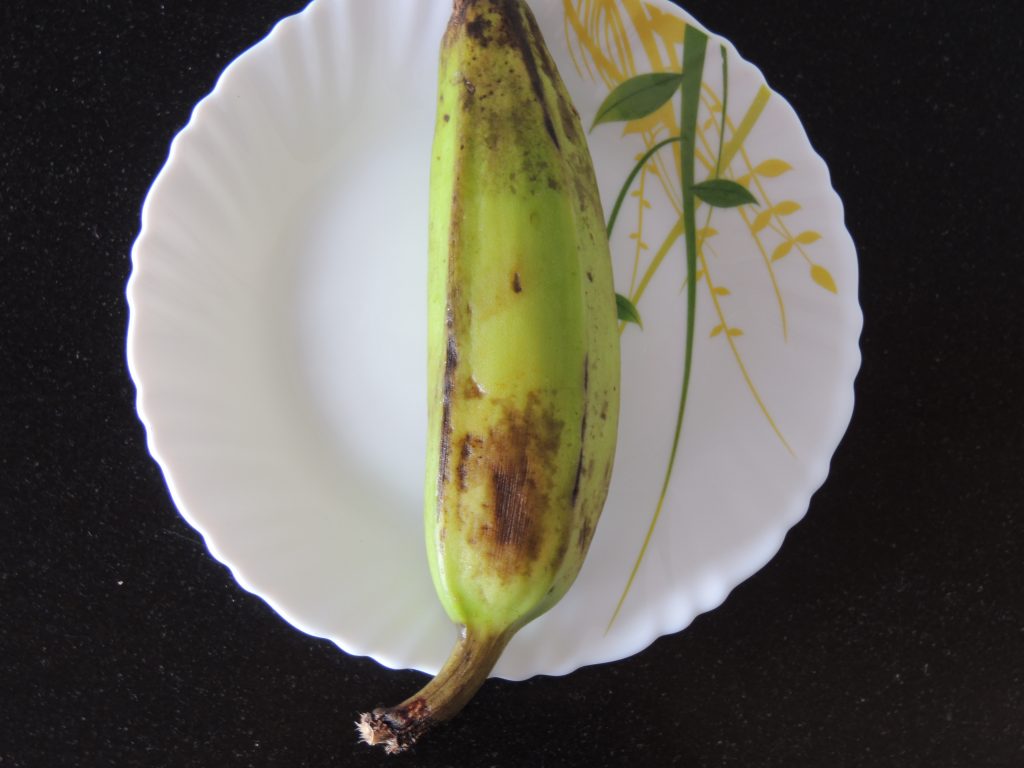
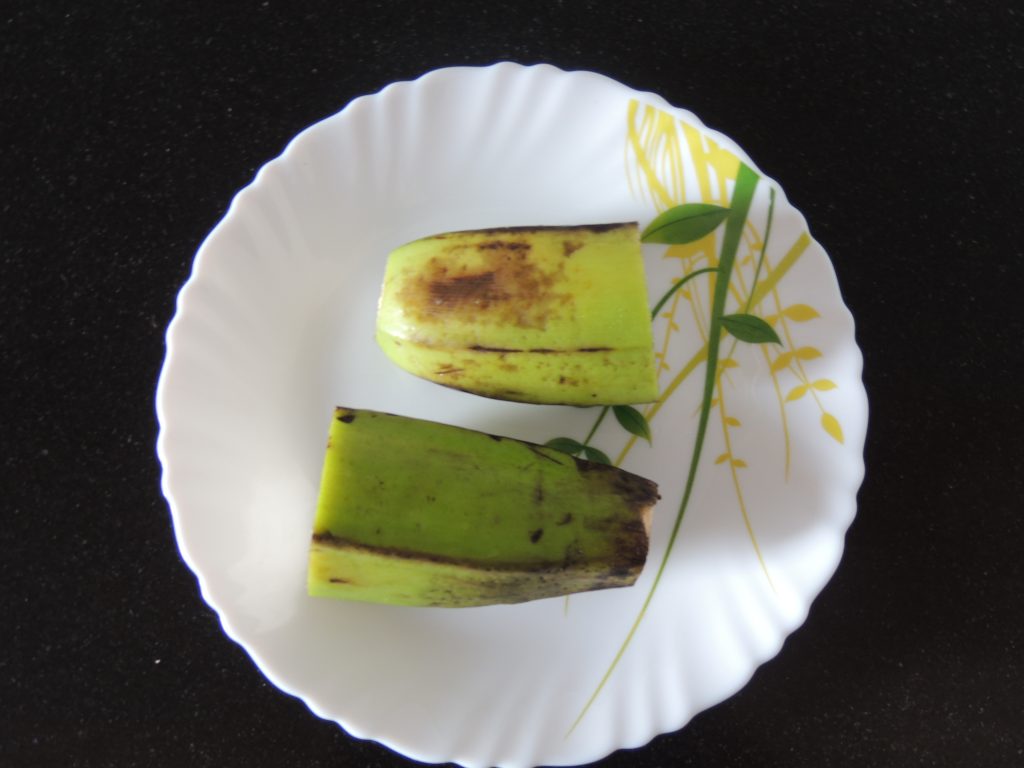
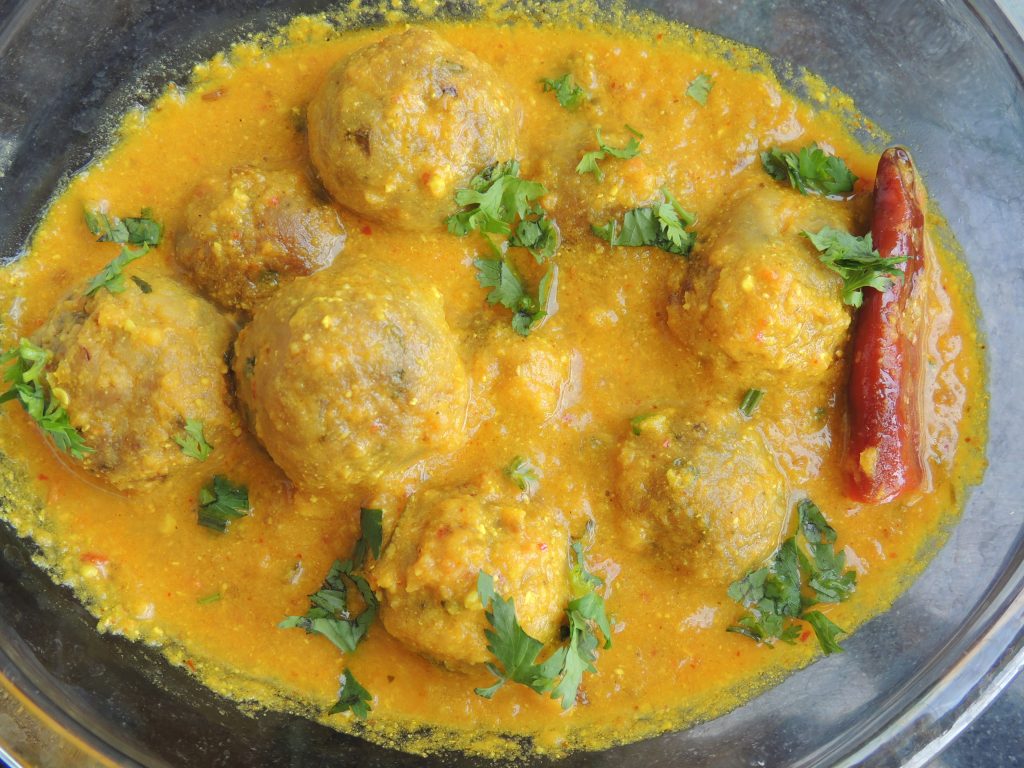
Today I will tell you how to make raw banana kofta sabzi / kachche kele ka kofta.
Ripe bananas are very beneficial for health and raw banana is also very good for health.
By the way, raw banana vegetable can be made in many ways, the matter of raw banana koftas is different.
The raw banana kofta vegetable is very tasty to eat, even if a guest comes, you can make it.
You can sometimes make banana kofta sabzi at home to change your taste.
If you want, you can eat banana koftas in this way without even making curry.
Follow the steps given below to make Banana Kofta curry recipe ….
Course Dinner, Indian, Lunch, Main Dish, Snacks
Cuisine dinner, Indian, lunch, Main
Prep Time 10minutes
Cook Time 20minutes
Total Time 30minutes
Servings 4People
Calories 18kcal
Equipment
Fry Pan / Wok
Plate
Spatula
Mixer Grinder
Knife
Bowl
Pressure Cooker
Ingredients
1UnitRaw Banana / Plaintain / Kachcha Kela
1.5tspGram Flour / Besan
1UnitBig Onion / Pyaz
3UnitLocal Tomato / Desi Tamatar, if local / desi tomato is not available then take hybrid tomato
2UnitGreen Chili / Hari Mirch
1inchGinger slice / Adrak ka tukda
1pinchAsafoetida / Heeng
1tspCoriander Seeds / Khadi Dhaniya
2tspCoriander leave / Dhaniya Patti
asper tasteSalt / Namak
100gramsOil for frying Kofta, if kofta’s are more or less, you can take oil sufficient for frying
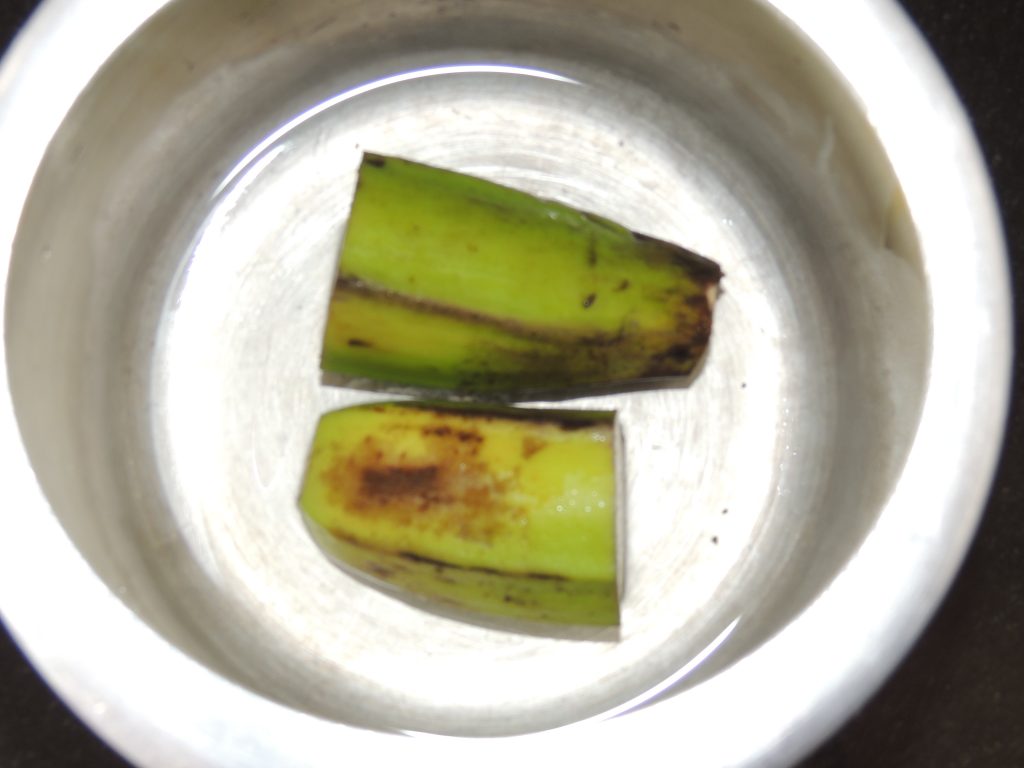
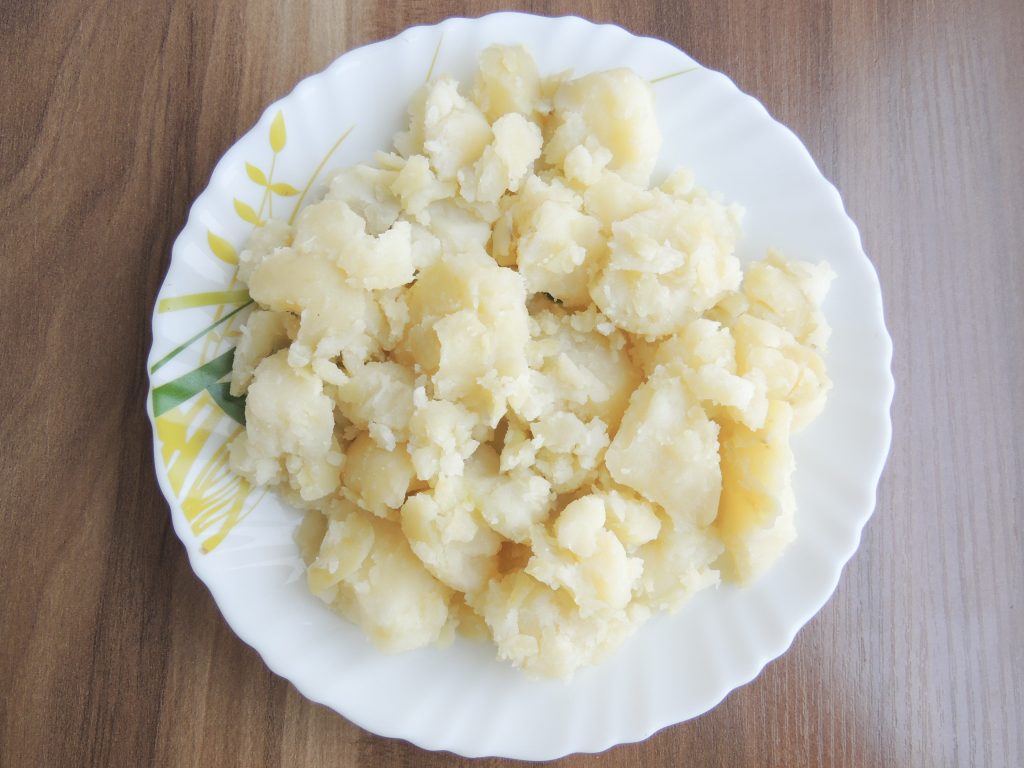
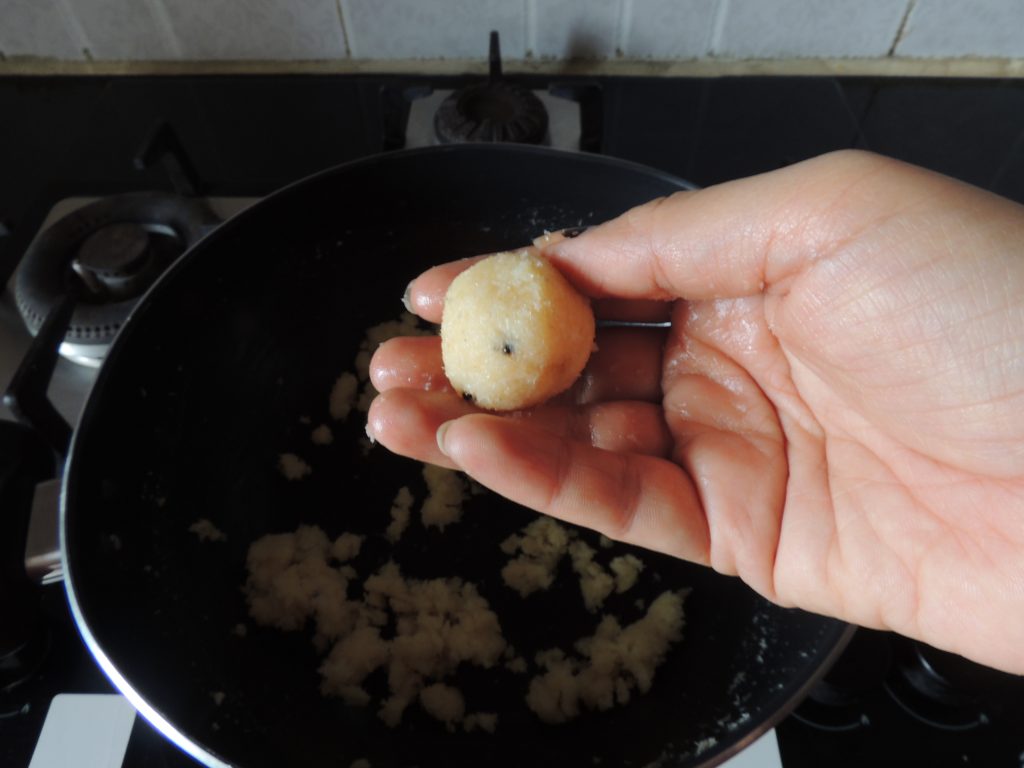
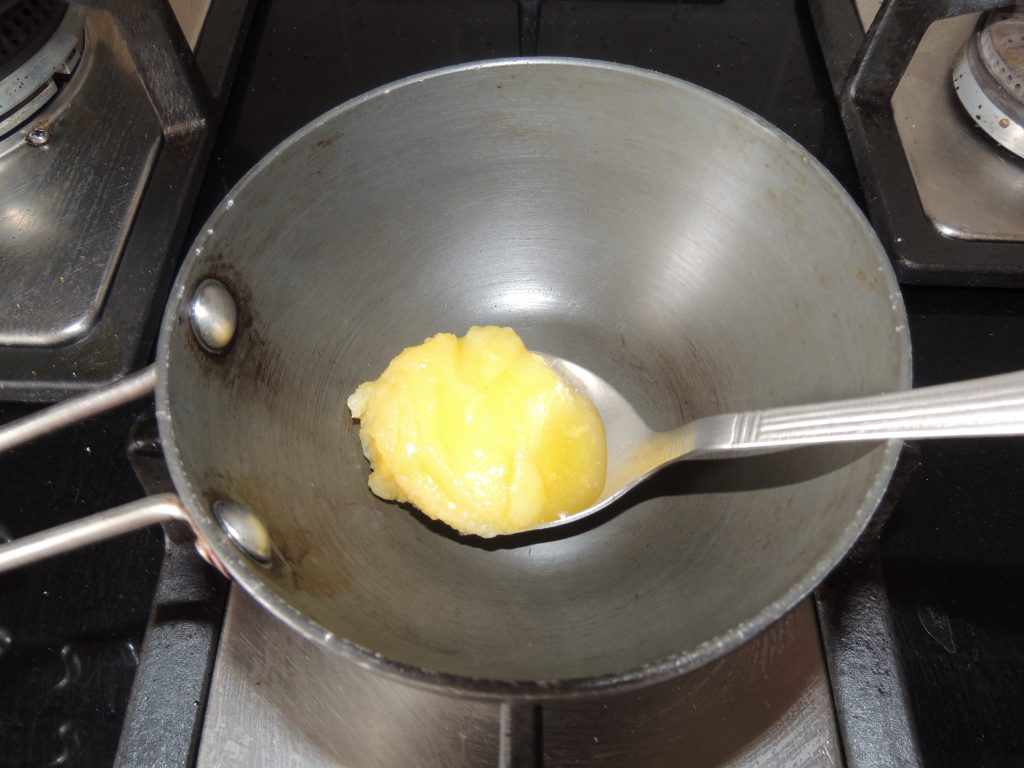
After that put raw banana in the pressure cooker and add about a cup of water.
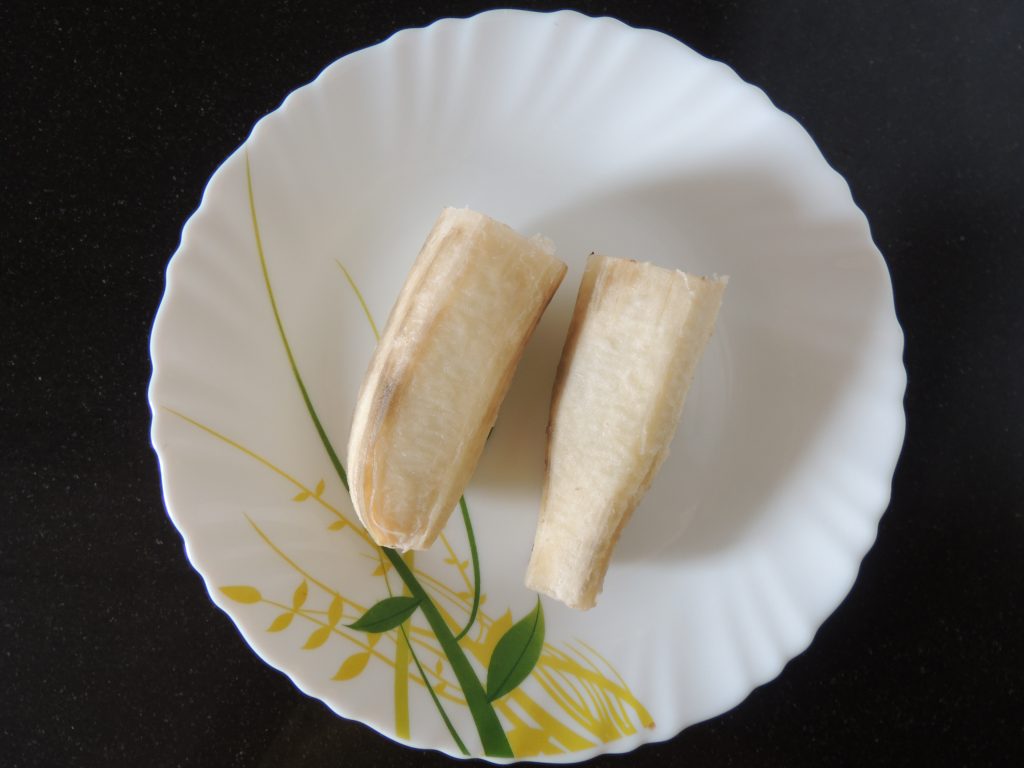
After this, cook the banana by giving it a whistle in the cooker. Remove the banana peel when the pressure comes out from the cooker.
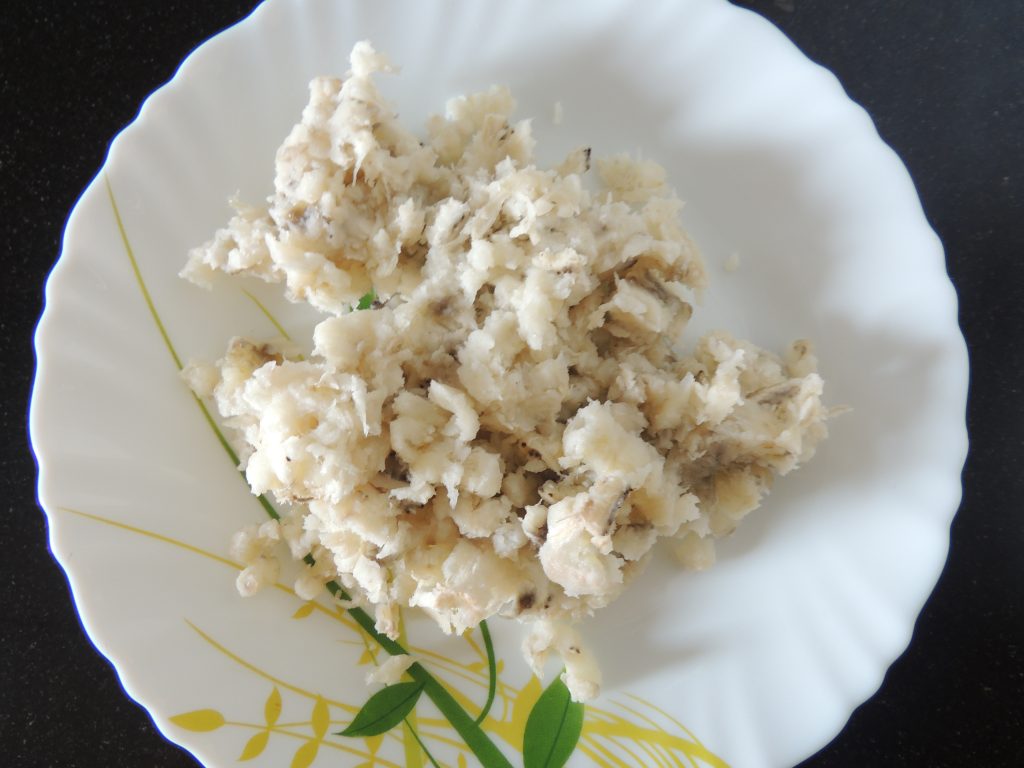
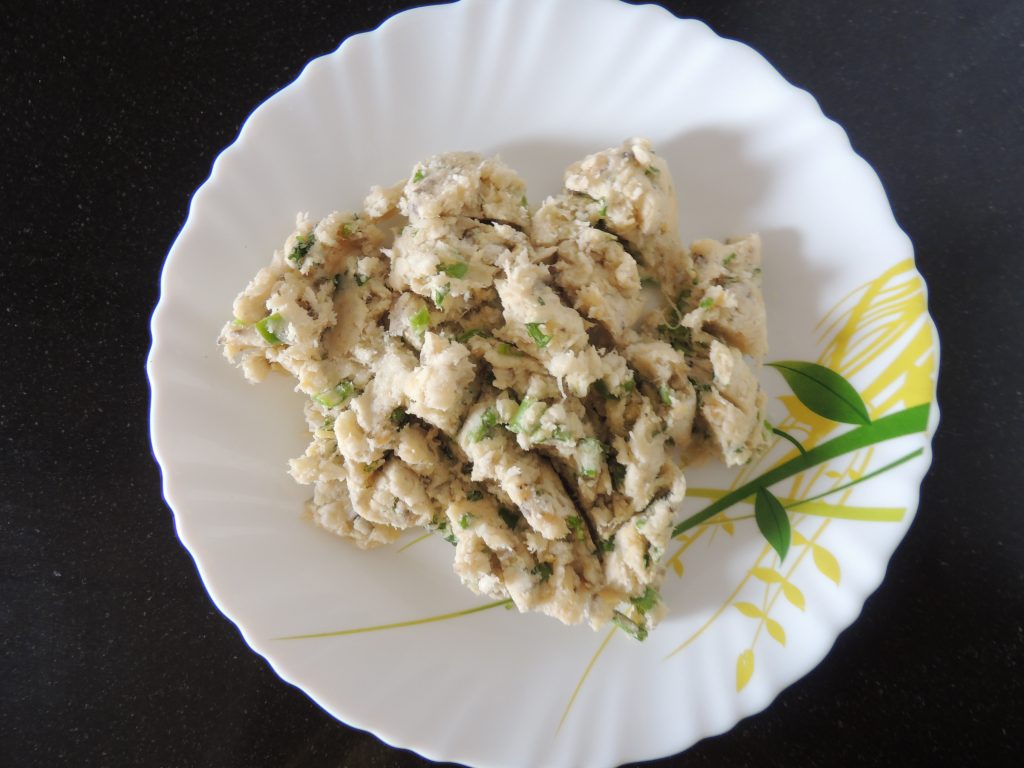
Then mash the banana.
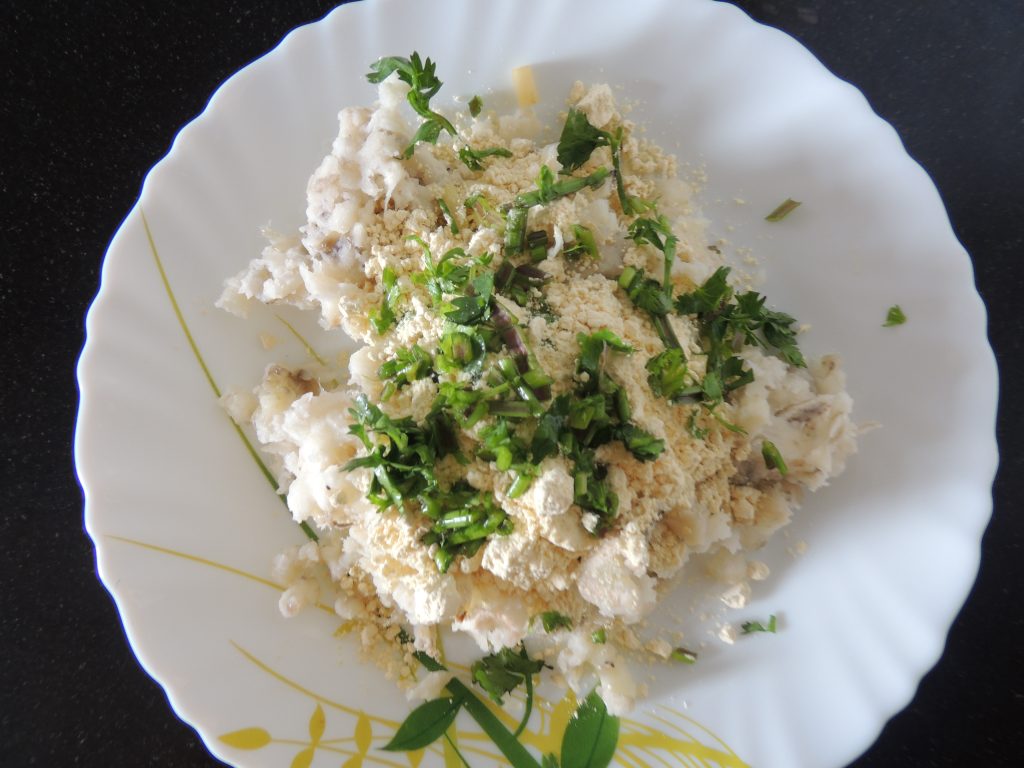
Now add one and a half teaspoon gram flour, finely chopped coriander, a pinch of asafoetida to the mashed banana and add a little salt too. Besan is not to be added too much, otherwise, only gram flour will appear in banana koftas.
Now mix the mixture.
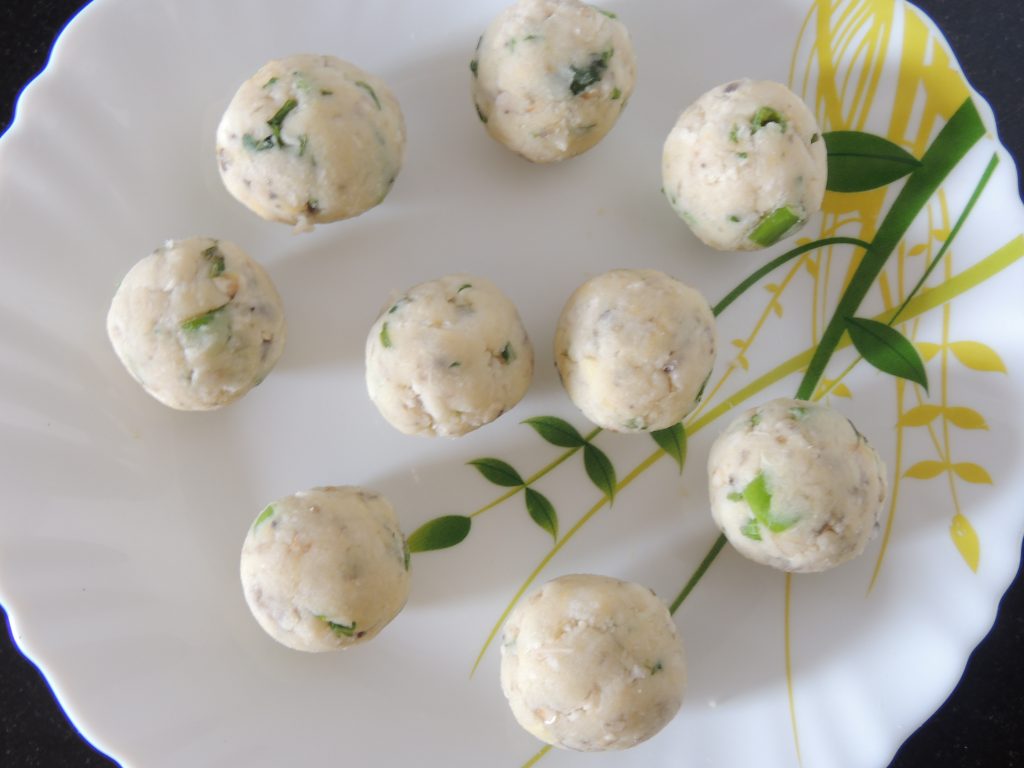
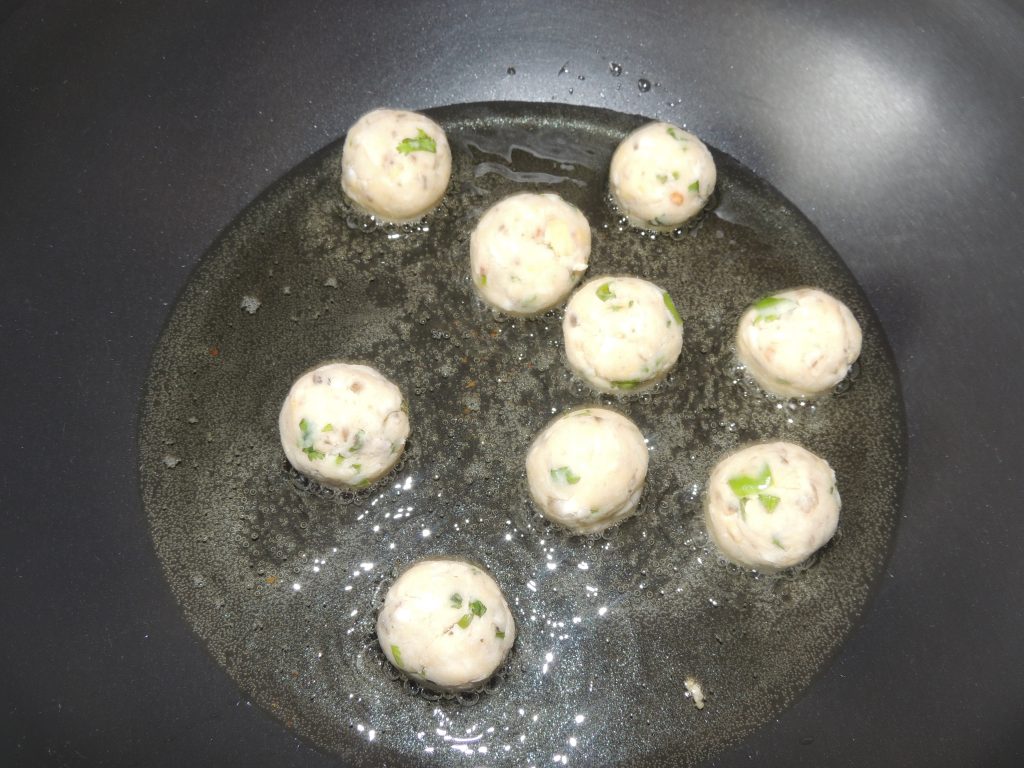
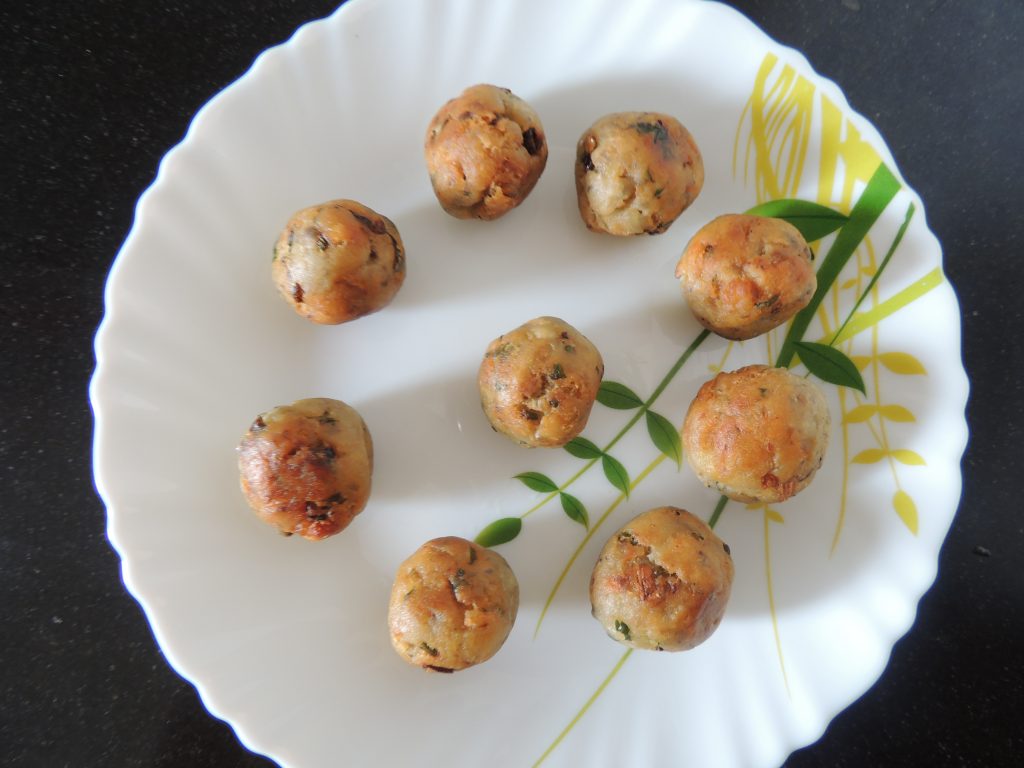
After this, take a little mashed mixture in your hand and make medium size spherical ball.
Make all the balls of that mixture.
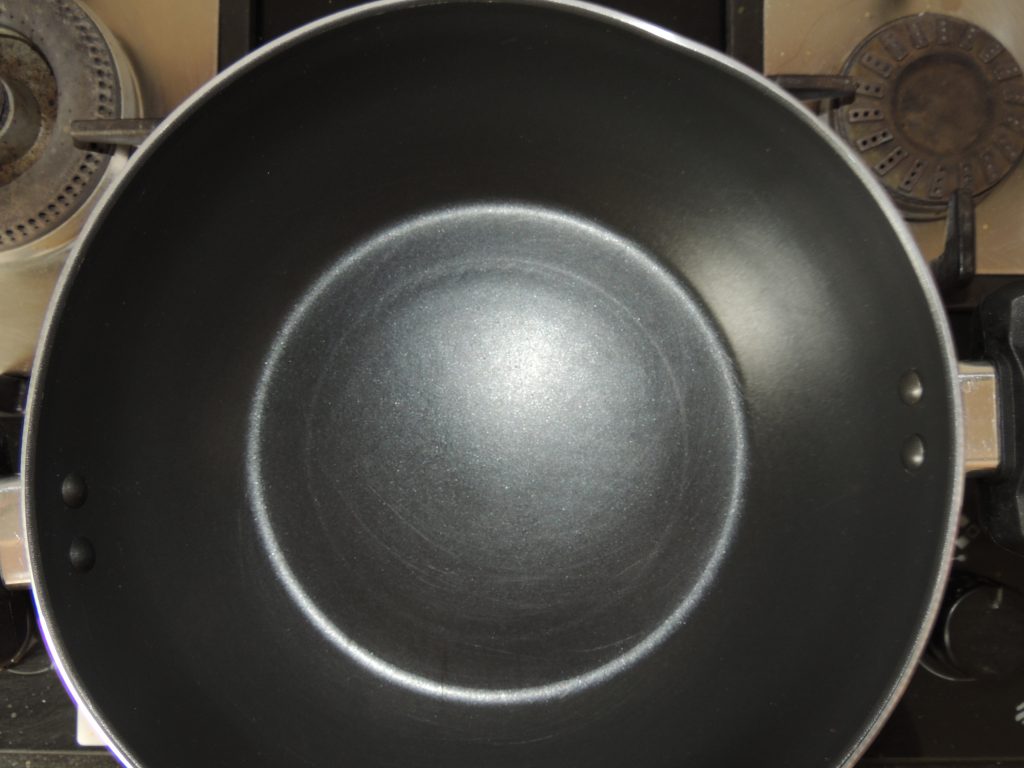
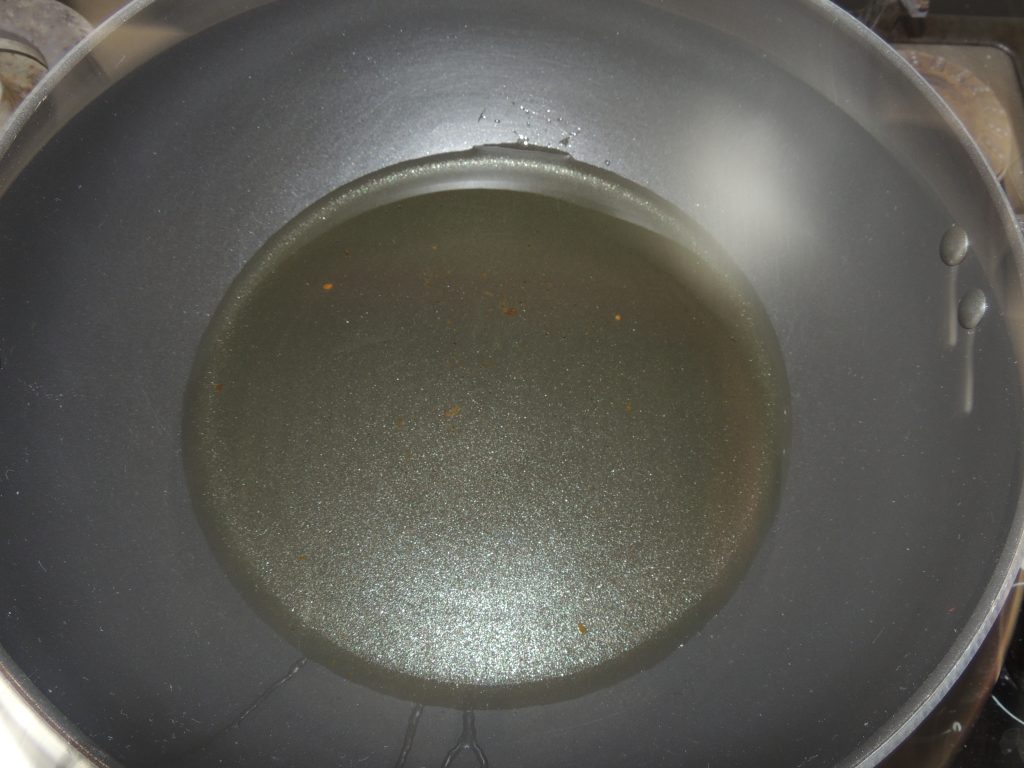
Now put a kadhai/frying pan on the gas.
Pour oil into the kadhai/ fry pan.
When the oil is hot, turn the gas to medium flame.
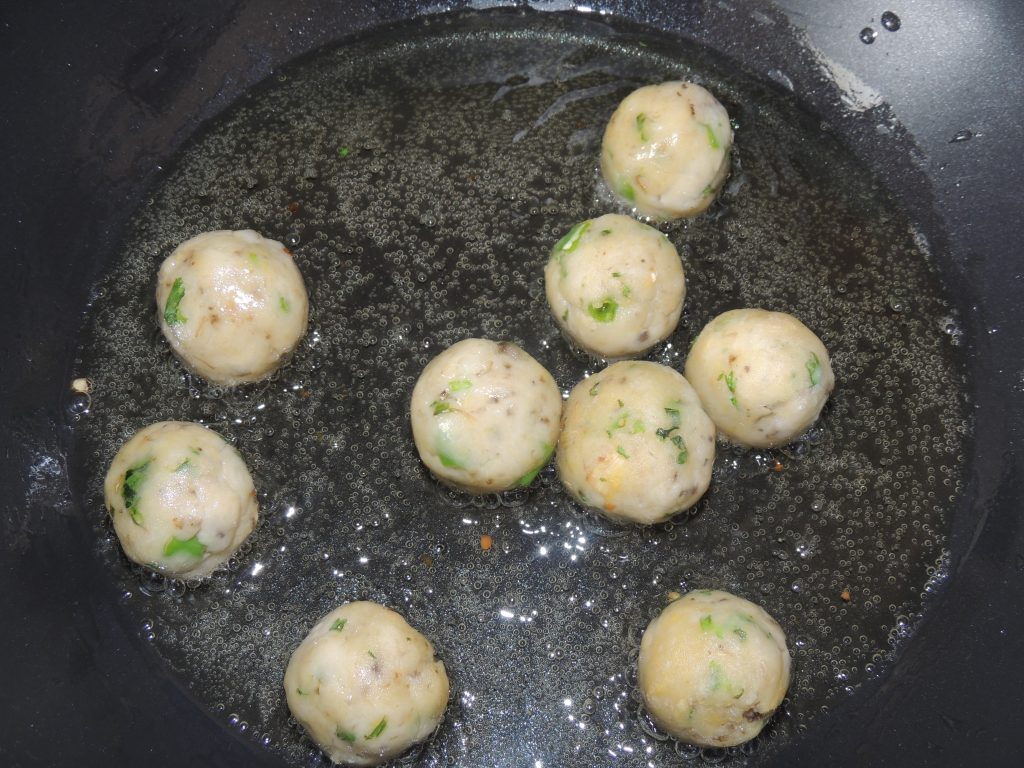
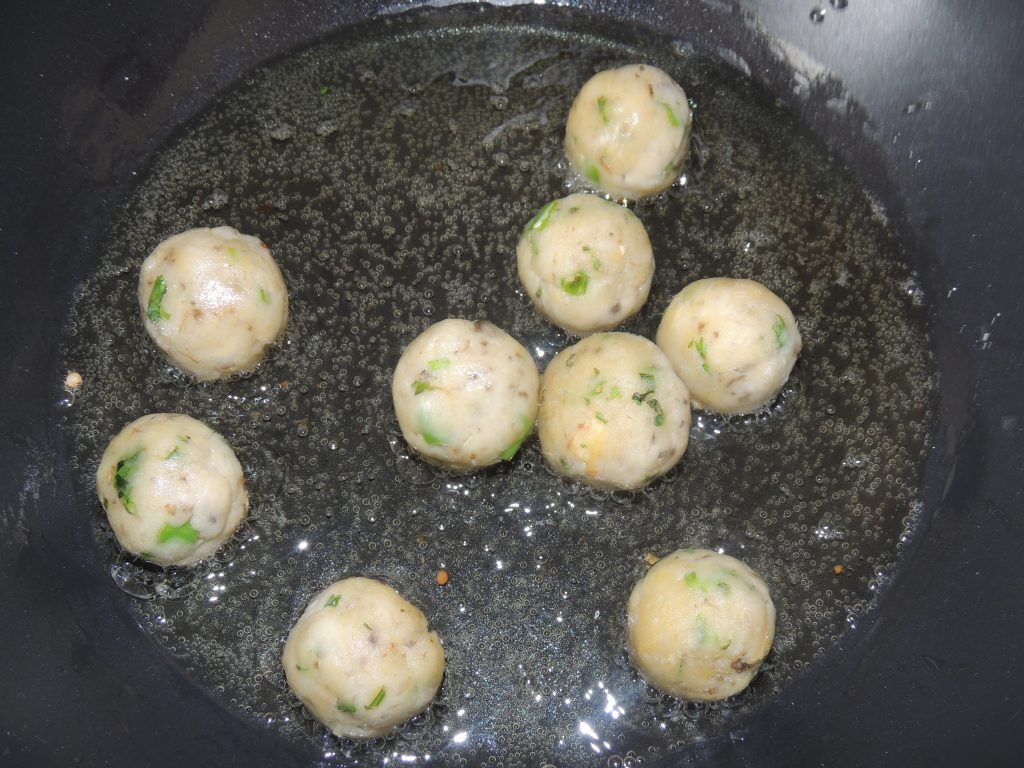
Now put the balls in hot oil and keep in mind that the gas remains on medium flame.
Keep driving the balls with a spoon and changing their sides so that the balls do not burn.
And fry them till they turn light brown.
When the balls become slightly bad, take them out of the oil.
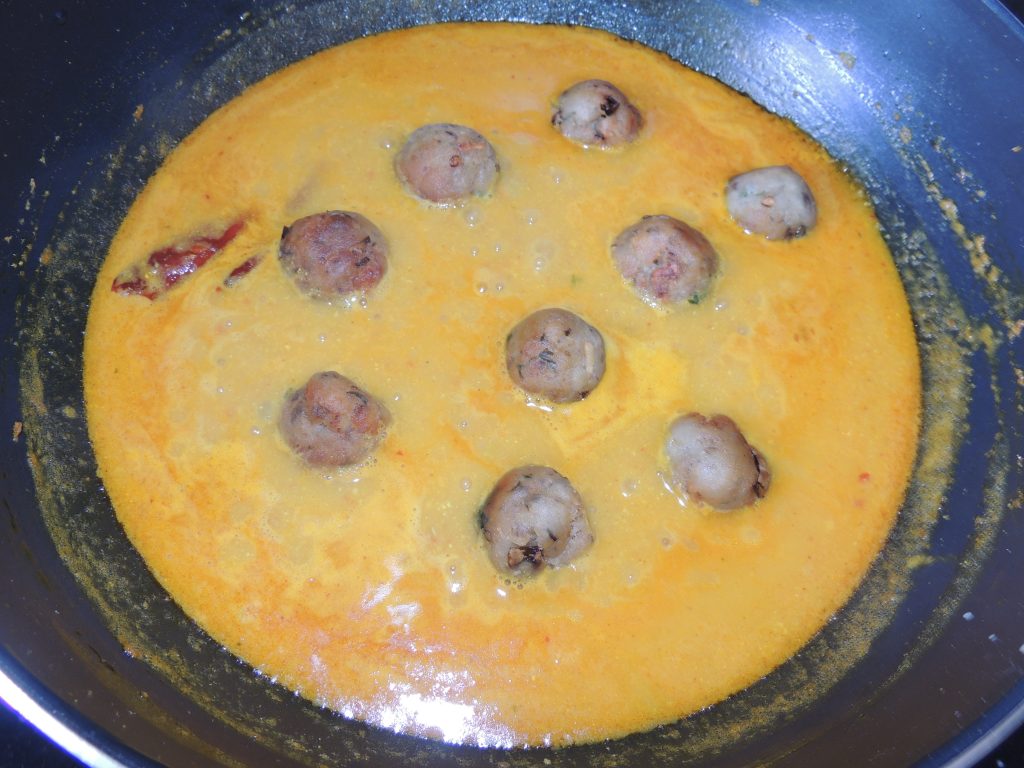
Now we’ll prepare mixture for Kofta Curry
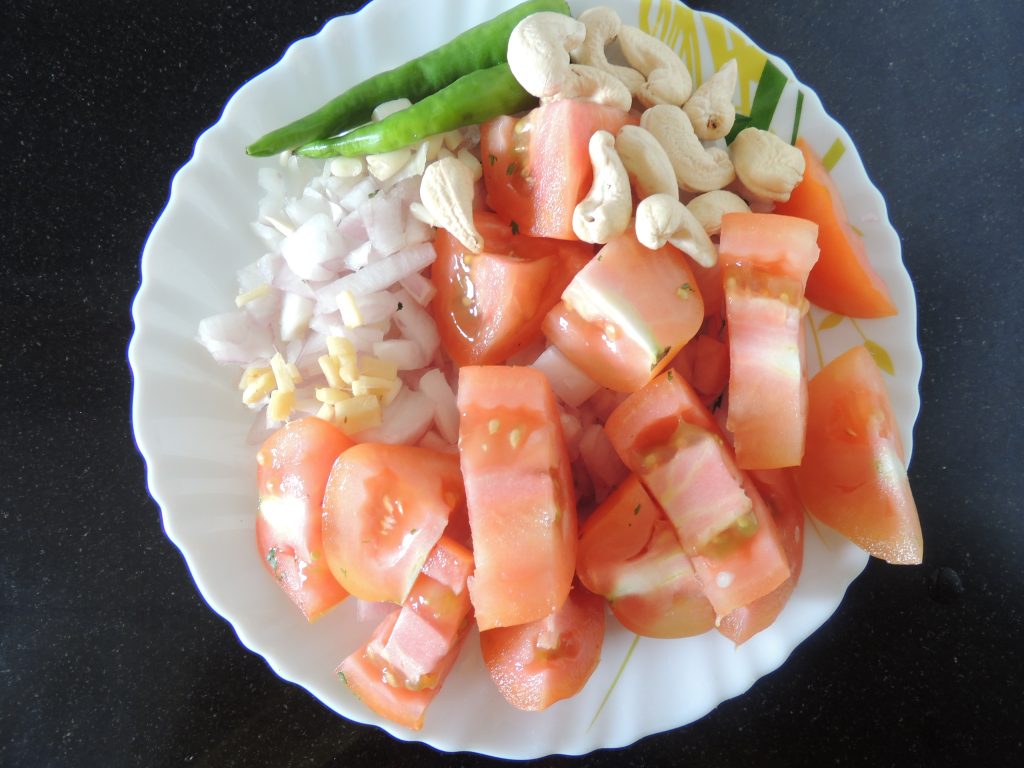
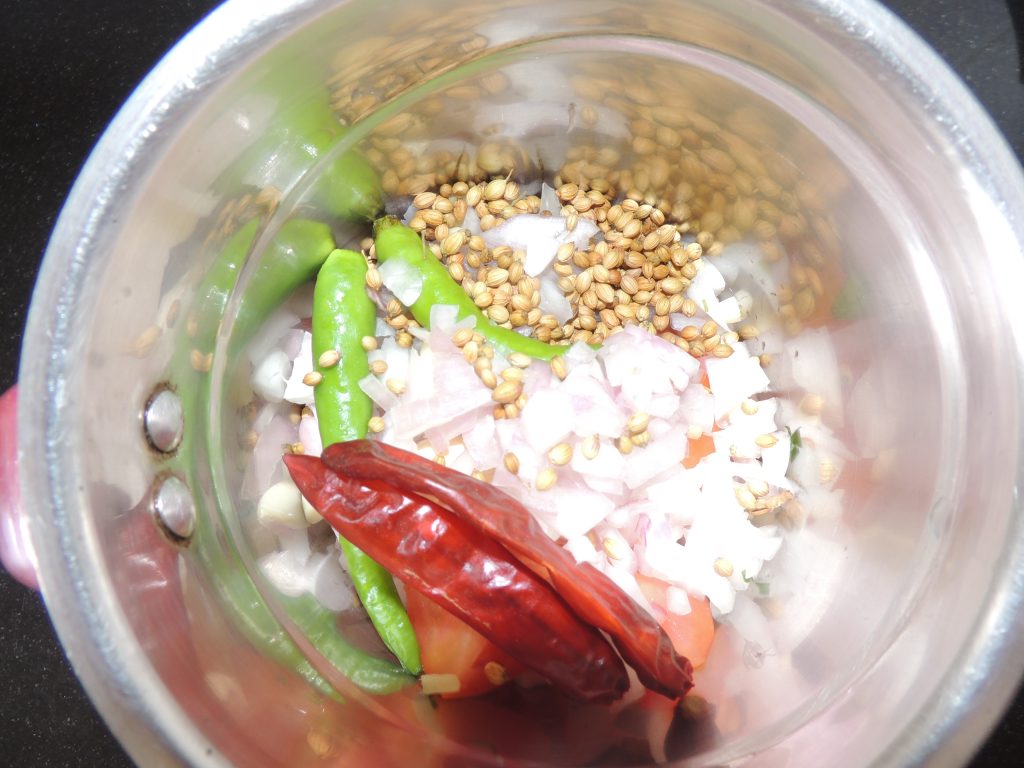
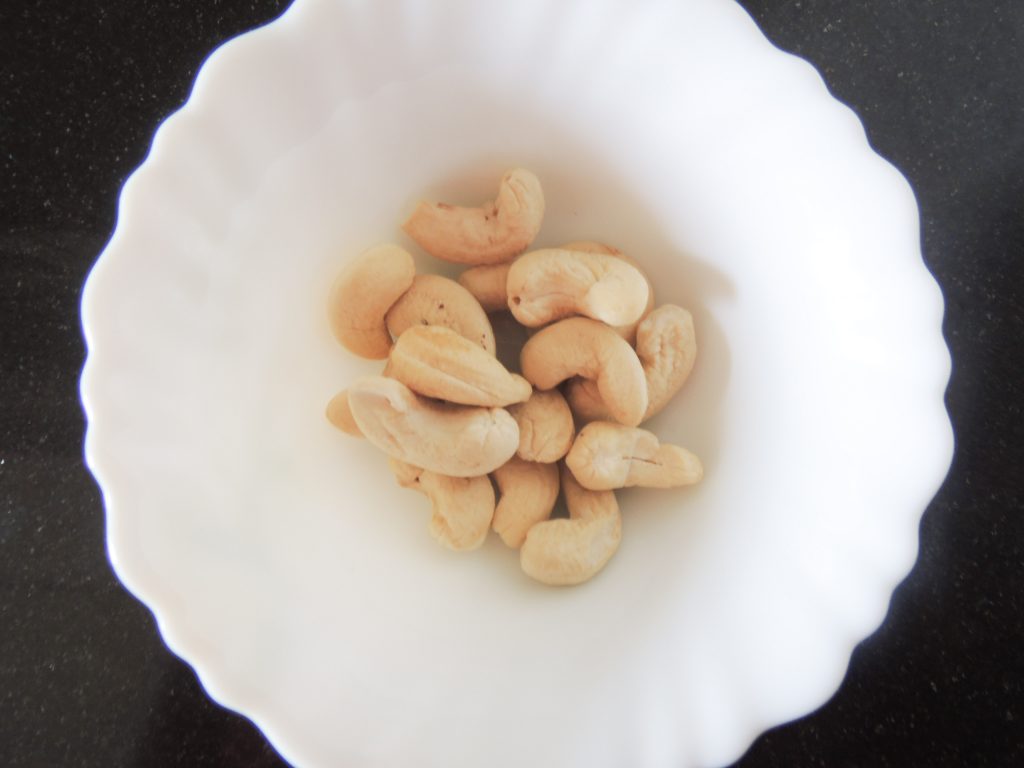
For curry spice, take three chopped tomatoes, one onion, 8 to 10 cashews, 2 green chilies, 1-inch piece of ginger, two red chilies, one spoon of coriander seeds.
And put all the spices in the jar of the grinder.
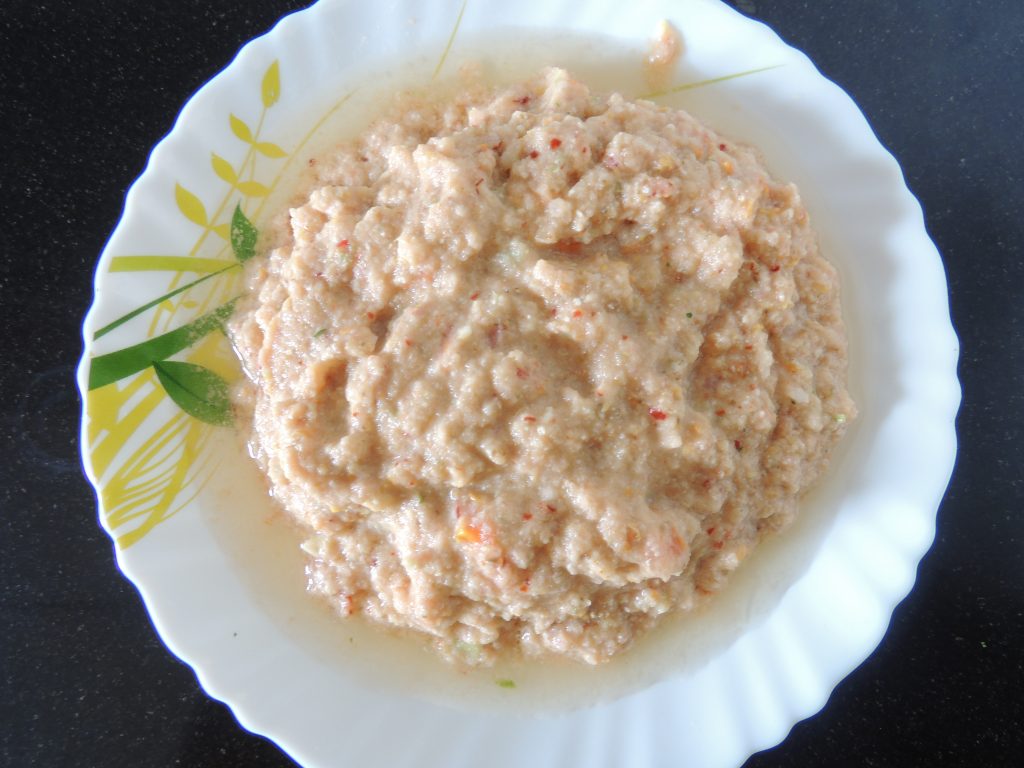
And grind them until they are slightly coarse in the grinder.
Now we will prepare curry for Kofta
Now take out the extra oil from the kadhai/ fry pan and leave two spoons of oil in it.
When the oil is hot, add cumin seeds and red chili.
When the cumin starts crackling.
Add the grinded spices to it.
Now fry the spices.
Fry the masala till the masala starts leaving the oil.
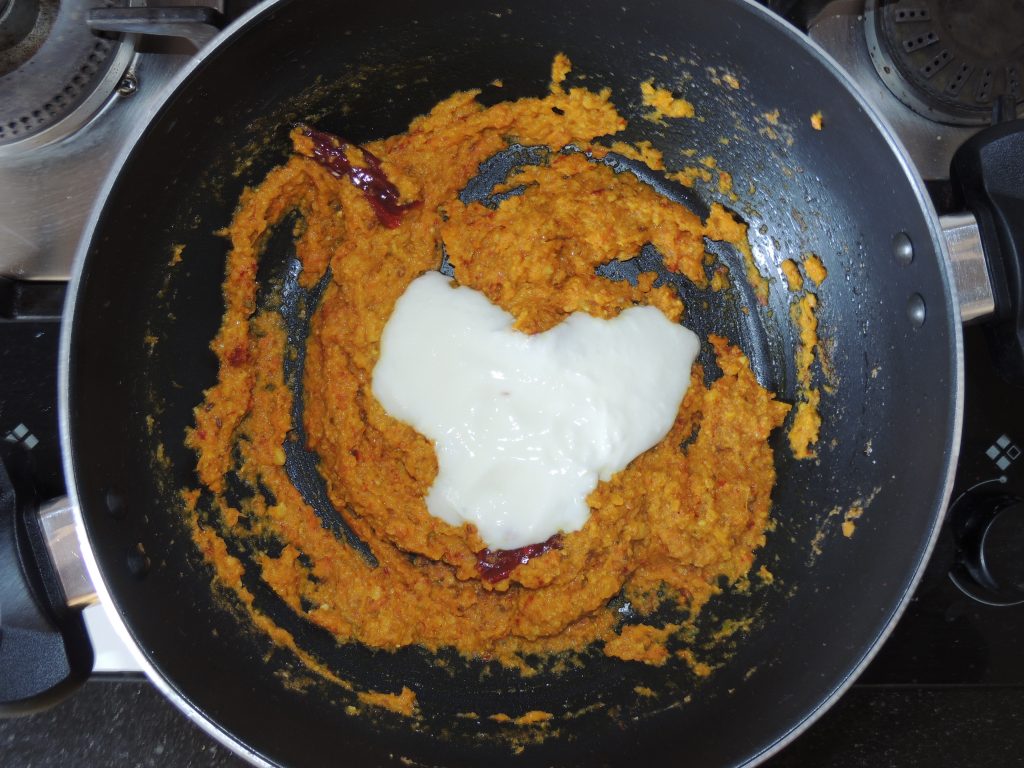
Now add two spoonfuls of beaten curd to the spices.
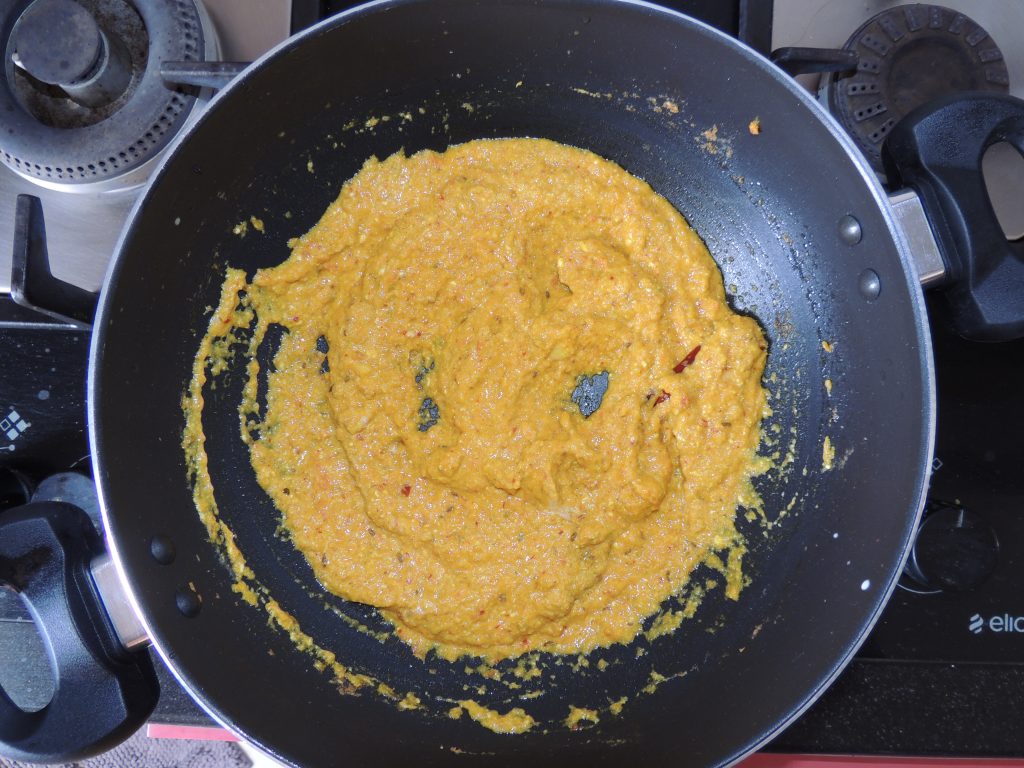
And the spices keep stirring. The spices have to keep running until the curd mixes well.
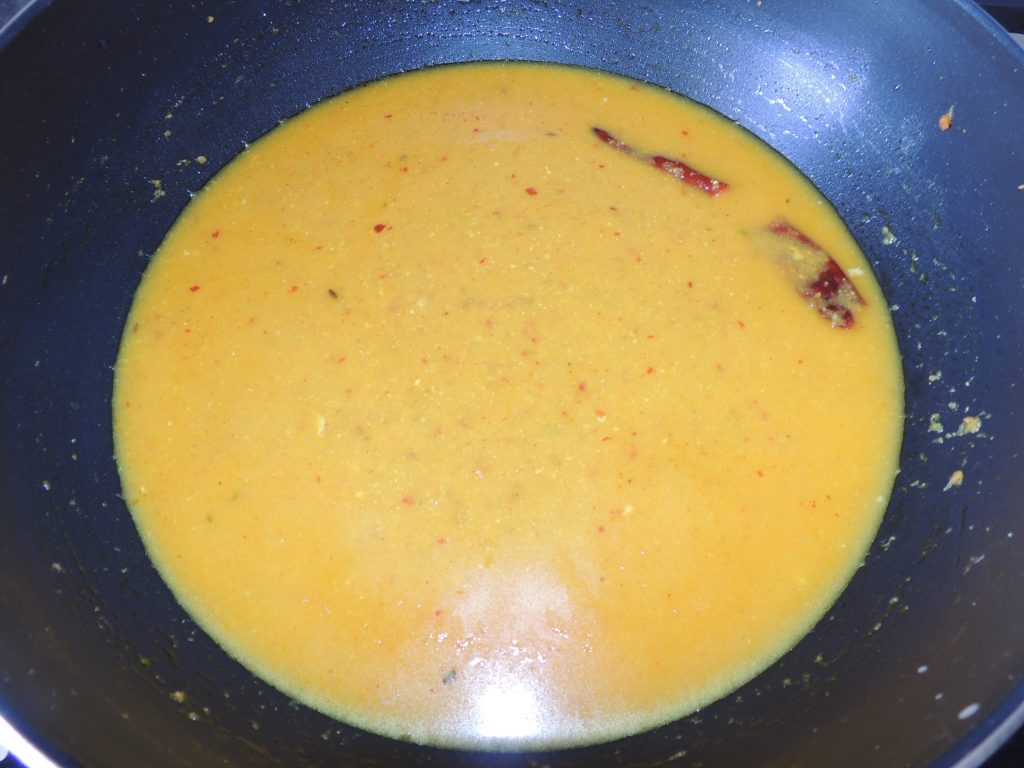
When the curd mixes well with the spices, add about a glass of water to it and add salt as well.
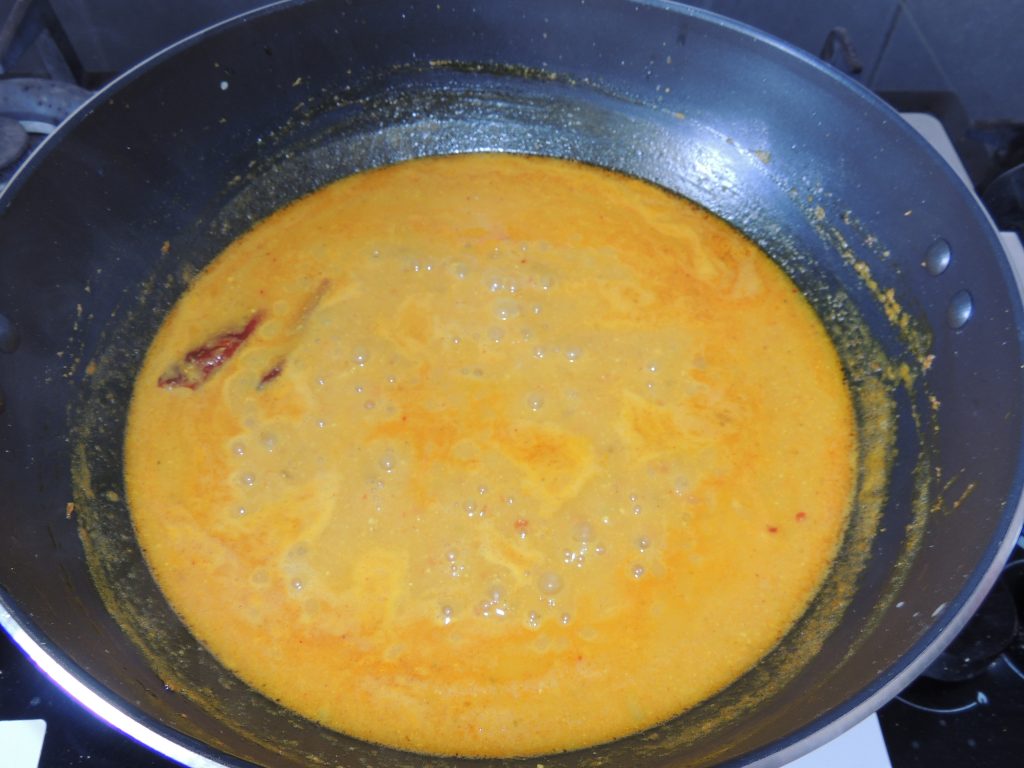
Turn high the flame.
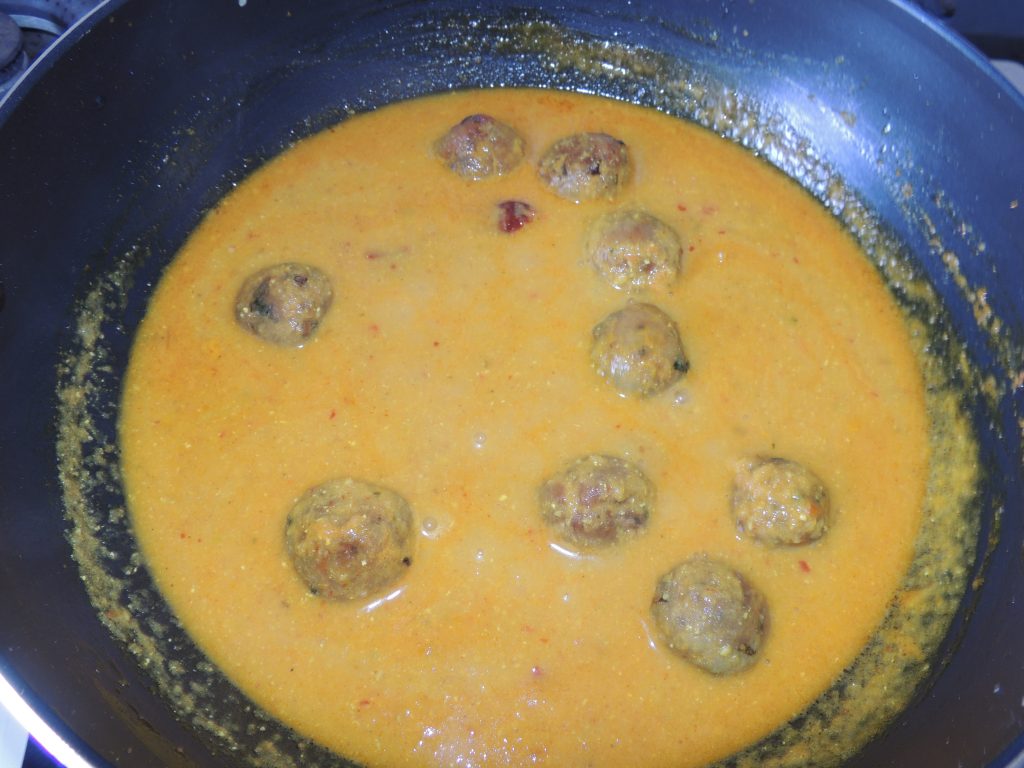
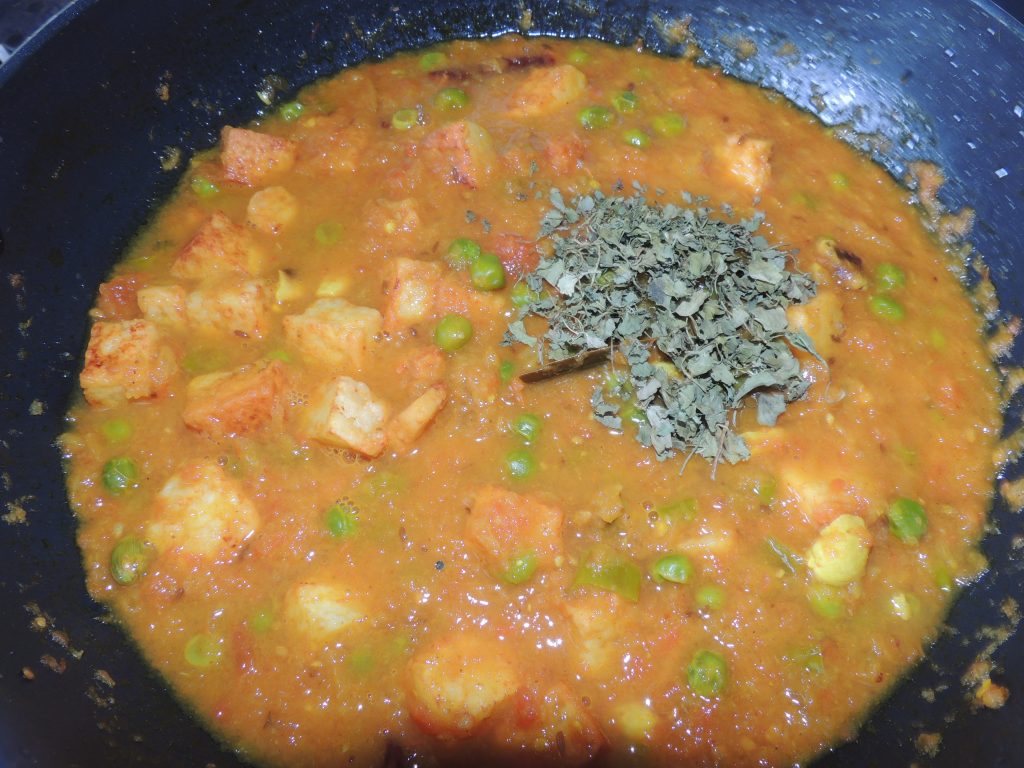
As soon as the curry comes to a boil add the koftas in it.
Also, put garam masala along with it.
Cover the pan with lid. And reduce the flame to medium. Cook for about 5 minutes. If you feel that the water is less then you can add more water.
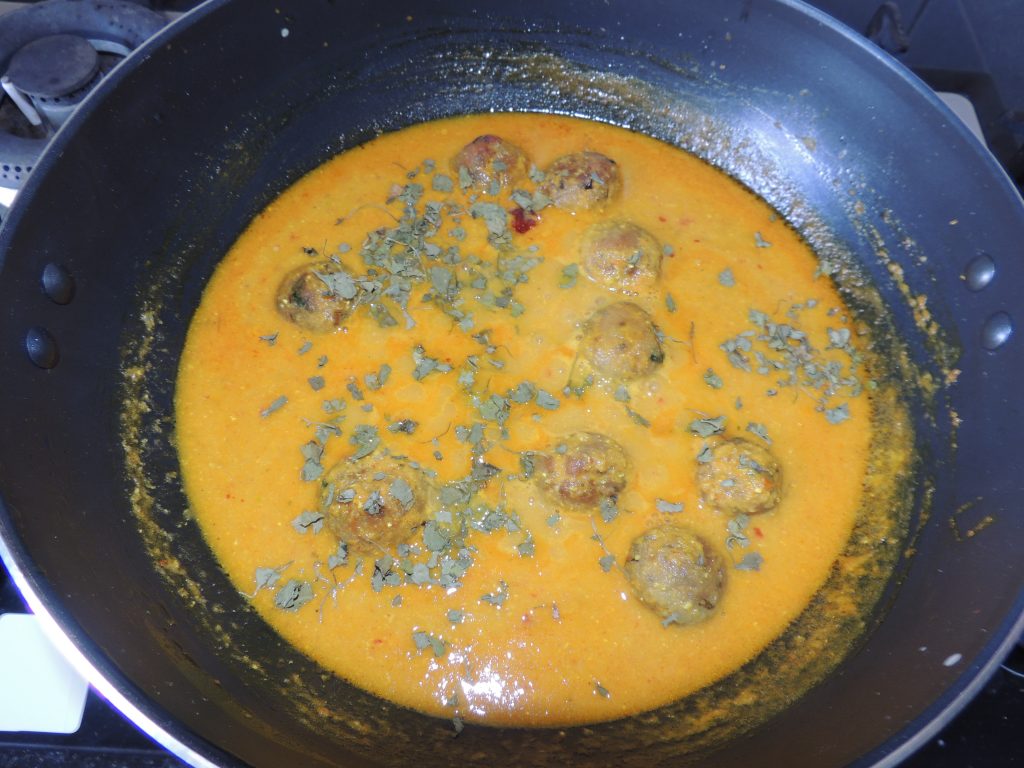
Put a tempering pan on a separate gas.
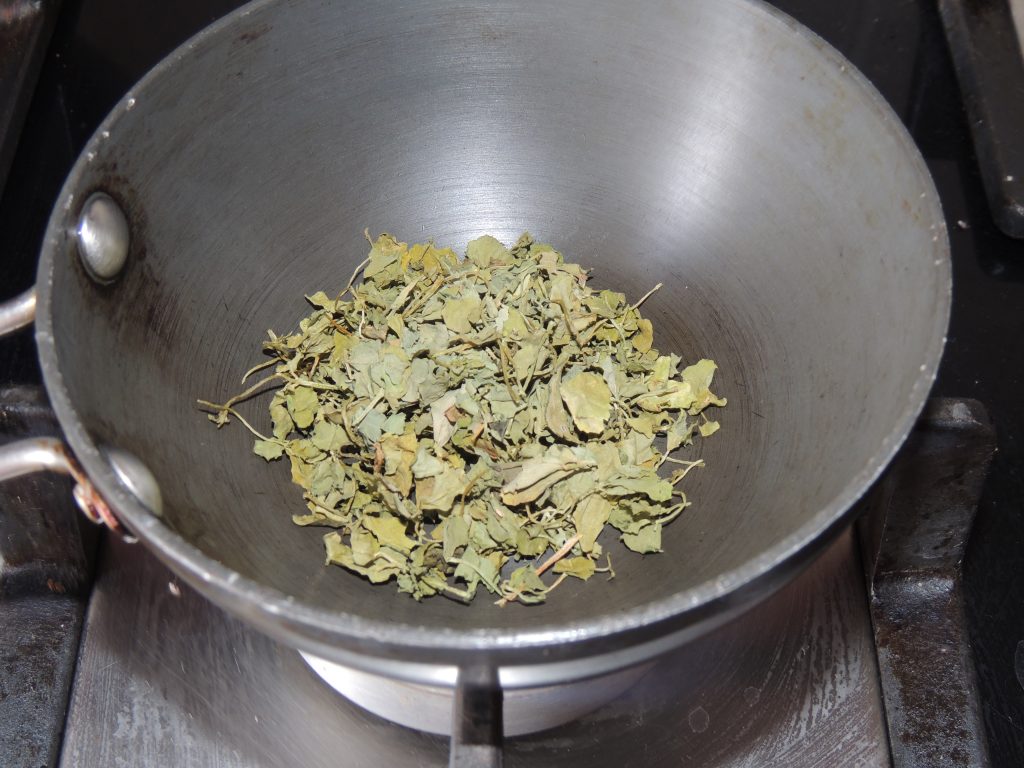
When the pan is hot, add 1 teaspoon Kasuri Methi to it.
Add hot kasoori methi to the kadhai/fry pan. Close the lid.
Cook for about 5 minutes.
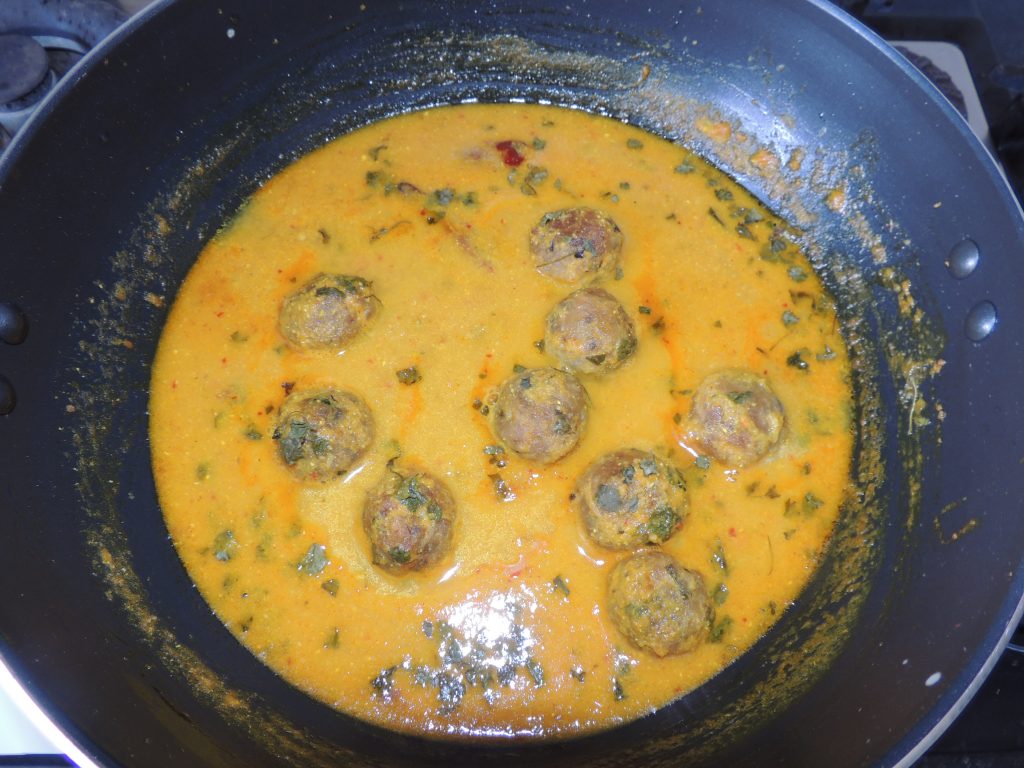
Delicious koftas are ready.
You can eat koftas with pulav or with roti or with paratha or puri.
These are very easy and tasty koftas. Please make these koftas at home and also provide feedback in the comment box.
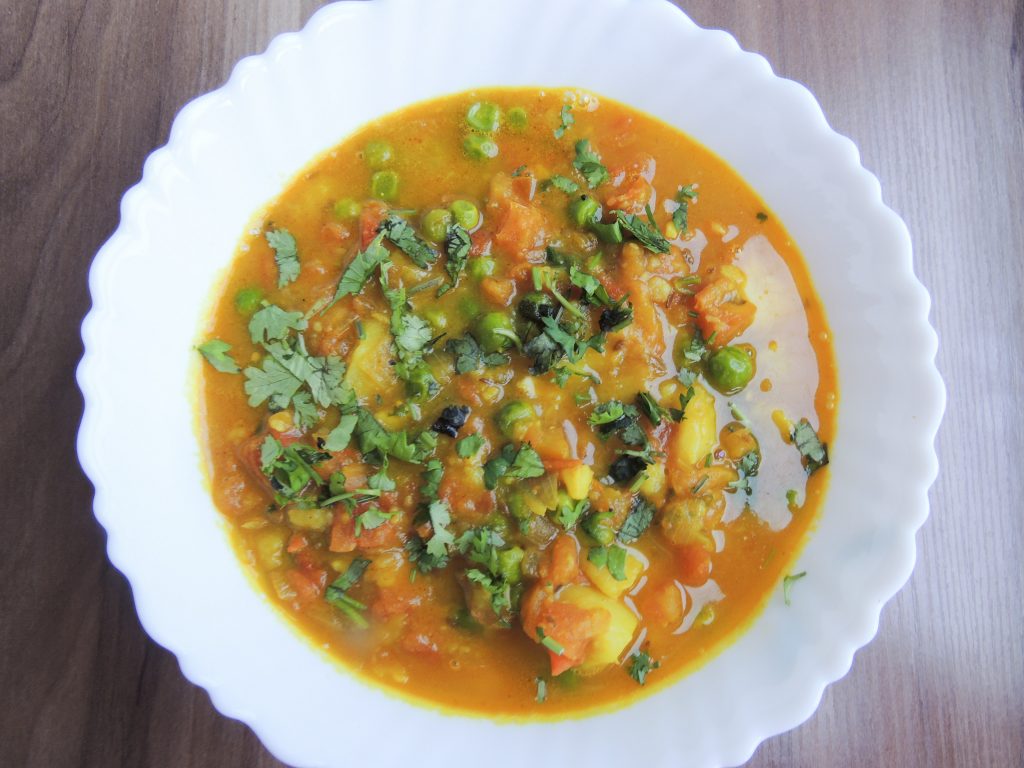
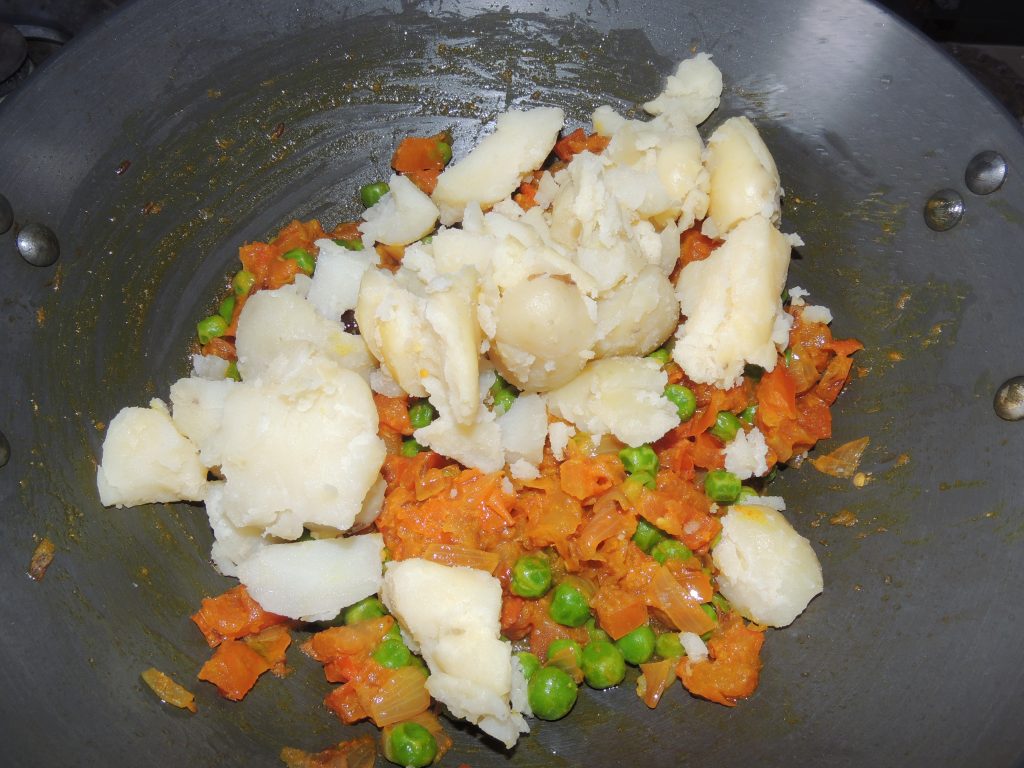
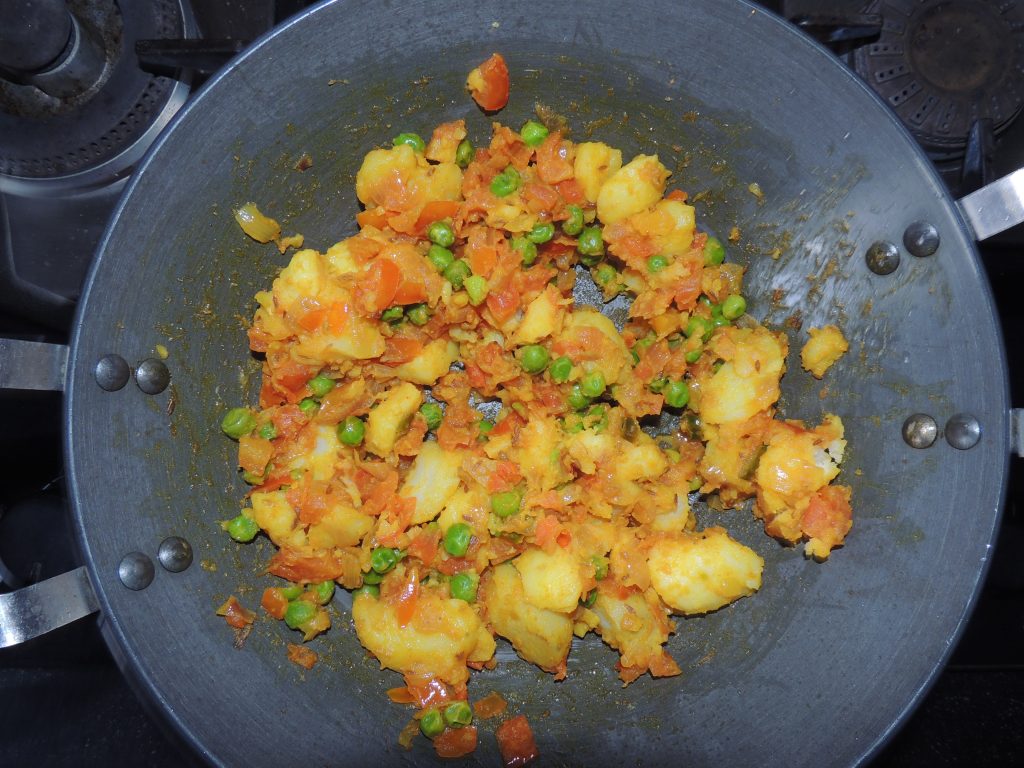
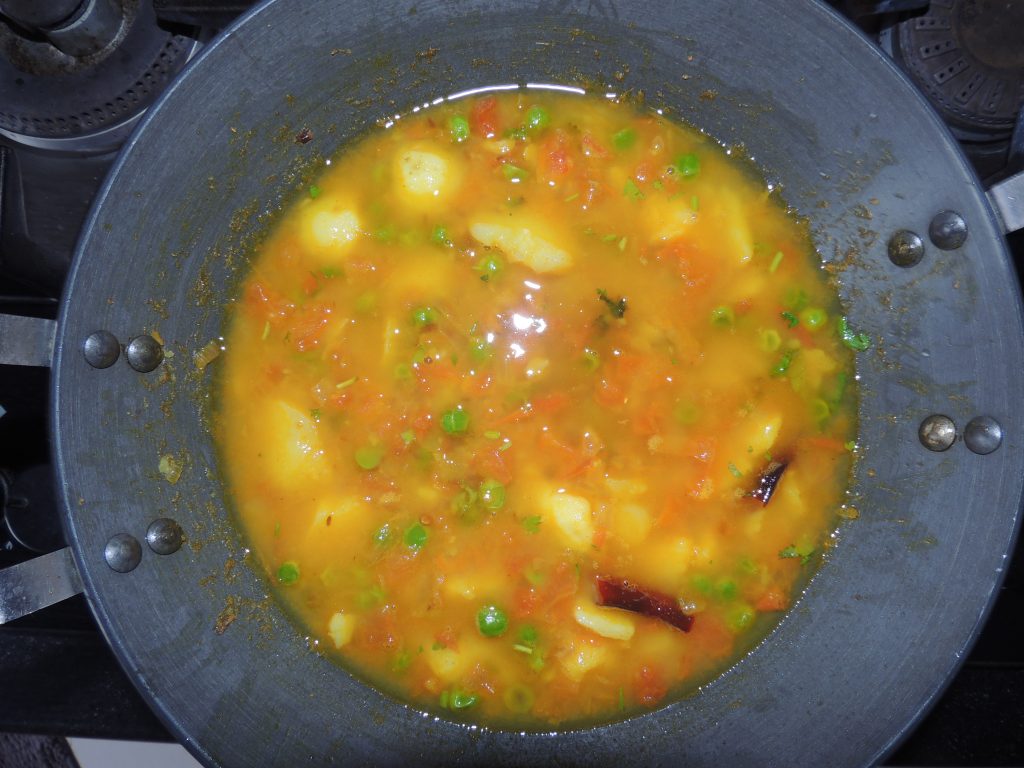
Today I will tell you the potato tomato pea vegetable.
By the way, it is very easy to make potato tomato pea vegetable.
You can call it in many ways, one way is to make potato tomato pea vegetable without boiling the potatoes.
And the second way is to boil the potatoes first and then make tomato pea vegetable.
Today I will tell you the other way to make potato tomato pea vegetable in which first boil the potato and then make its vegetable.
This vegetable is very easy to make and is made immediately and is often made in everyone’s homes. This vegetable can be made in both dry and succulent manner.
Potato Tomato Pea vegetable is colorful to look at, which you feel like eating, you can feed this vegetable to whomever it will be happy, you can eat potato tomato pea vegetable with paratha roti whole rice.
Follow the steps given below to make potato tomato pea vegetable…
Course Breakfast, Dinner, Indian, Lunch, Main Dish
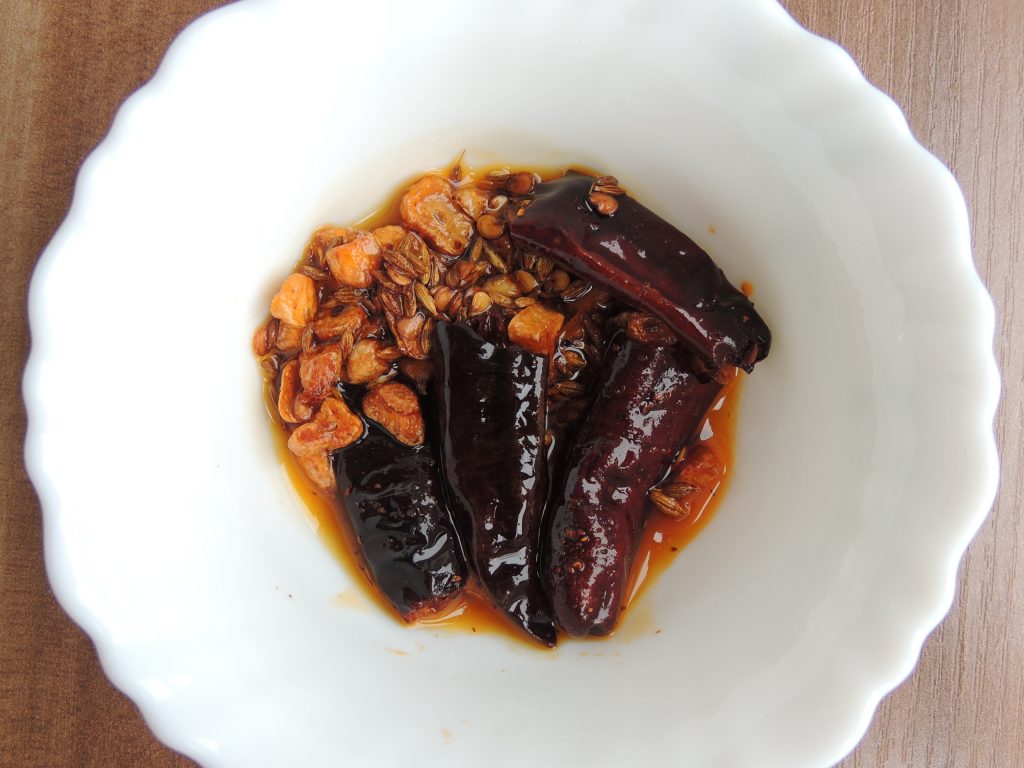
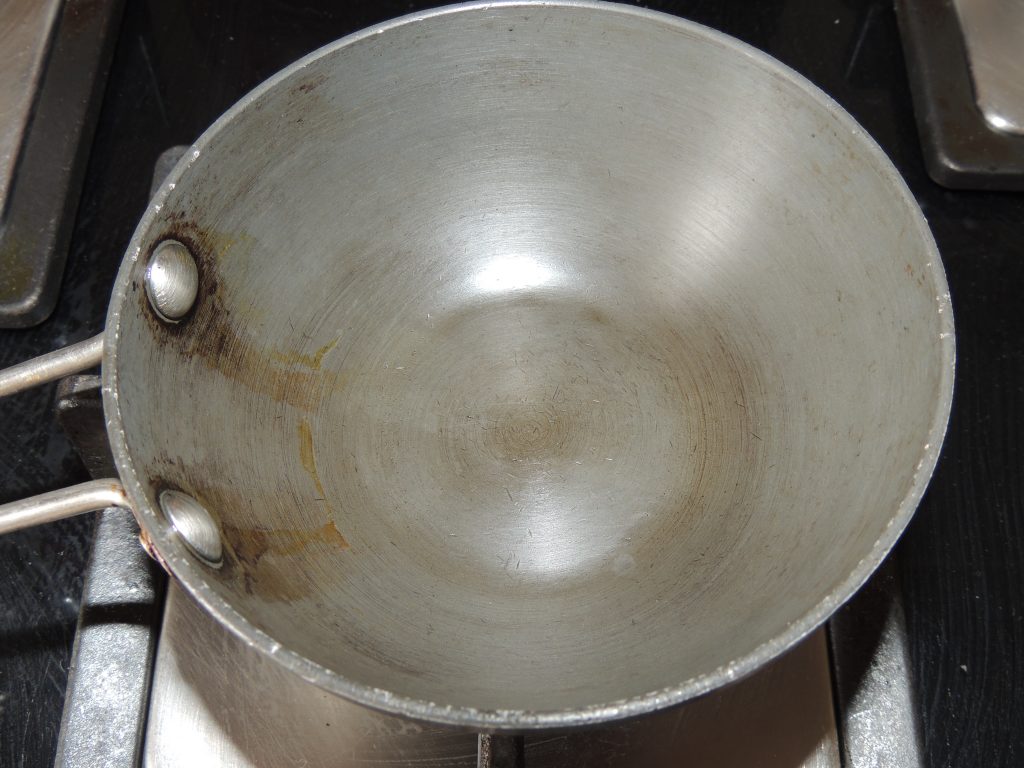
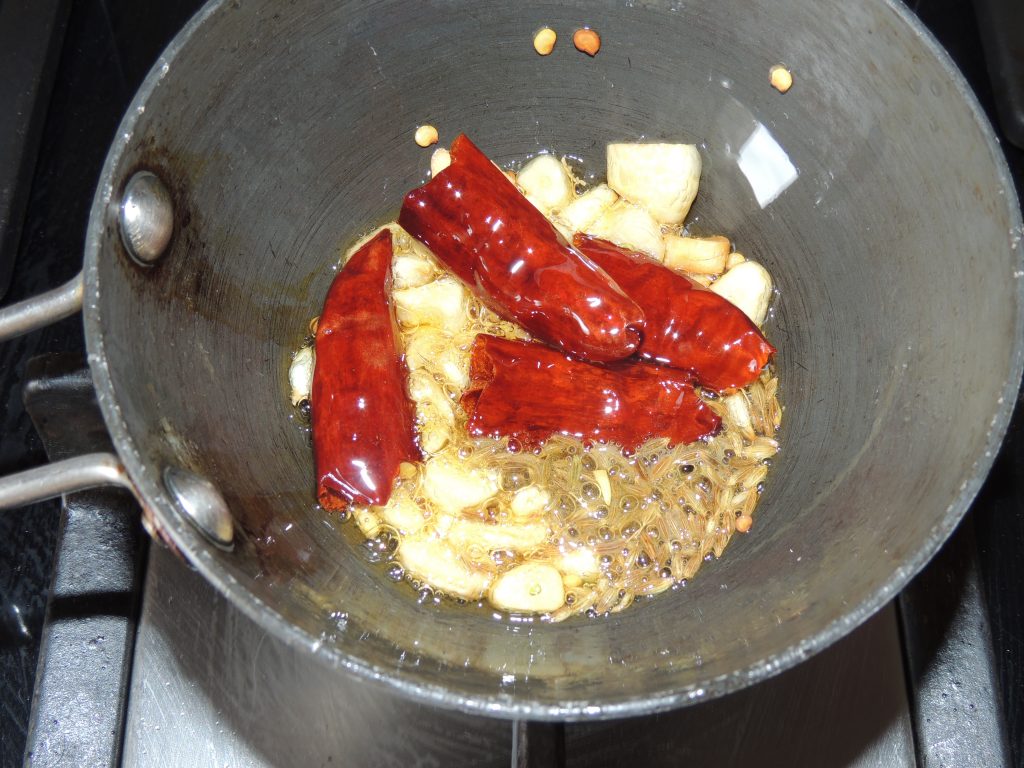
Today I will tell you how to make chilli garlic tempering / lehsun lal mirch tadka.
Garlic is very good for health, stomach, in joint pain and garlic tempering adds extra flavour to any recipe.
You can add garlic tempering to any recipe, add to dal or any vegetable or curry.
If ever your recipe has become a little bad taste then add garlic tempering to the recipe, your recipe will be amazingly delicious.
Add garlic tempering to the vegetable and enjoy the recipe.
Follow the steps given below to make a delicious Tadka of garlic…
Course Breakfast, Dinner, Indian, Lunch, Main Dish, Pickle
Cuisine Breakfast, dinner, Indian, lunch, Main
Prep Time 2minutes
Cook Time 3minutes
Total Time 5minutes
Servings 4People
Calories 27kcal
Equipment
Tadka Pan
Spoon
Knife
Bowl
Ingredients
3-4Cloves / KaliGarlic / Lehsun, Cut in 3 to 4 pieces
2UnitRed Chilli / Lal Mirch
3tspButter/ Desi Ghee
1tspCumin / Jeera Seeds
1/2tspRed Chilli / Lal Mirch Powder
Instructions
First take one tadka pan and place on the gas.
Switch on the gas on medium flame.
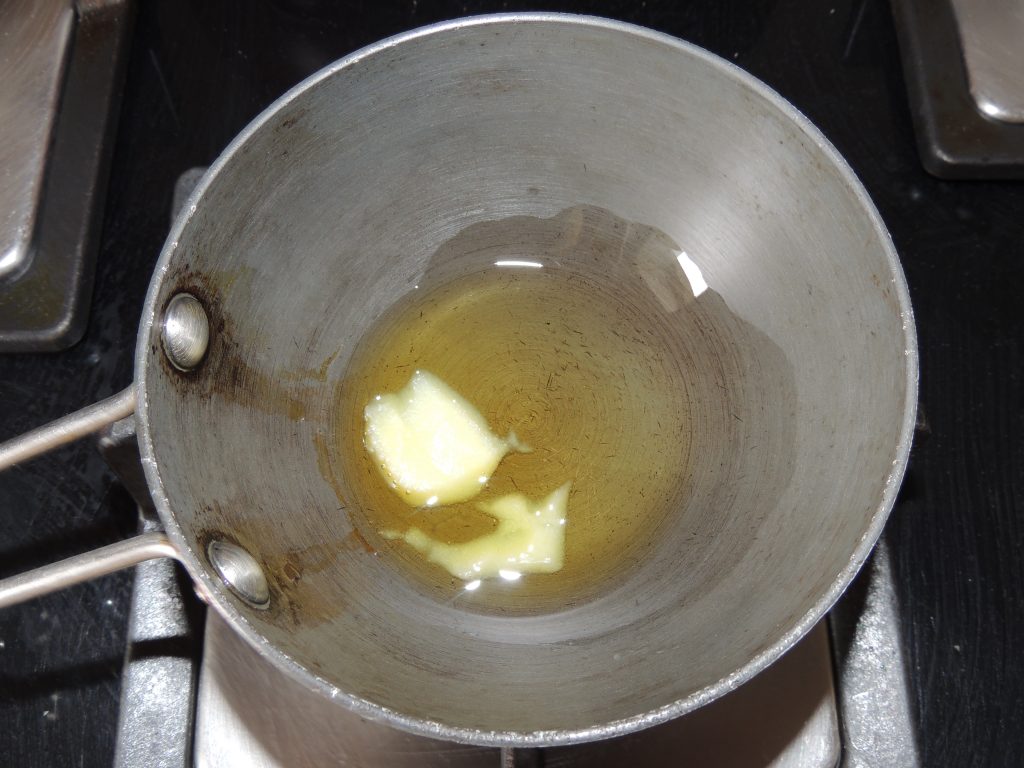
Add 3 tsp of desi ghee / country ghee in the pan.
Allow ghee to heat.
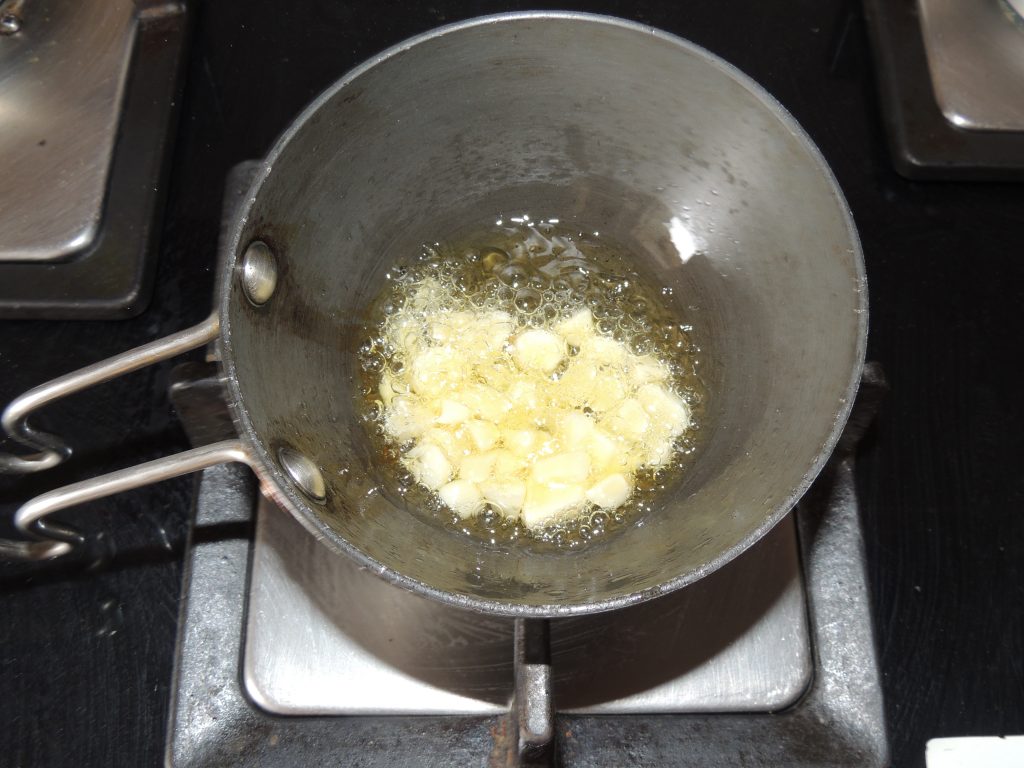
When smoke starts blowing from the ghee, add chopped garlic into desi ghee.
Stir garlic with spoon.
Let fry garlic for 20 seconds.
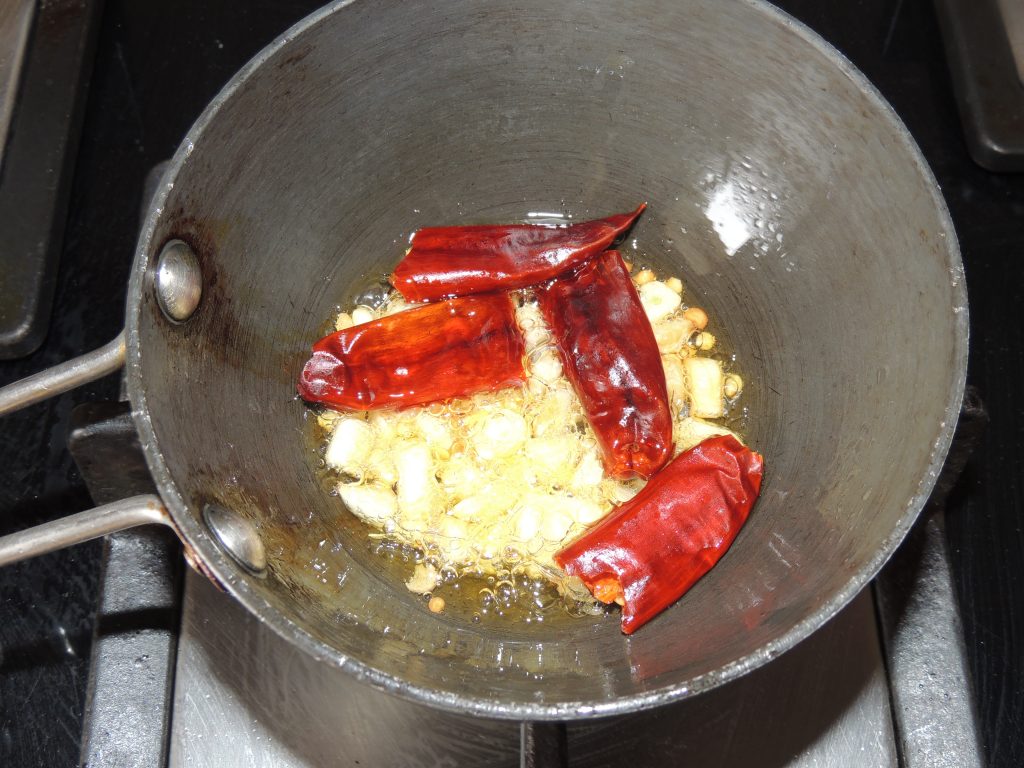
After that add pieces of red chilli.
Add cumin seeds after 10 seconds.
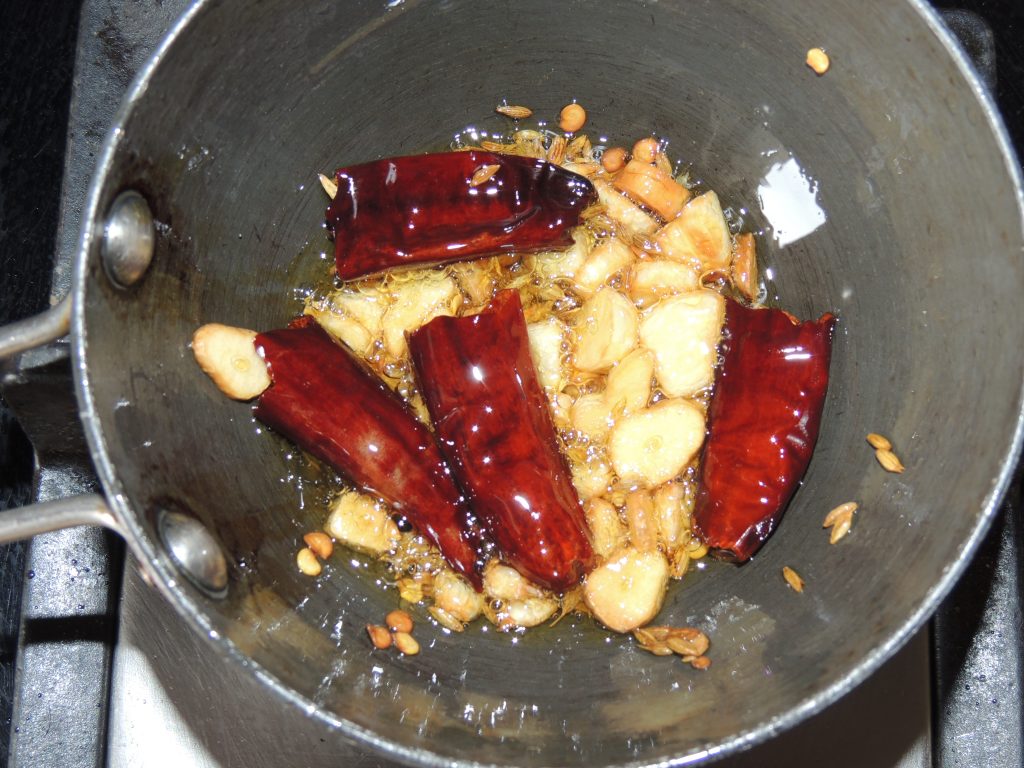
Roast cumin.
Fry the garlic till light brown.
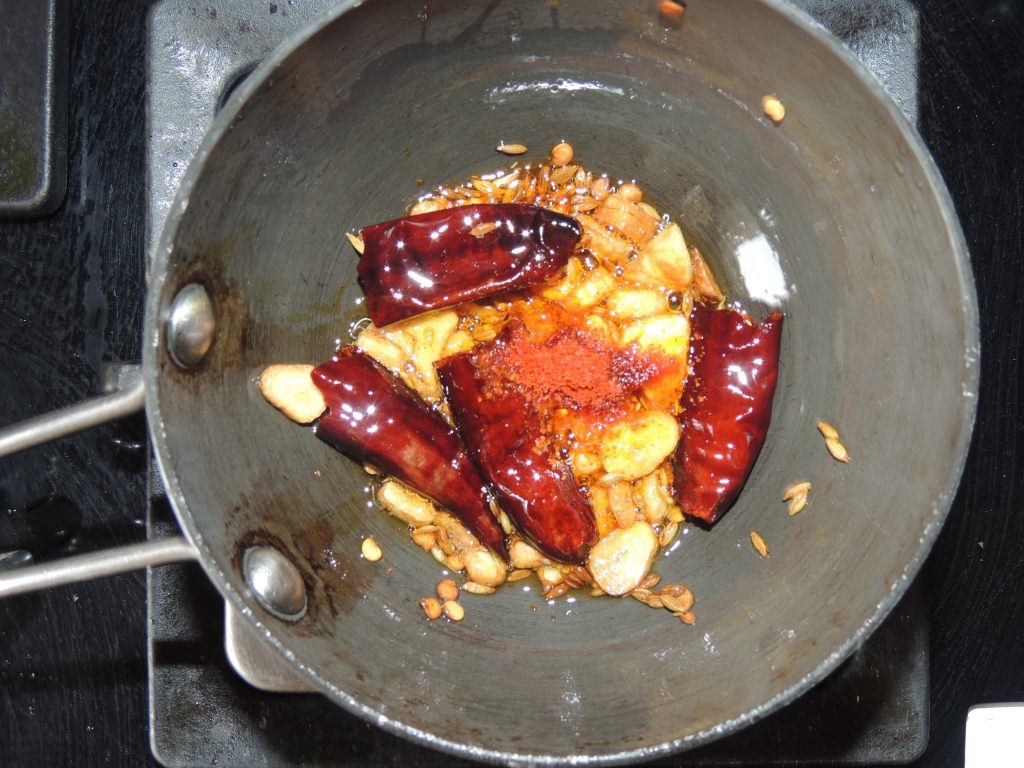
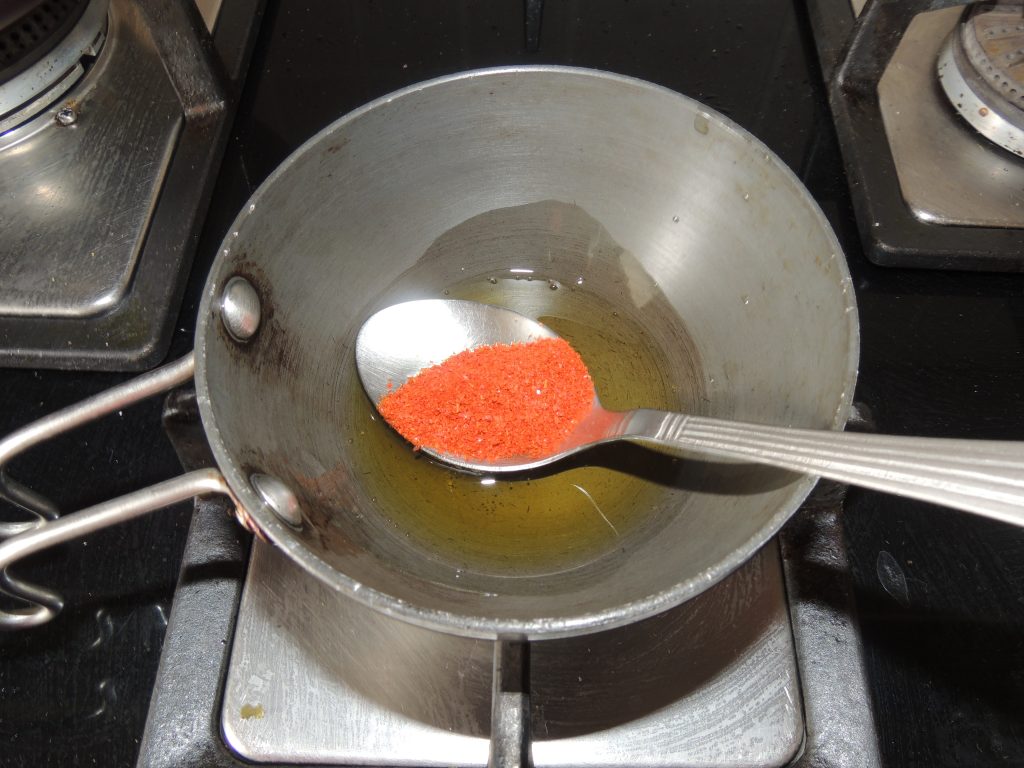
Turn off the gas and add red chilli powder.
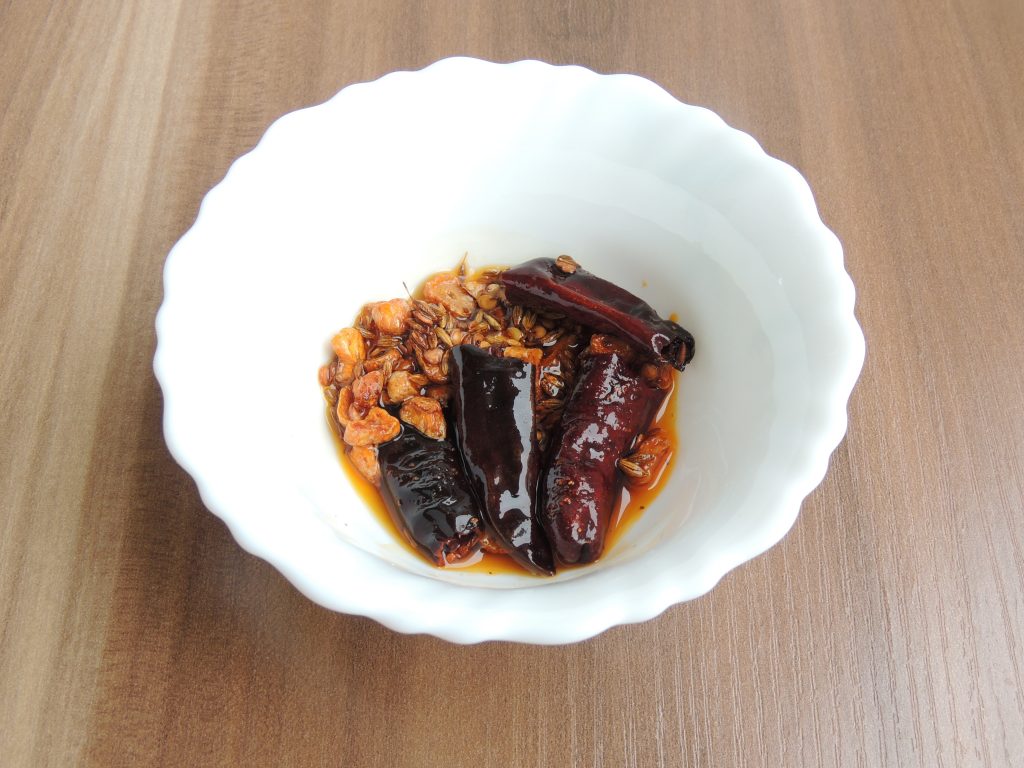
Now garlic red chilli / lehsun lal mirch tadka is ready.
Video
Notes
Garlic is very good for health, stomach, in joint pain and garlic tempering adds extra flavour to any recipe.
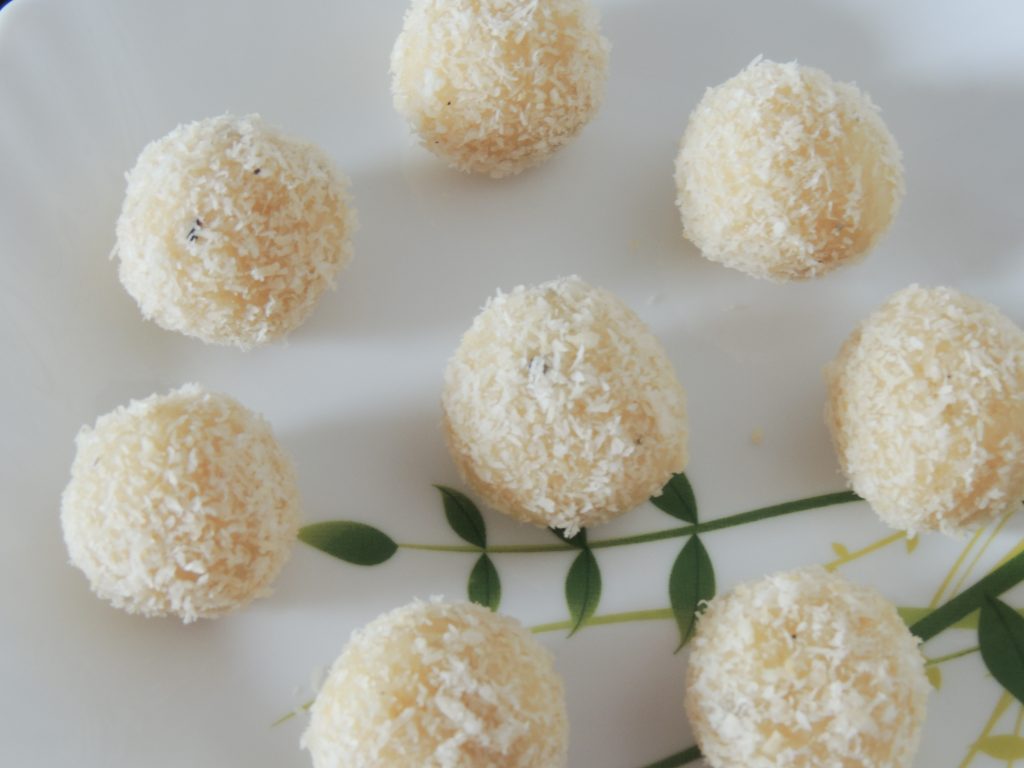
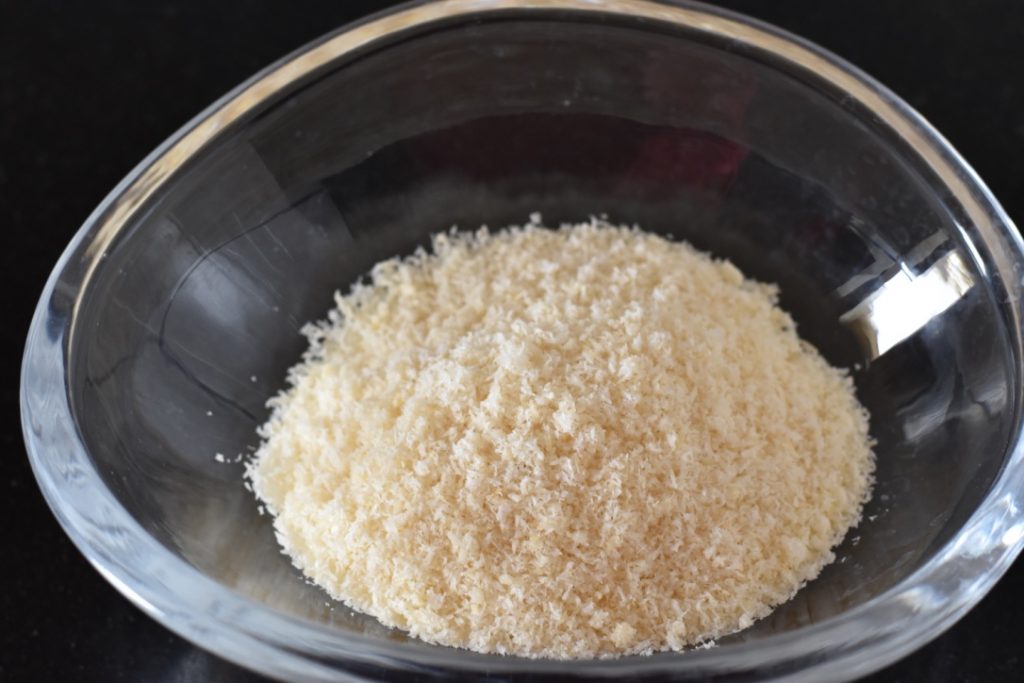
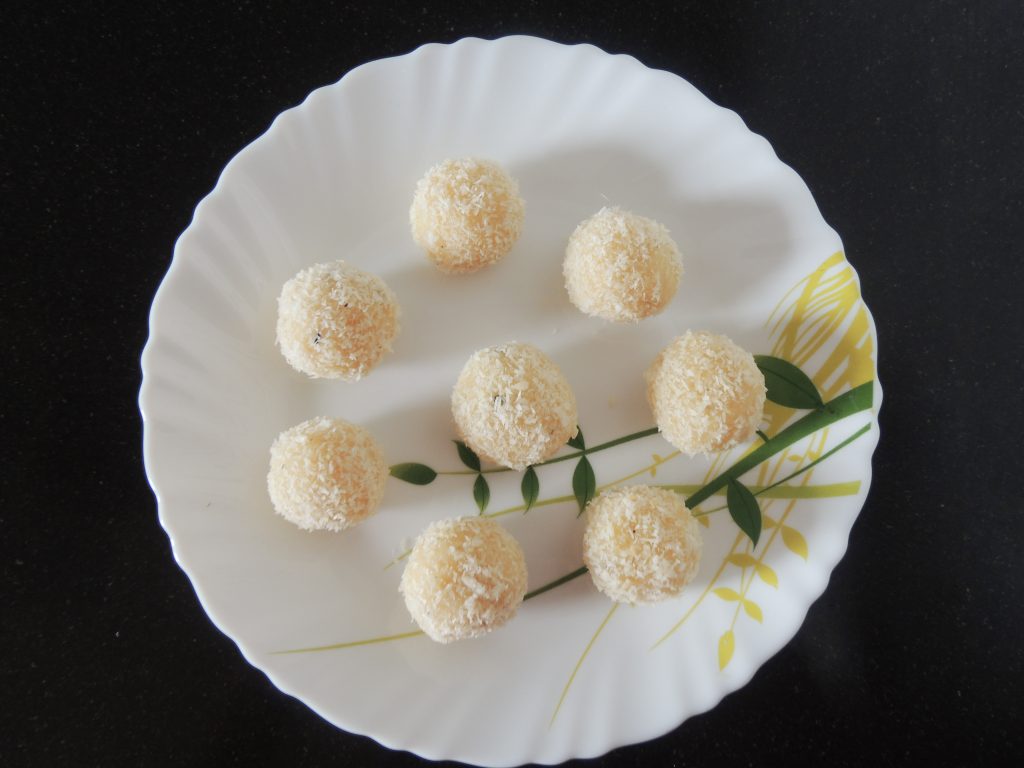
Coconut is very good for health and is also very tasty to eat. The raw white meat inside a coconut is referred to as the kernel. It has a firm texture and delicious, slightly sweet flavor. If you have a whole coconut, you can scrape the raw meat out of the shell and eat it. In its processed form, you’ll usually find it sliced, shaved, or grated. Grated coconut is also called as coconut powder or coconut boora. Coconut laddus can be eaten in any season, whatever the season, coconut has very few calories. So this coconut dessert is also very effective in reducing your body weight, Because it is made of coconut powder, coconut powder has very little fat. This coconut dessert is made very quickly and is very tasty to eat as well as very beneficial for health. I will tell you a very easy method of making coconut laddus which is very tasty to eat. Follow the steps given below to make delicious coconut laddus …
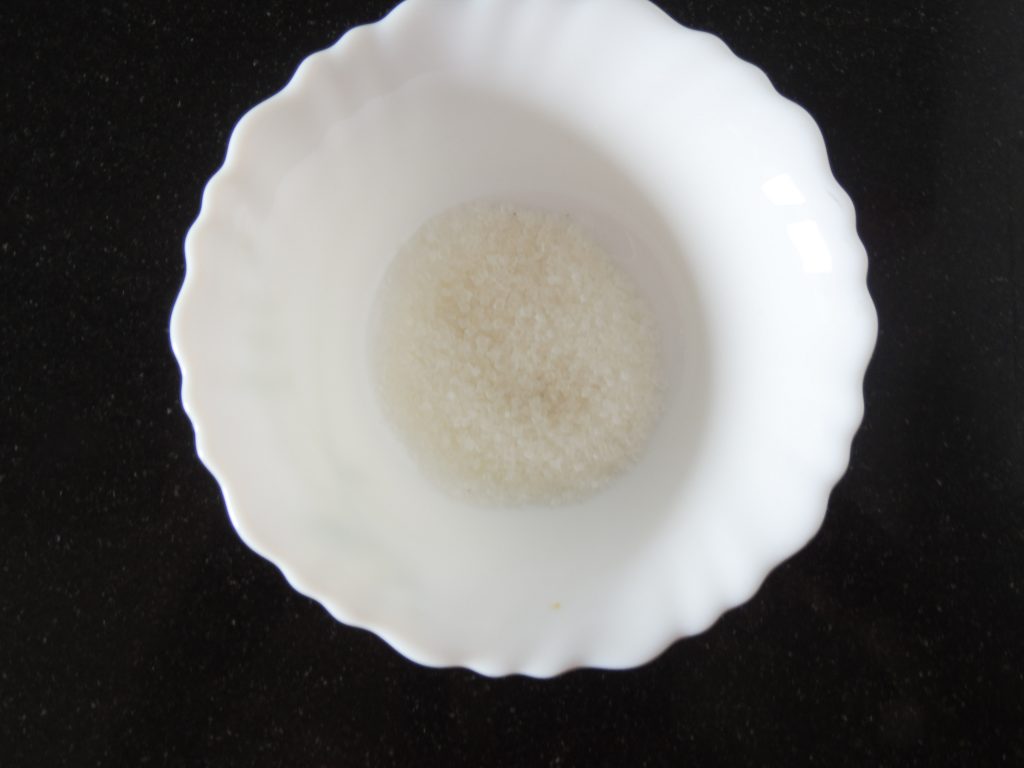
Take 4 tbsp of sugar. You can use sugar as per your wish. More or less but even if you eat more sugar, do not add more than half a cup of sugar.
I am not making too much sweet nor less sweet laddu here. Do not add sugar at all if someone has sugar problems. Coconut powder is naturally sweet. So it would be nice to eat laddu without sugar as well.
Take 1/2 cup of milk also.
After that take 1 tsp of desi ghee.
Take 1/4 tsp cardamom / elaichi powder.
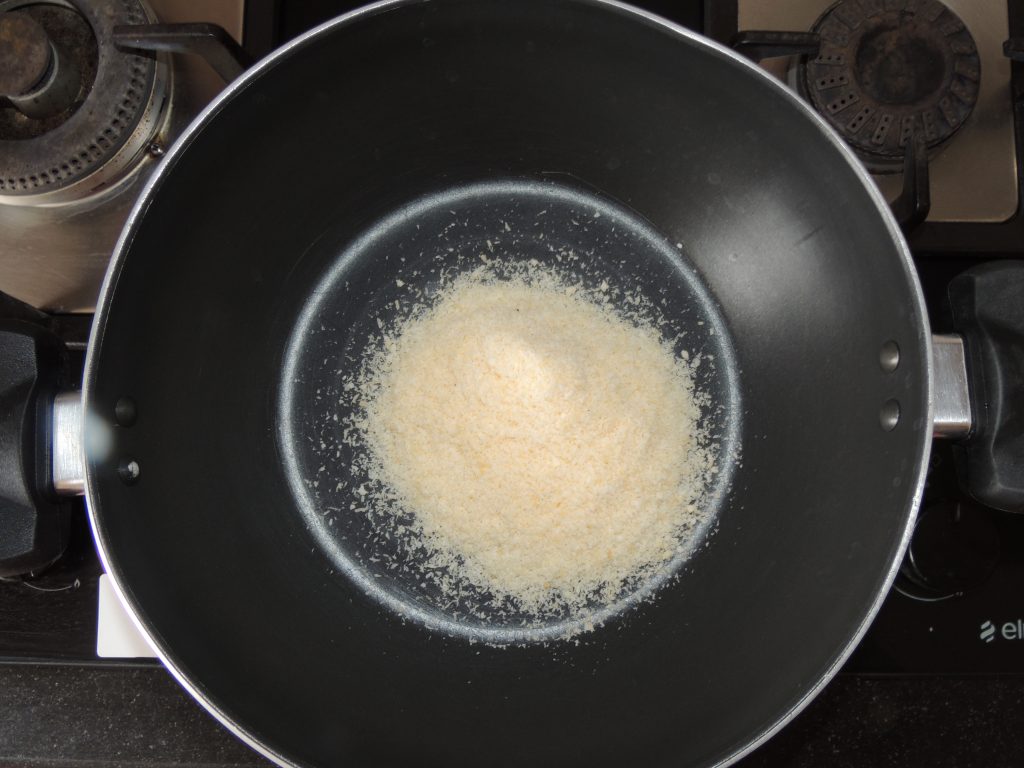
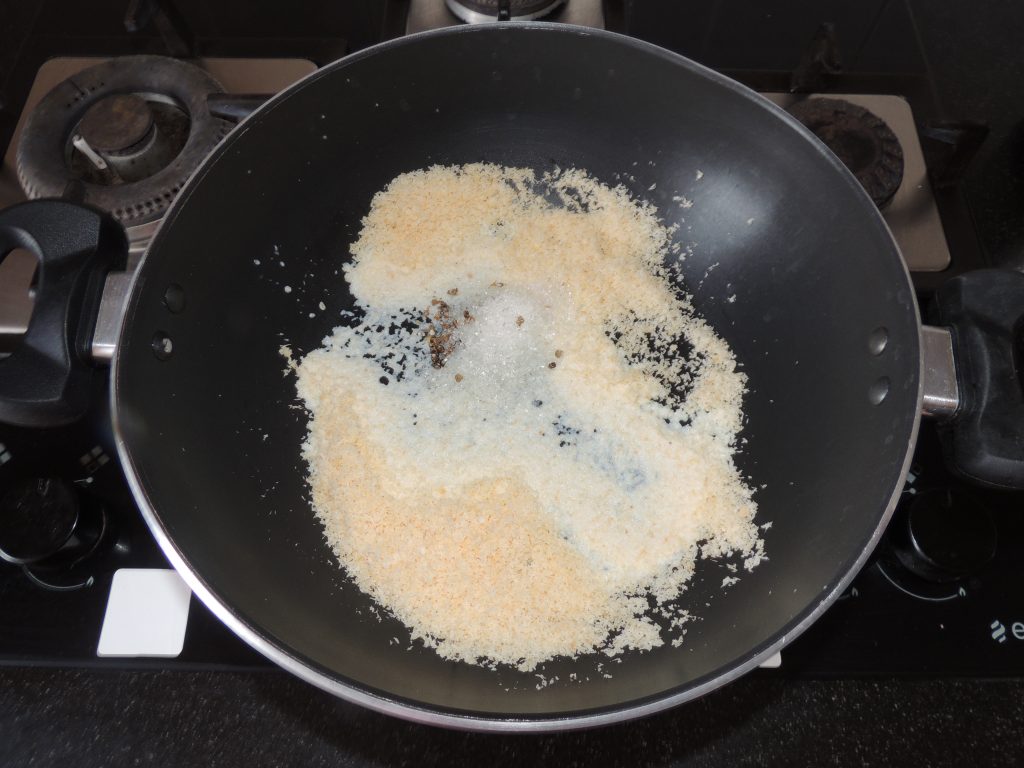
Put kadhai / fry pan on the gas. Add a cup of coconut powder to the kadhai / fry pan.
Stir the coconut powder with a spatula so that the moisture of the coconut powder runs out.
Fry for a minute.
After that add sugar, cardamom powder along with 1/2 cup of milk.
Fry this mixture with a spatula. Fry till the milk dries in the mixture.
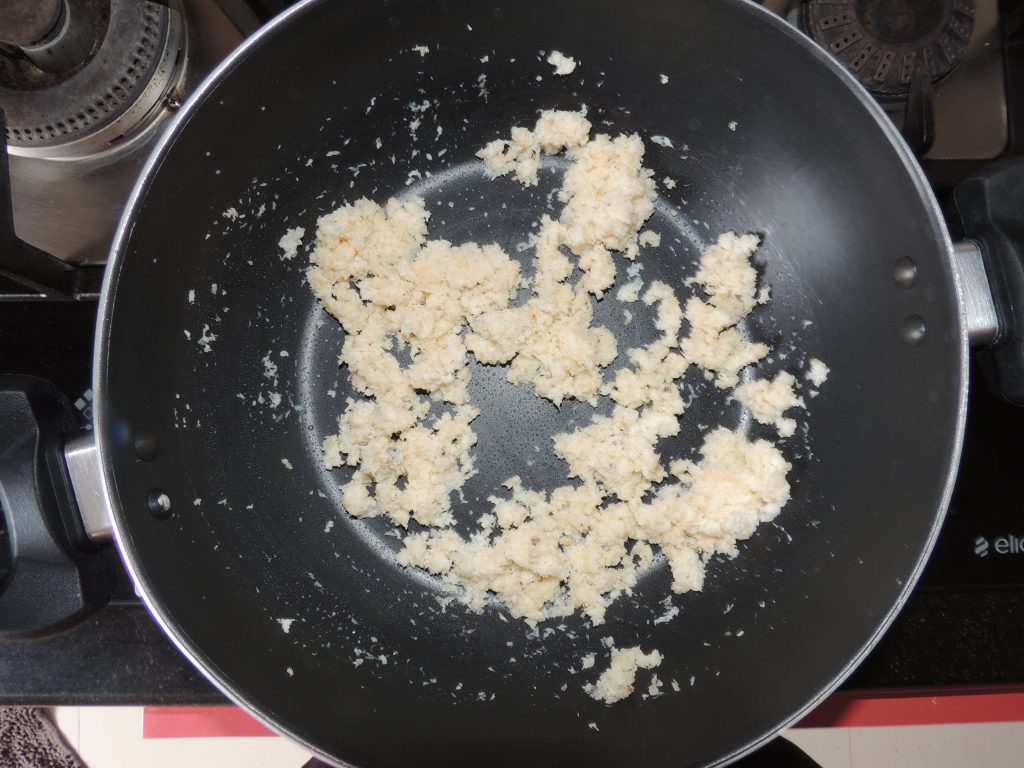
When the milk of the mixture dries.
Then add a spoon of desi ghee and stir with a spatula.
Fry the mixture for 30 seconds.
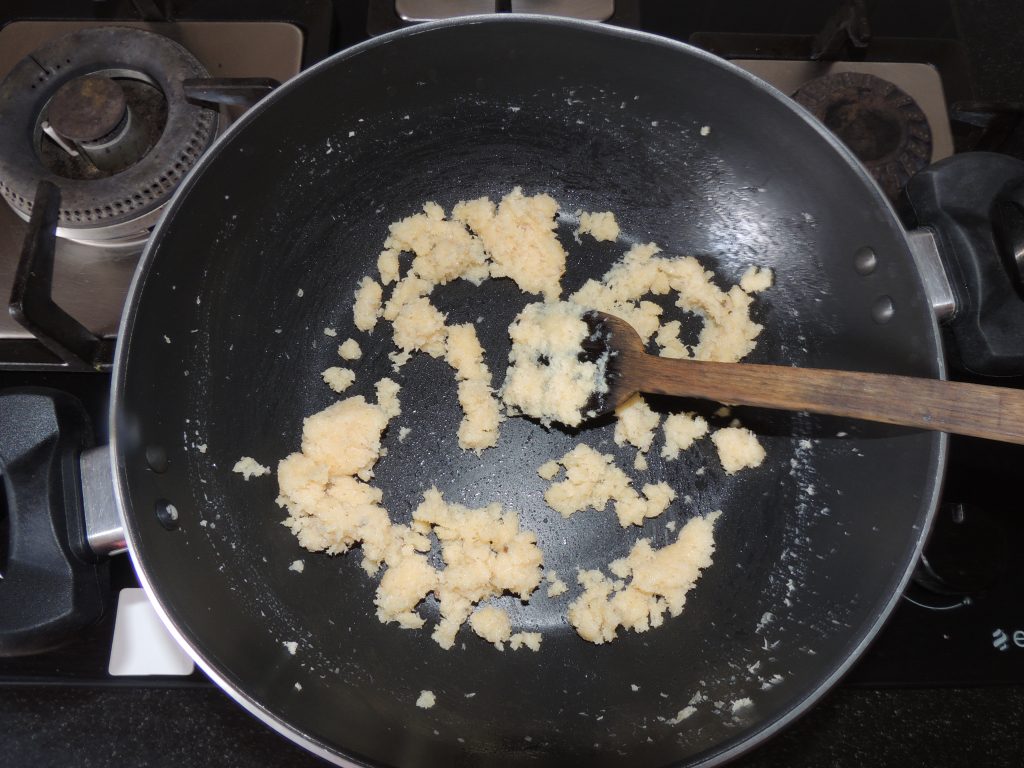
Now switch off the gas.
Let the mixture cool.
When the mixture cools down.
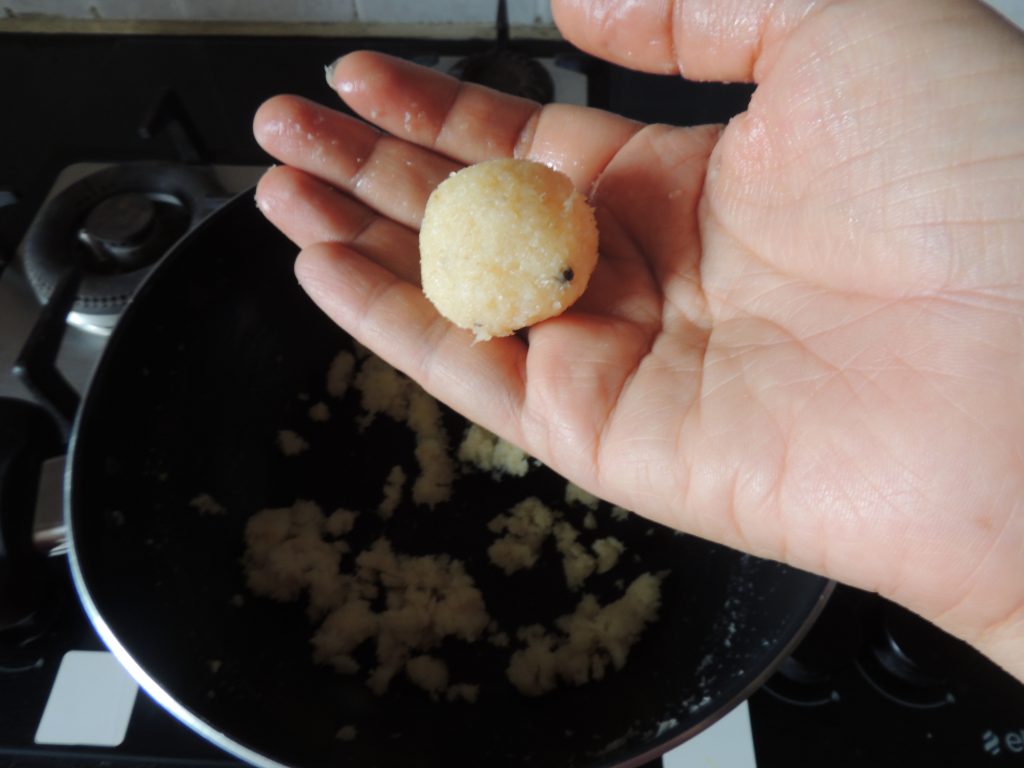
Then make the laddus with a light hand.
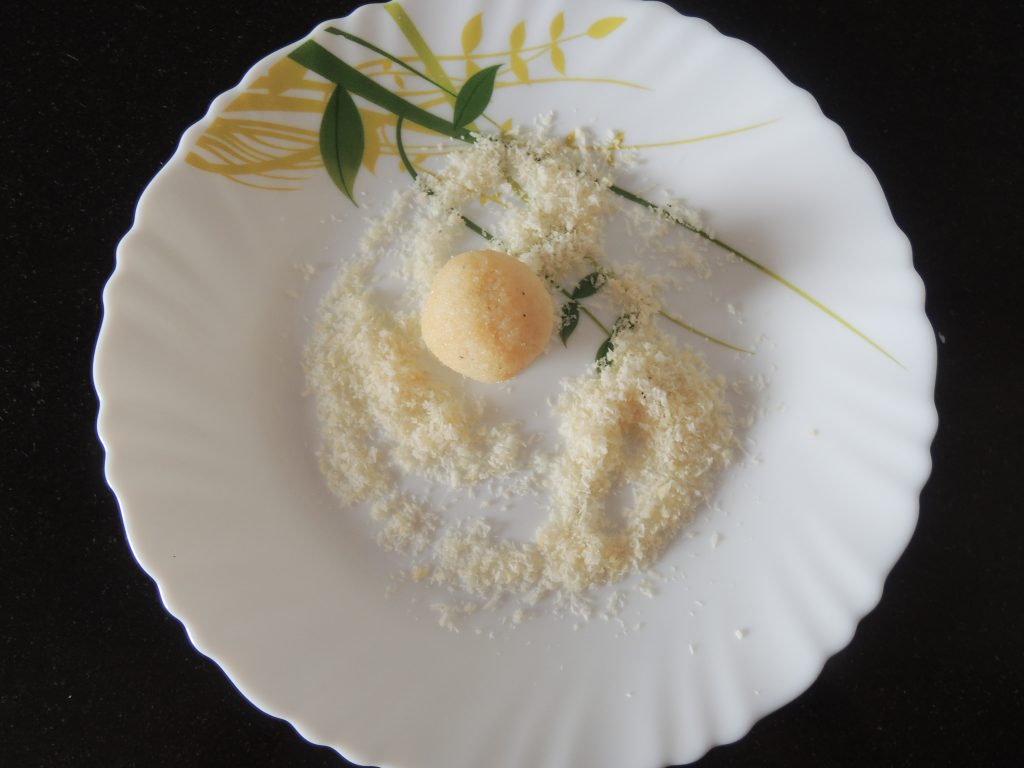
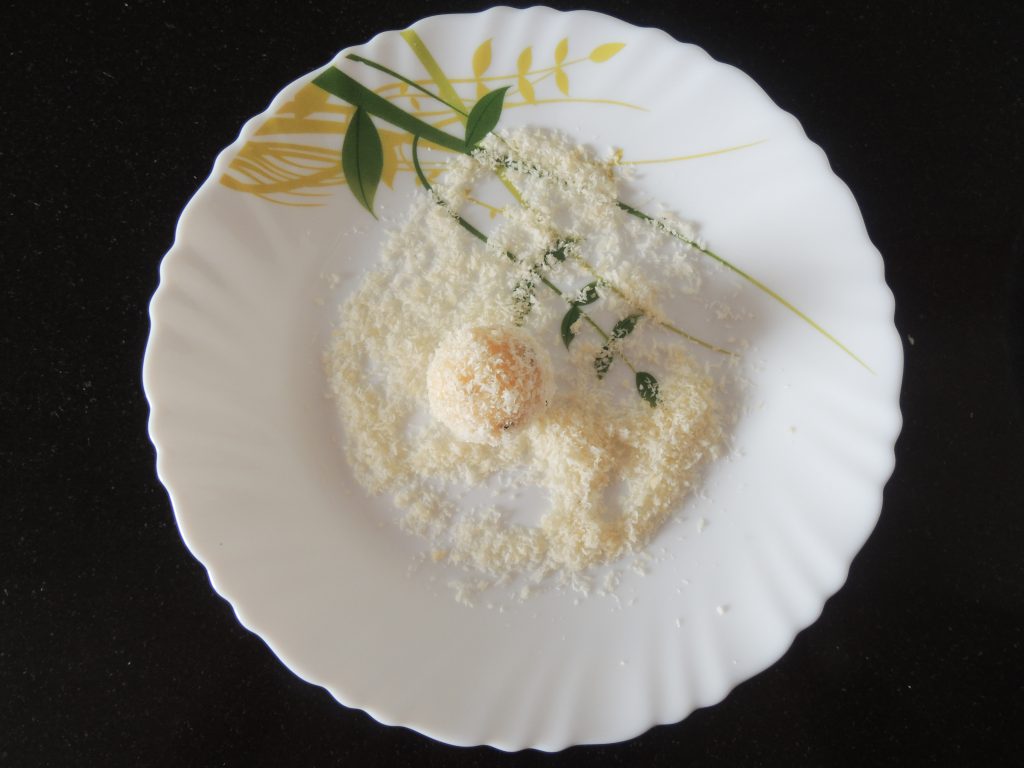
Take a spoonful of coconut dust after making laddus.
Wrap dust of coconut on all coconut laddu.
Make the remaining laddu following the above-given steps.
Delicious coconut laddus are ready to eat. Enjoy this delicious and instant desert.
Notes
Coconuts are known for their versatility of uses, ranging from food to cosmetics.
The inner flesh of the mature seed, as well as the coconut milk extracted from it, forms a regular part of the diets of many people in the tropics and subtropics.
Coconuts are distinct from other fruits because their endosperm contains a large quantity of clear liquid, called coconut water or coconut juice.
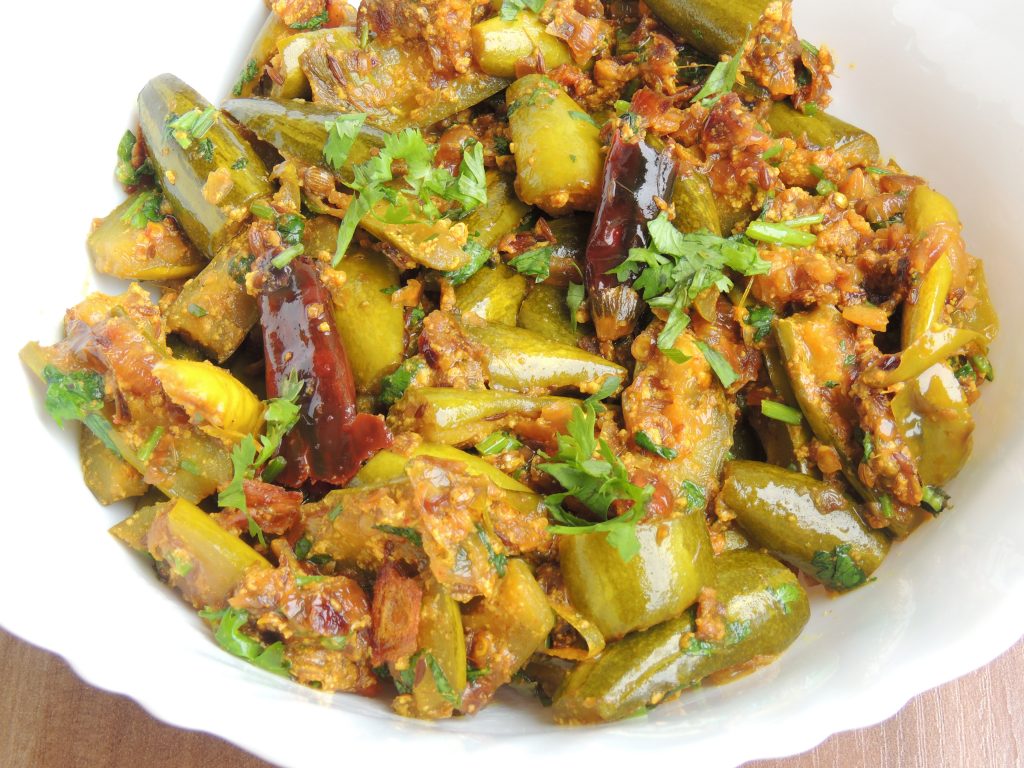
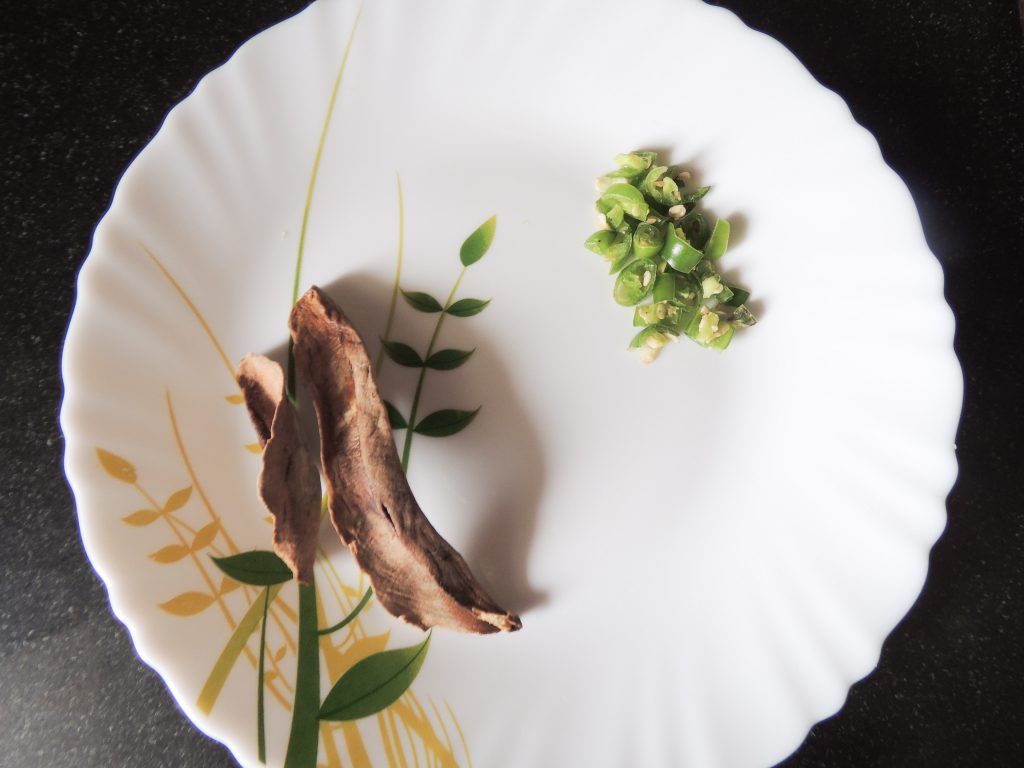
Parwal is abundant in minerals and vitamins. Green vegetables are also very delicious to consume and essential for health.
There are many individuals who do not like eating parwal at all, but do you understand that in relation to vitamin-A, vitamin-B1, vitamin B2 and vitamin-C, calcium is also discovered in abundance, which is the quantity of calories.
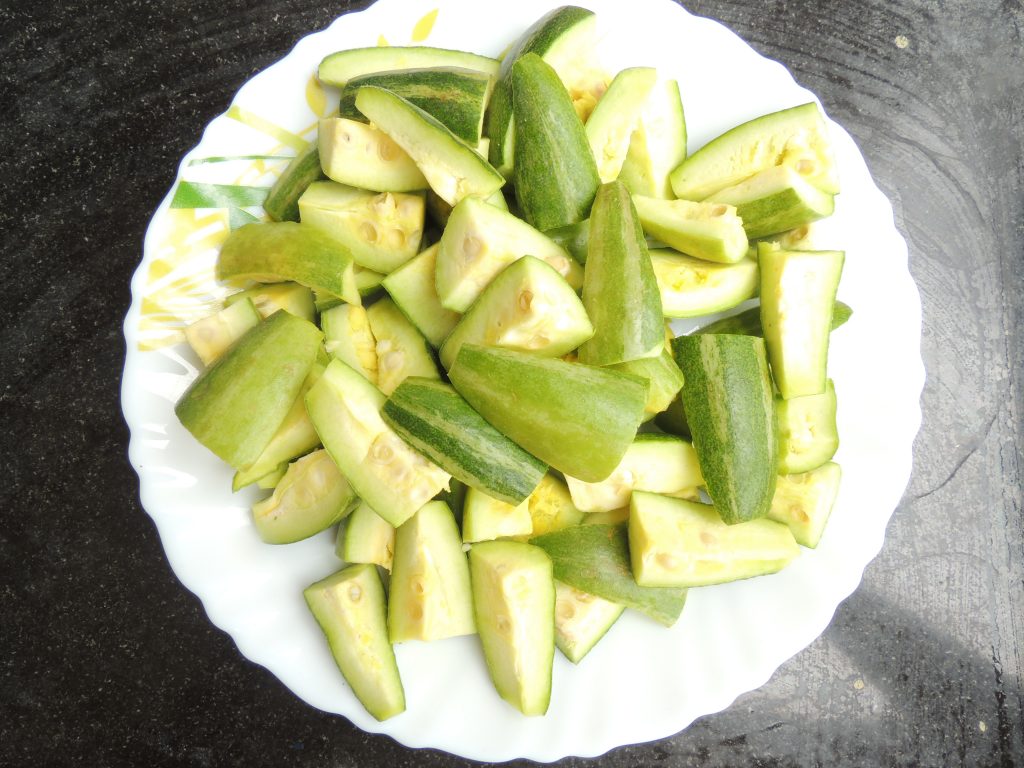
Today I will tell you such dry vegetable of Parwal that even if you do not like the vegetable of Parwal, it will also lick fingers after eating the vegetable and will make dry parwal recipe again and again.
Course Breakfast, Dinner, Indian, Lunch, Main Dish
Cuisine Breakfast, dinner, Indian, lunch, Main
Prep Time 5minutes
Cook Time 20minutes
Total Time 25minutes
Servings 4People
Calories 28kcal
Equipment
Kadhai / Fry Pan
Big Spoon
Knife
Plate
Ingredients
200GramsPointed Gourd
1UnitOnion / Pyaz, chopped
1UnitGreen Chilli / Hari Mirch, chopped
2UnitWhole Red Chilly / Lal Mirch, break in two pieces
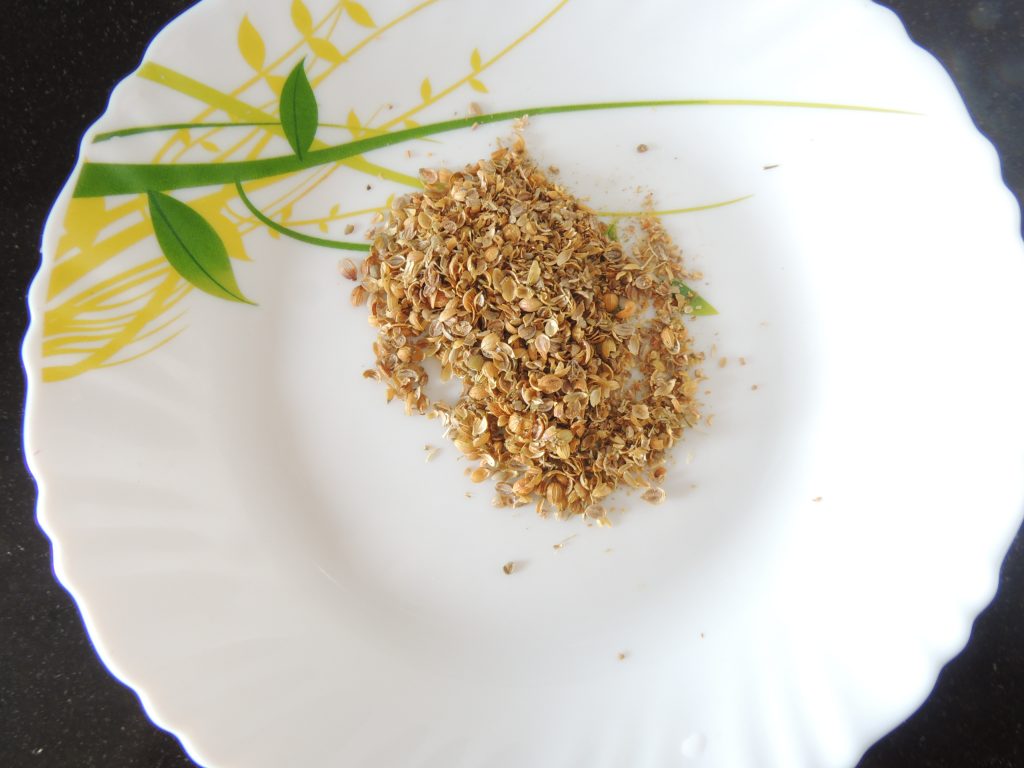
1tspCoriander Seeds / Khadi Dhaniya, Break coriander seed in mortar and pestle
1/2tspTurmeric (haldi) powder
2tspOil / Tel
2tspCurd / Dahi / Yogurt, Beat the curd
1tspCoriander leave / Dhaniya Patti, chop coriander leave
2tspOil
Instructions
First rinse the pointed gourd / parwal with water.
And cut one pointed gourd into 4 pieces.
Take an onion and chop it well.
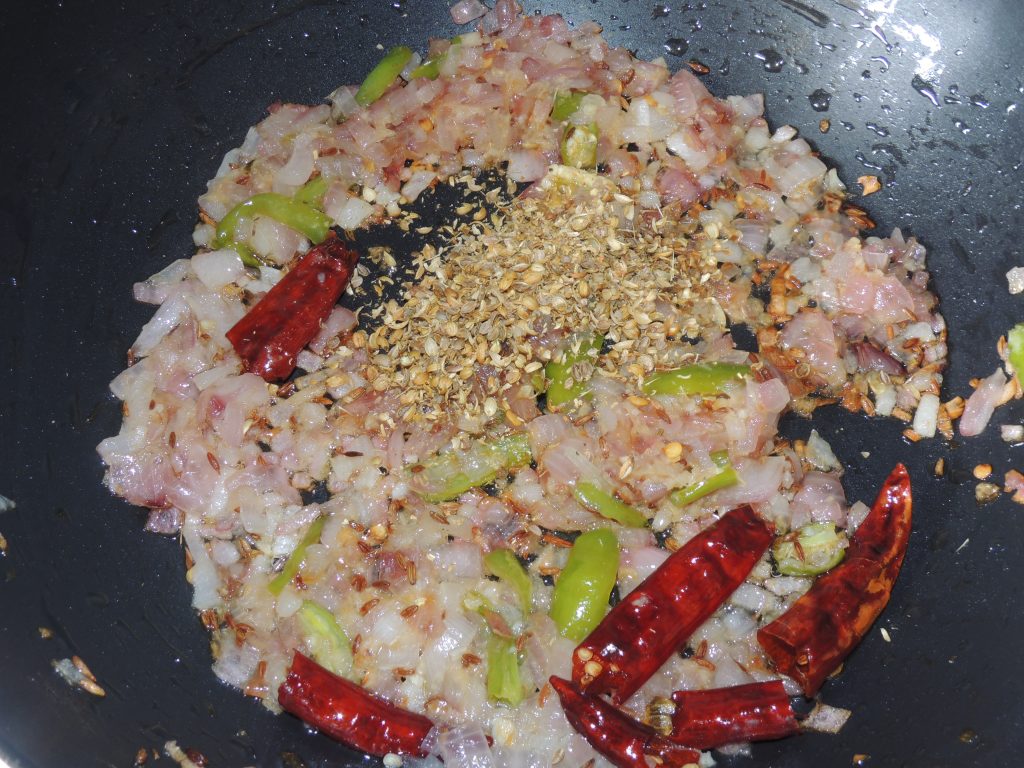
Crush the coriander seed coarsely with mortar and pestle.
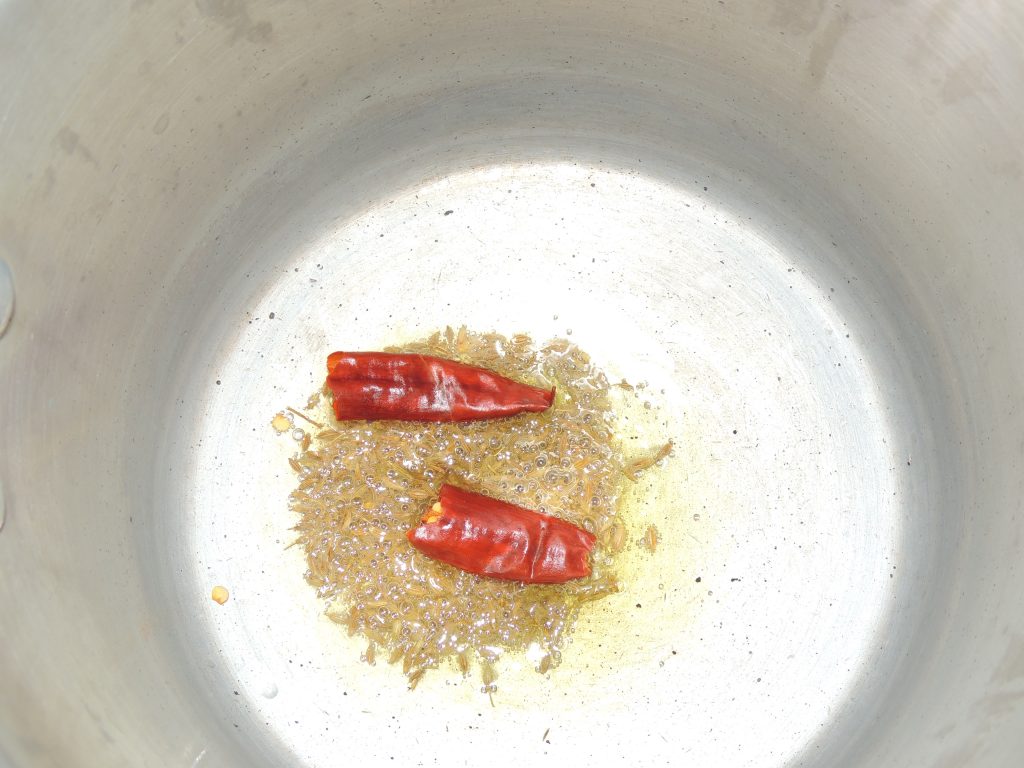
Now put the kadai / fry pan on the gas.
Add 2 tsp of oil in kadai / fry pan.
Then add cumin seeds to the oil.
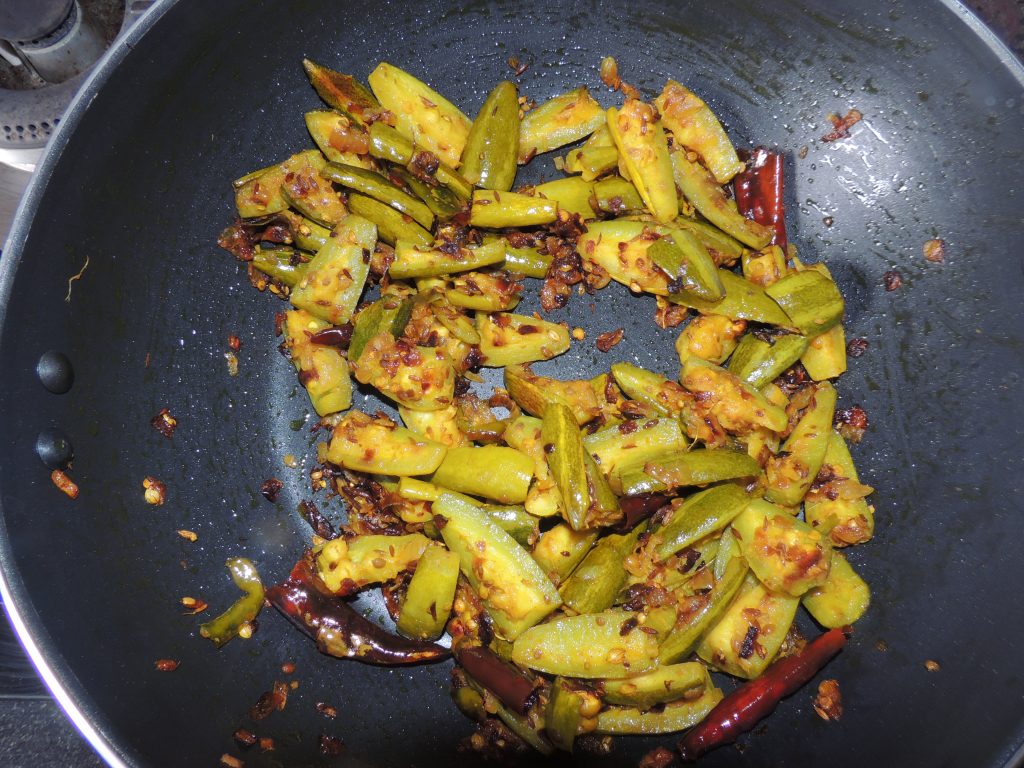
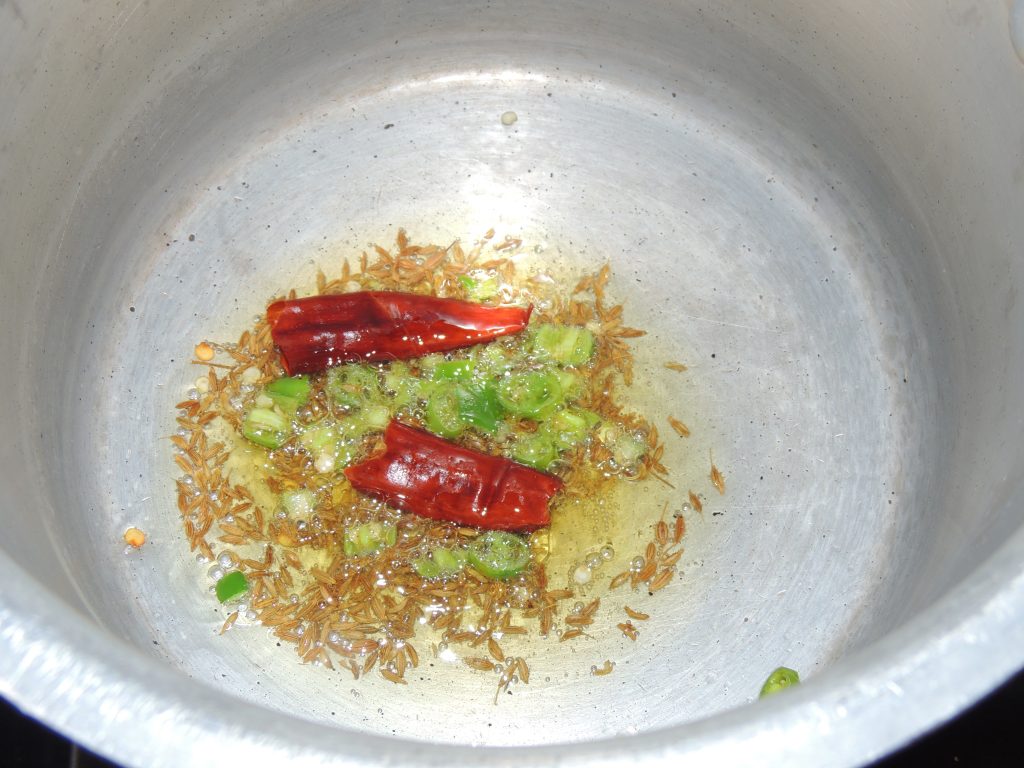
When the cumin seeds start crackling add red chillies.
After 10 seconds add chopped green chilli and chopped onion.
Stir spices with spatula.
Fry until light pink.
After that add coarse coriander.
Stir for 30 seconds.
After that add turmeric into kadai / fry pan.
Fry the spices for about a minute.
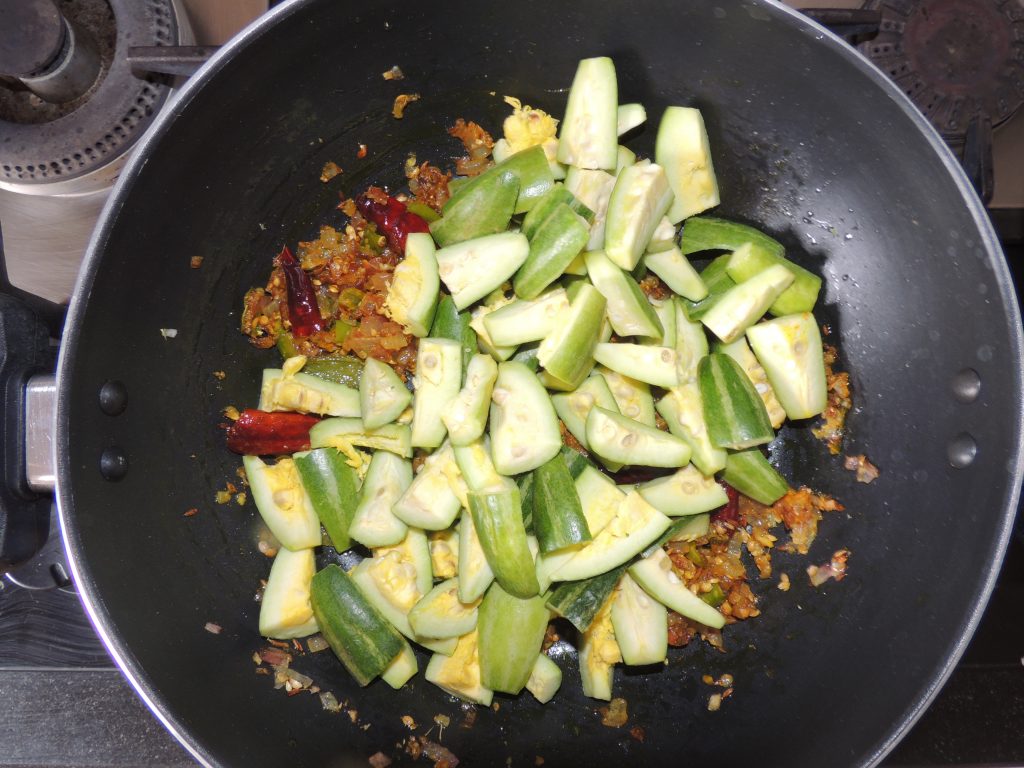
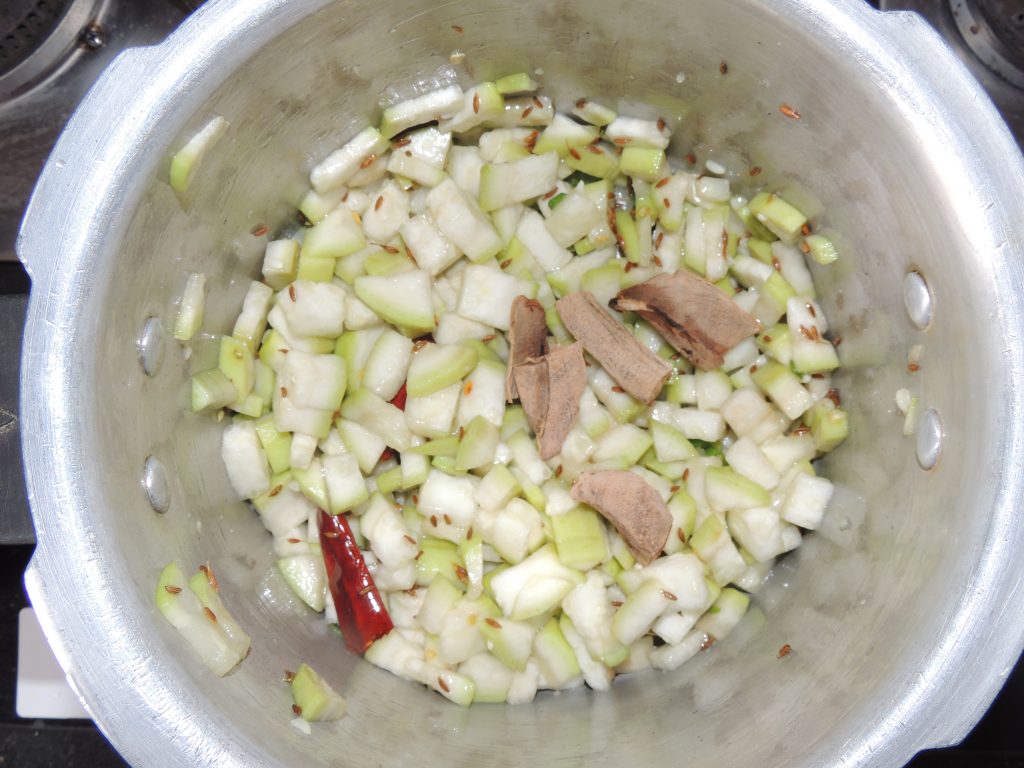
Then add chopped pointed gourd / parwal to the spices.
Mix chopped pointed gourd / parwal with spices.
Cover the lid on the kadai / fry pan.
Leave the lid of the kadai / fry pan closed for five minutes.
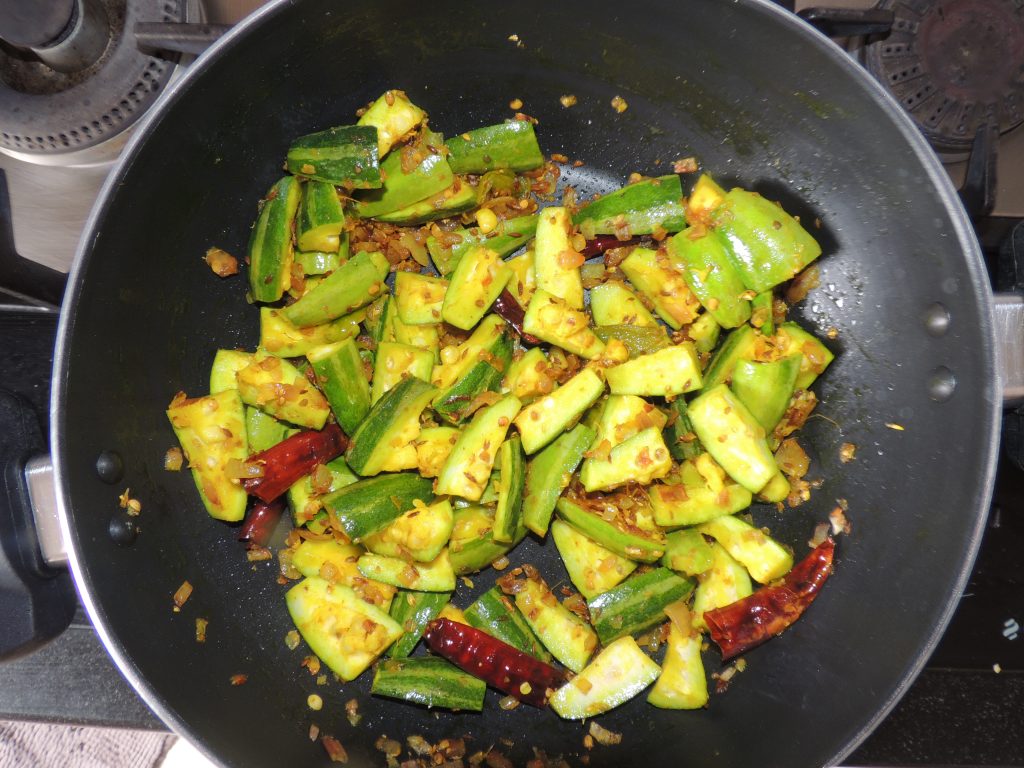
Keep stirring the vegetables periodically.
If the vegetable is not fully cooked, then close the lid of the kadai / fry pan again.
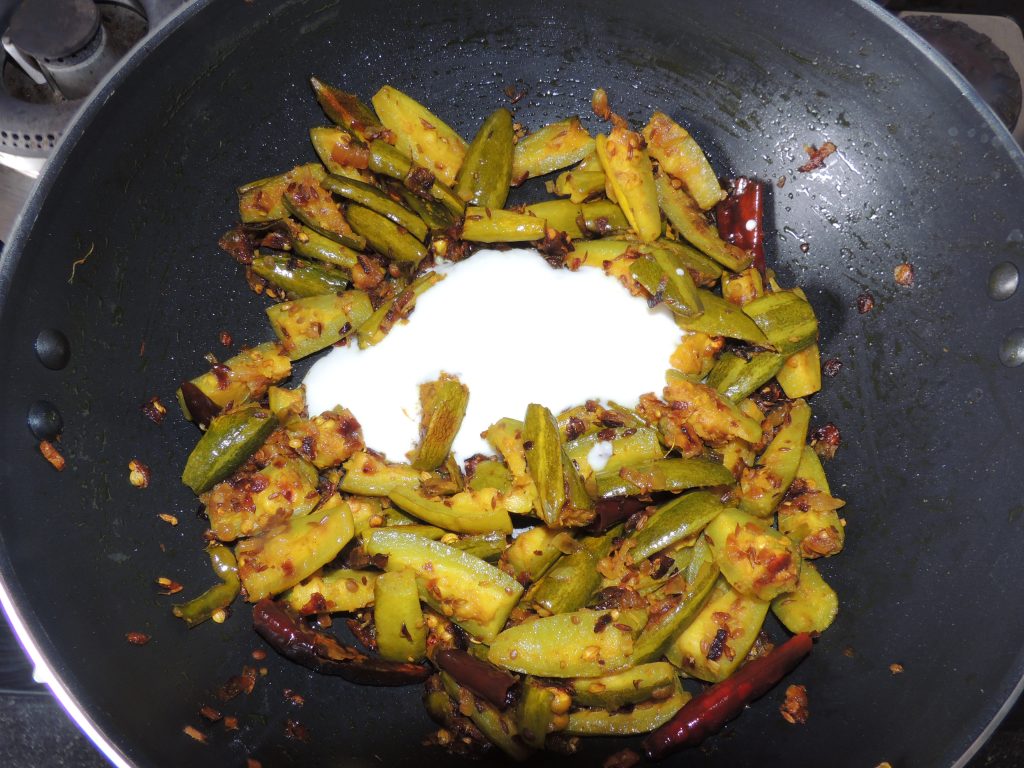
Open the lid again and check if the vegetable is cooked.
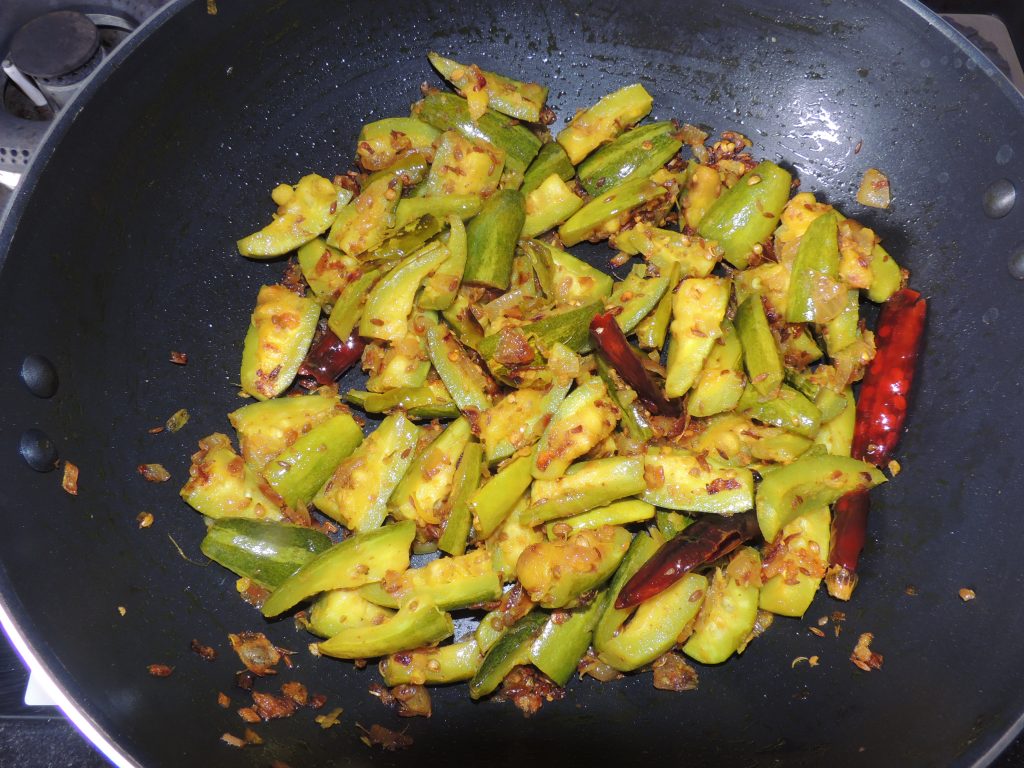
If the vegetables are cooked, add the 2 tbsp beaten curd onto pointed gourd / parwal.
Keep stirring the vegetable for one minute.
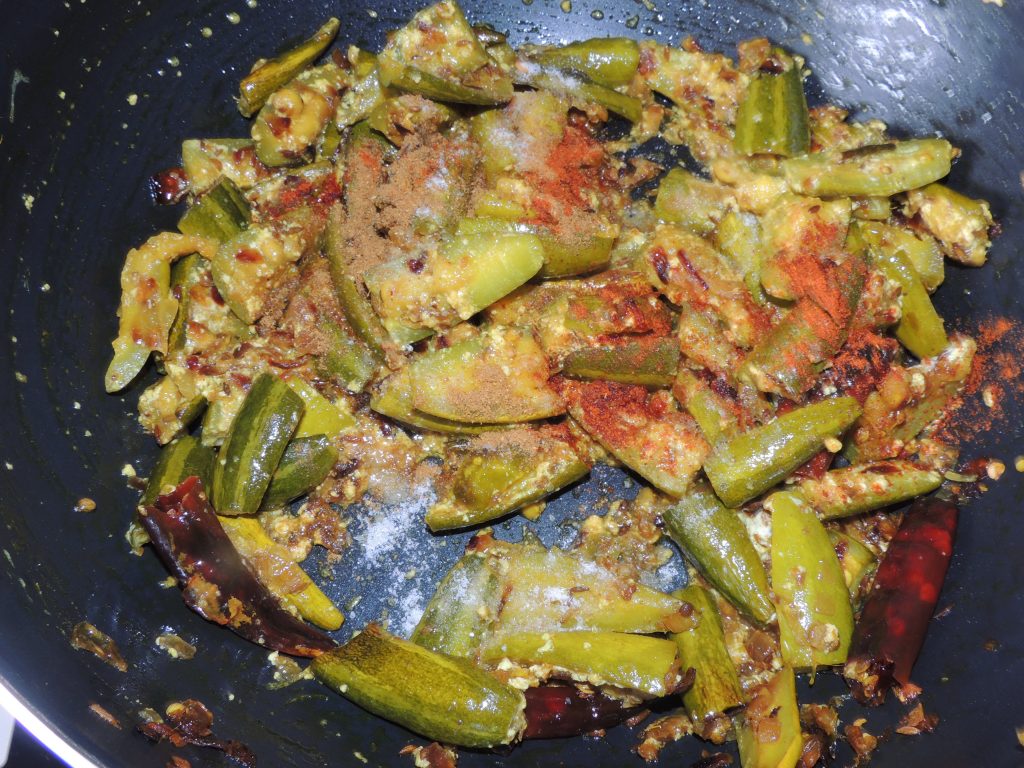
Add salt to the sabji as per taste.
Add red chilli powder and garam spice / masala to the vegetable.
Mix spices to the vegetable and close the lid of kadai / fry pan.
Leave the lid closed for one minute.
So that the aroma of garam masala properly mixes with the vegetable.
Sprinkle coriander leaves on curd dry parwal recipe.
Now recipe is ready.
Serve recipe with poori, paratha, chapati or nan.
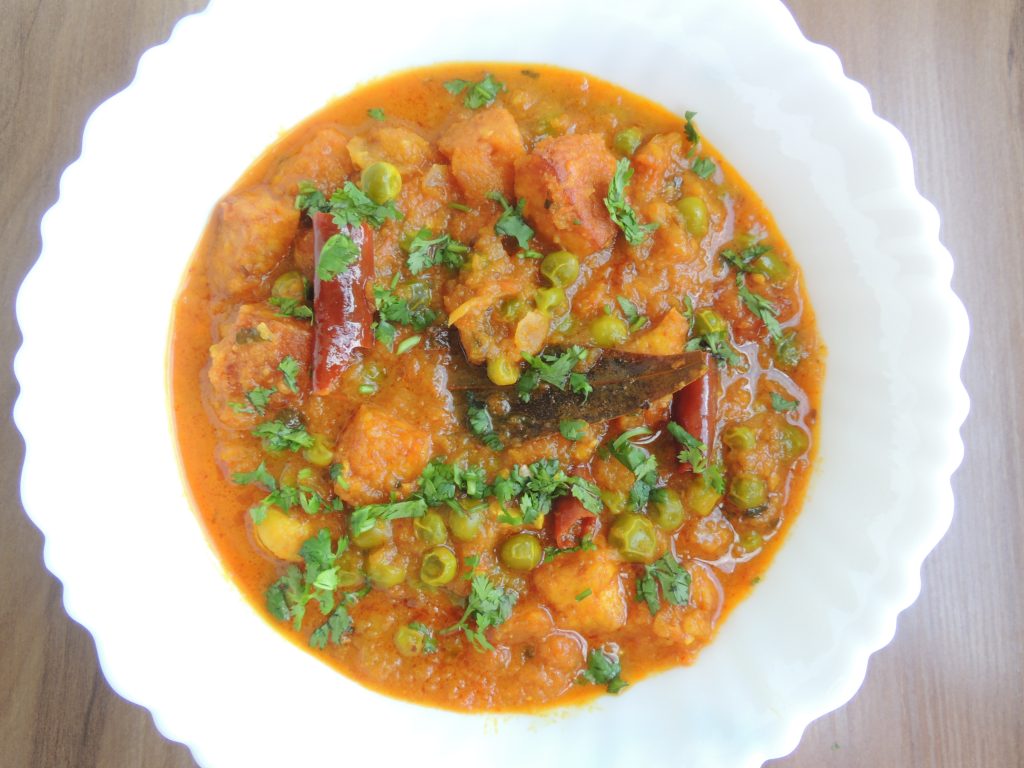
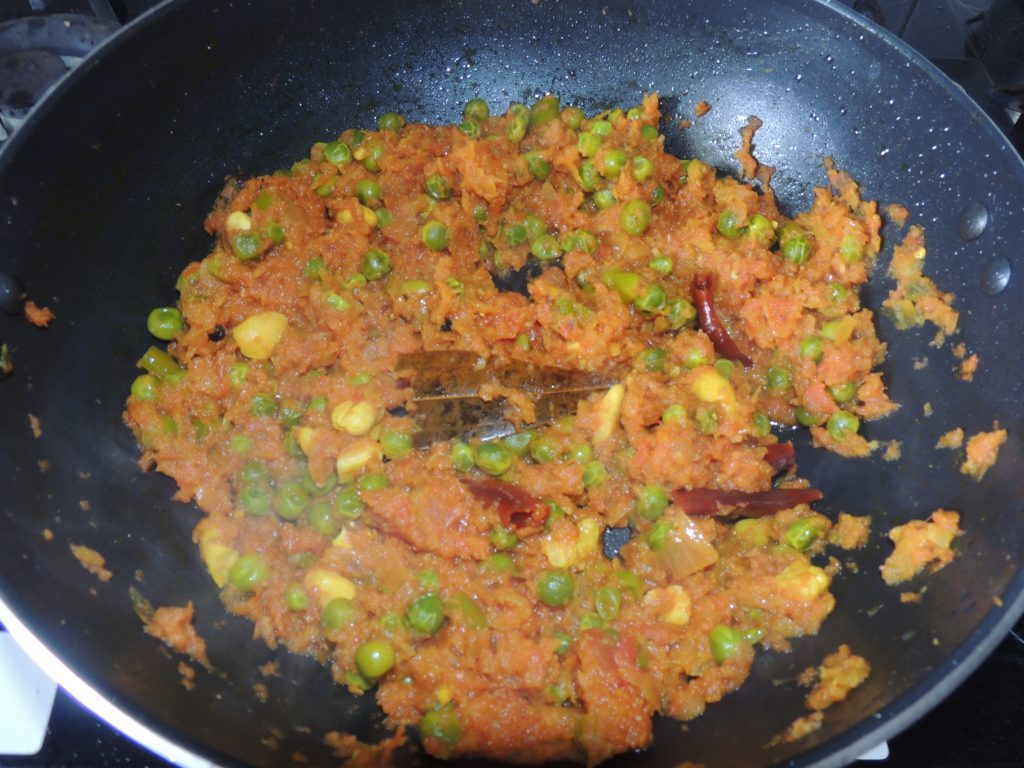
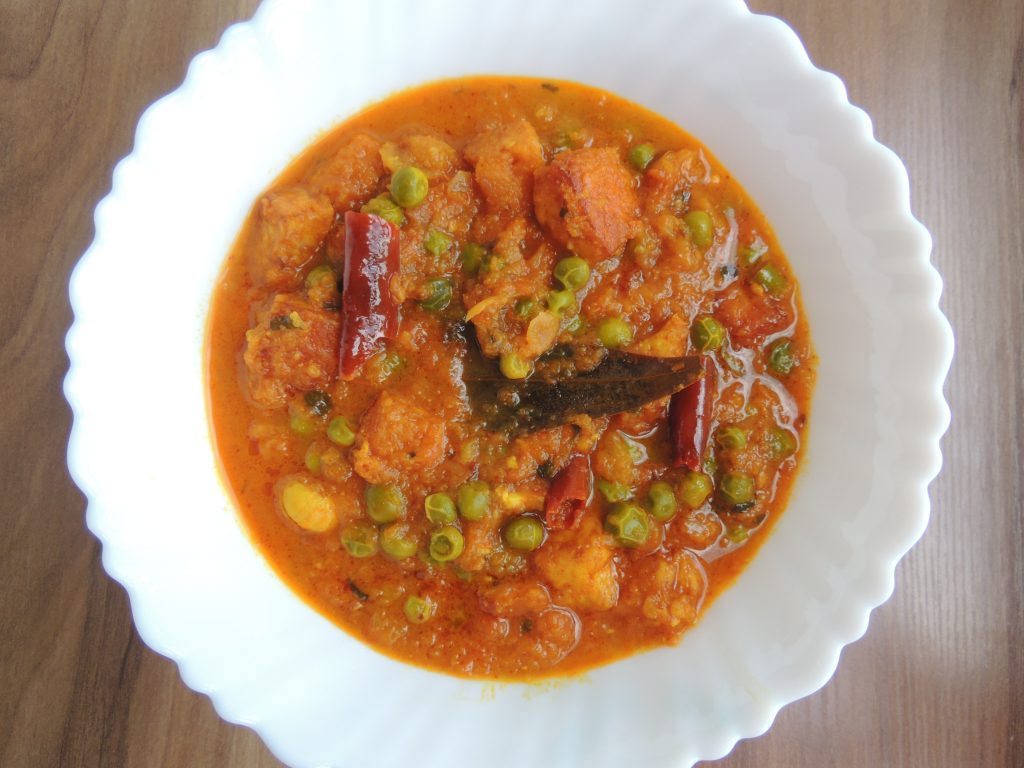
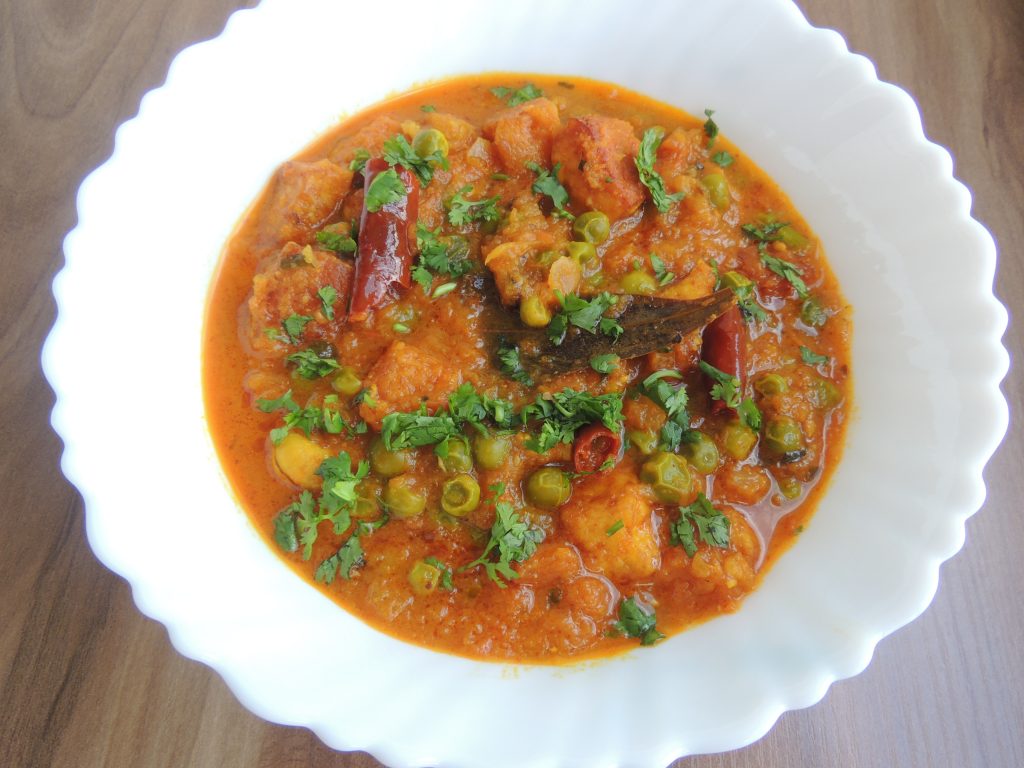
Hotel Vali Matar Paneer / Restaurant Style Cheese Peas Curry
Cheese is a excellent calcium, fat, and protein source. It also includes elevated quantities of vitamins A and B-12, together with zinc, nitrogen, and riboflavin. Cheese produced from 100% grass-fed cattle ' milk is the largest in nutrients and also includes omega-3 fatty acids and vitamin K-2.The nutritional value of cheese varies widely. Cottage cheese may consist of 4% fat and 11% protein while some whey cheeses are 15% fat and 11% protein, and triple-crème cheeses are 36% fat and 7% protein.Cheese is very good for health.Everyone likes cheese curry very much.But today I am going to tell you the cheese curry recipe.After eating it you will be licking fingers.You must have eaten cheese curry recipe in hotels or at weddings.Today I will tell you a very tasty and delicious cheese curry recipe made in hotels or weddings.Please follow the steps given below and enjoy a very tasty cheese curry recipe …
Course Dinner, Indian, Lunch, Main Dish, Starter
Cuisine Breakfast, dinner, Indian, lunch, Main
Prep Time 10minutes
Cook Time 20minutes
Total Time 30minutes
Servings 4People
Calories 497kcal
Equipment
Kadhai / Fry Pan
Big Spoon
Bowl
Mixer Grinder and Jar
Ingredients
250GramsCheese / Paneer
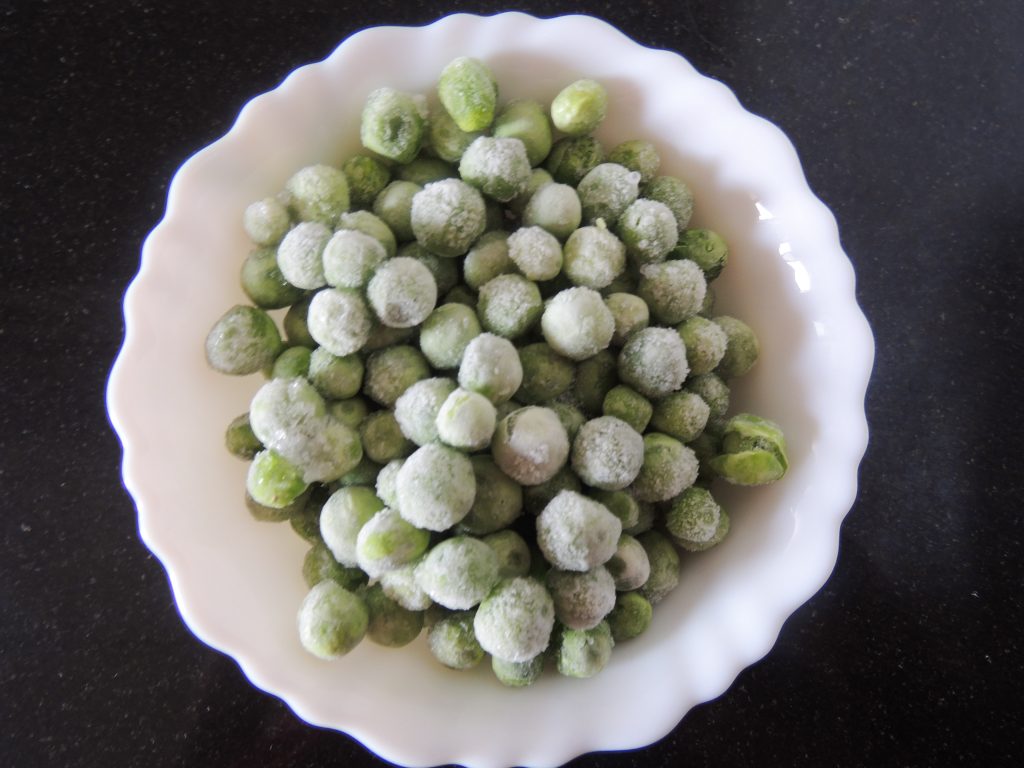
1Bowl Green Pea / Hari Matar, or 150 grams Green Pea / Hari Matar
1tspGinger Garlic Paste / Adrak Lehsun Paste
3Unit Big Onion / Pyaz
1inchGinger Sliced
2UnitGreen Chilli / Hari Mirch, Sliced
4 – 5 UnitBig Tomato / Bade Tamatar
1tspCream, optional
2leavesBay Leave / Tej Patta
1tspCumin Seed / Jeera
2UnitGreen Cardamom / Hari Elaichi
1UnitBig Cardamom / Badi Elaichi
8 – 10 UnitCashew / Kaju, Fry little brown
1tspDegi Red chilli / Degi Lal Mirch
asper tasteSalt
100gramsOil, for frying cheese cubes / paneer
2tspOil, Chhaunk lagane ke liye / To Blow
Instructions
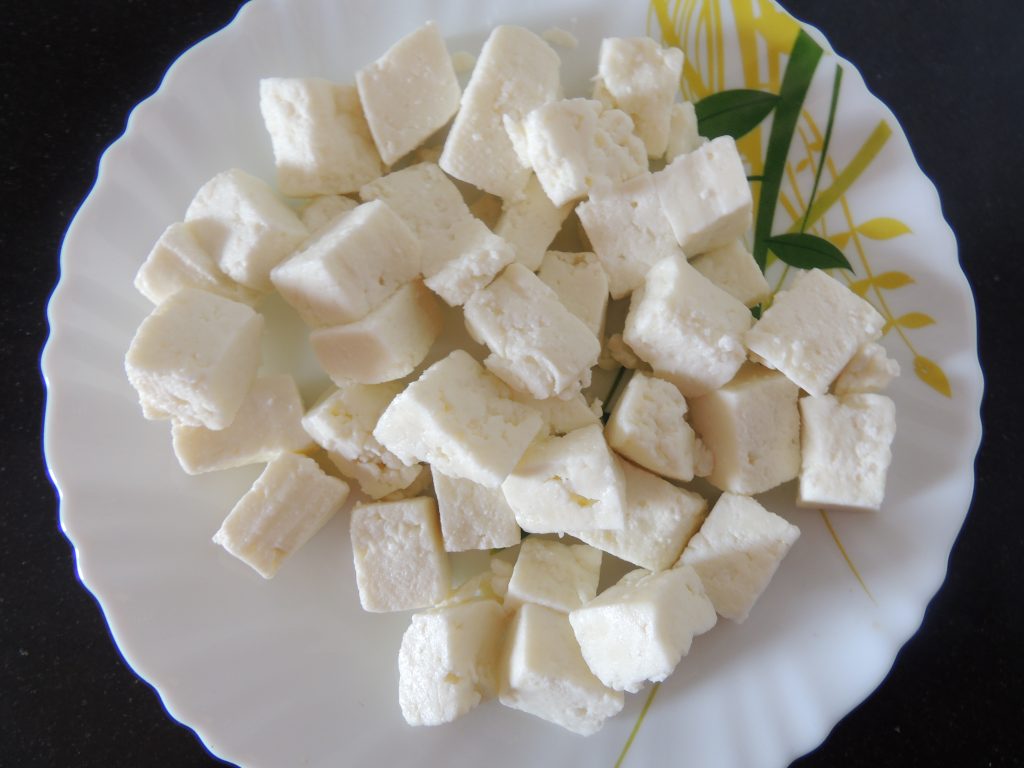
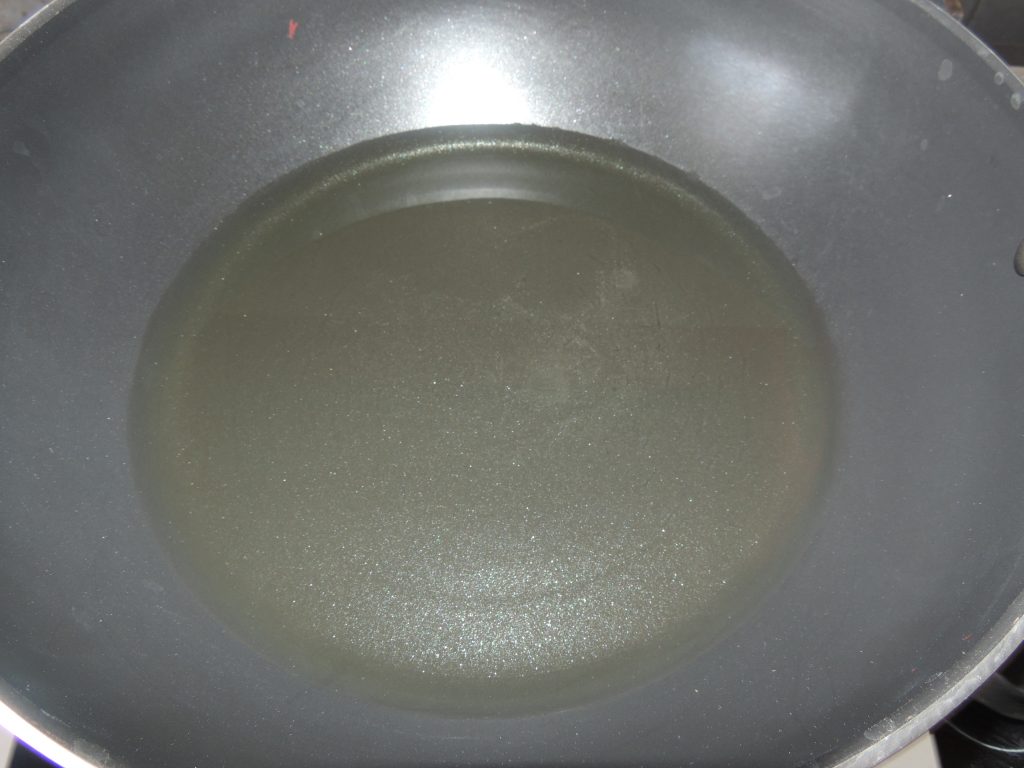
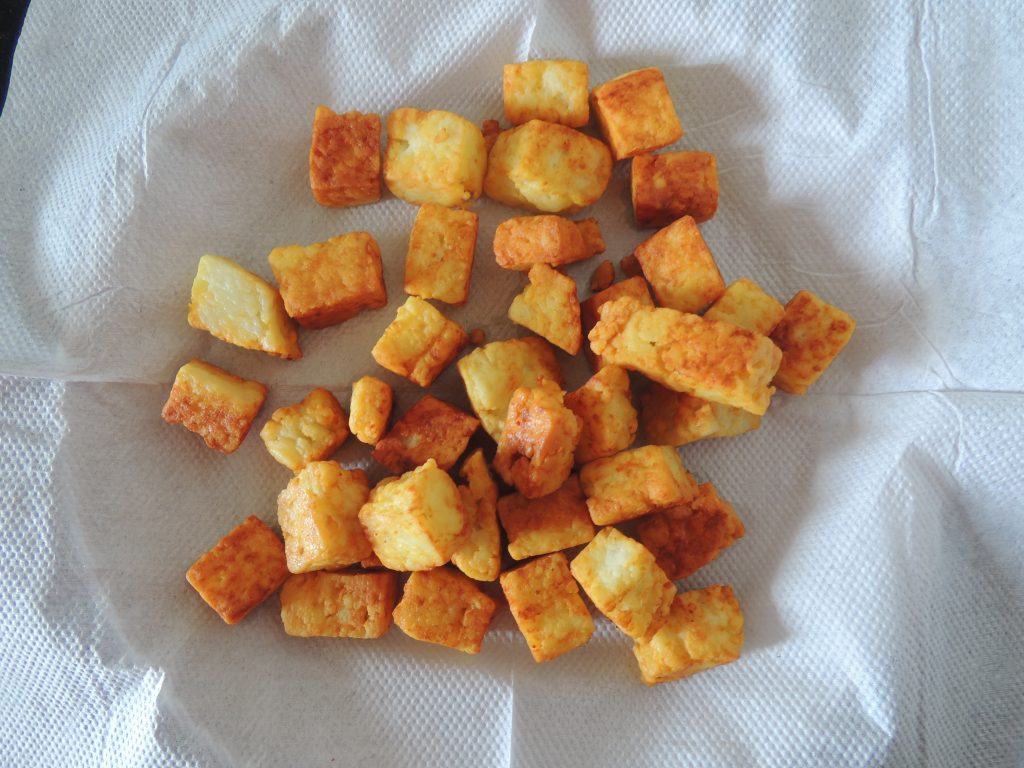
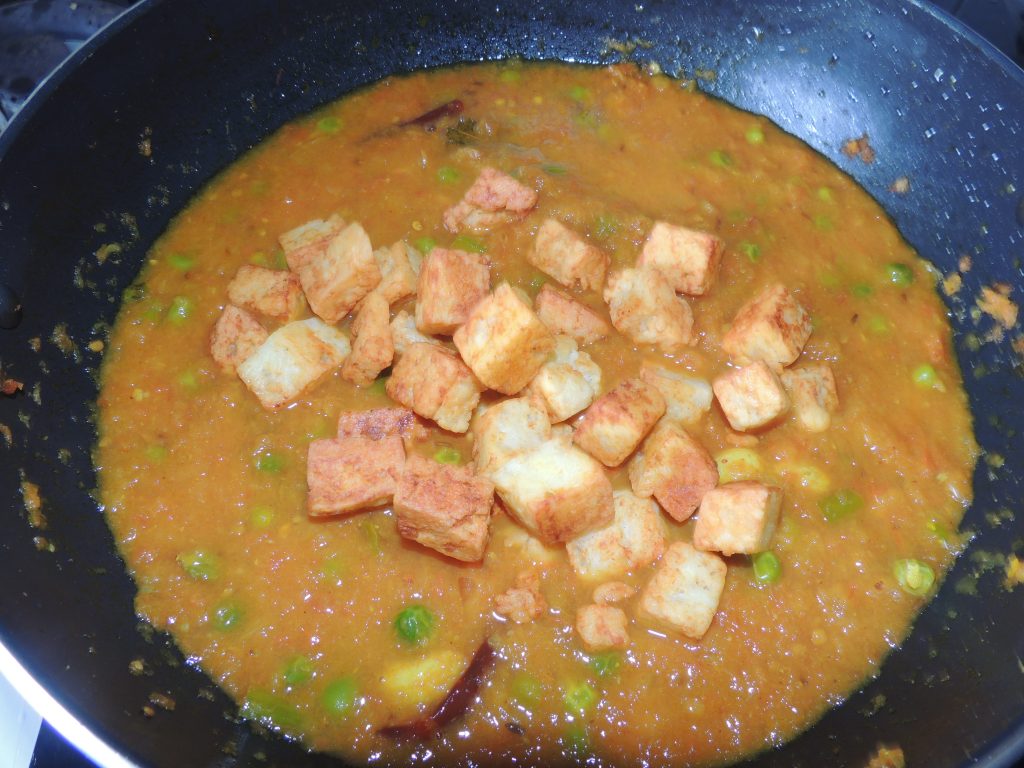
First cut the paneer into cubes.
After that take one fry pan / Kadai.
Place pan / kadai on the gas.
Add oil to the pan / kadai to fry the paneer.
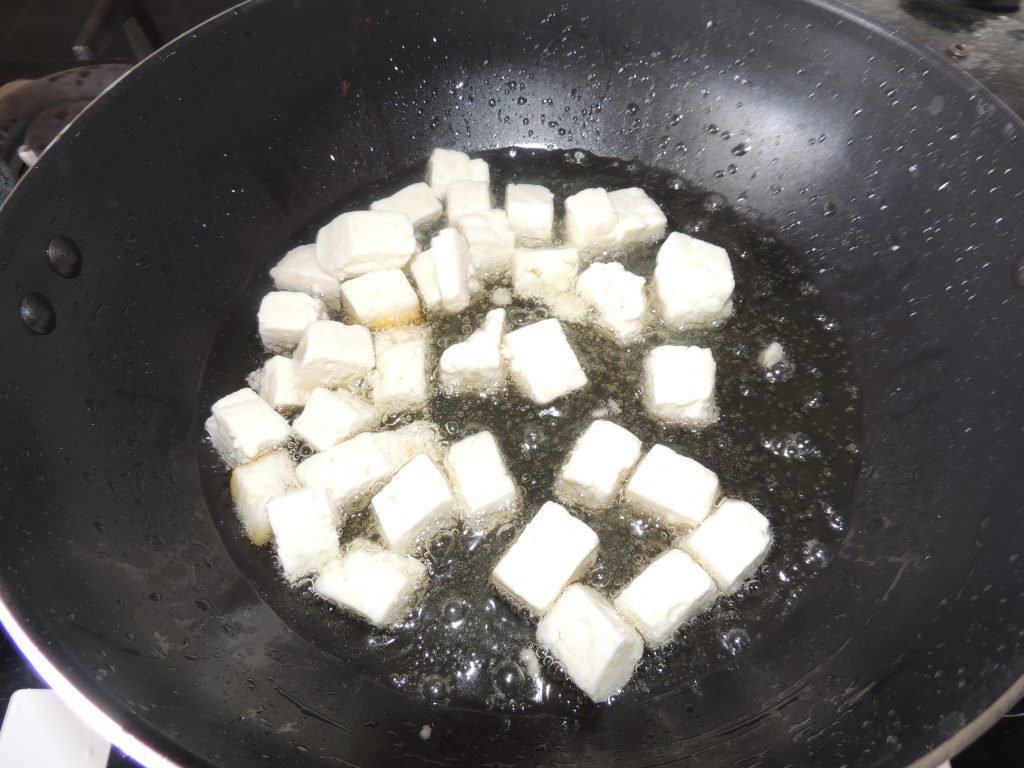
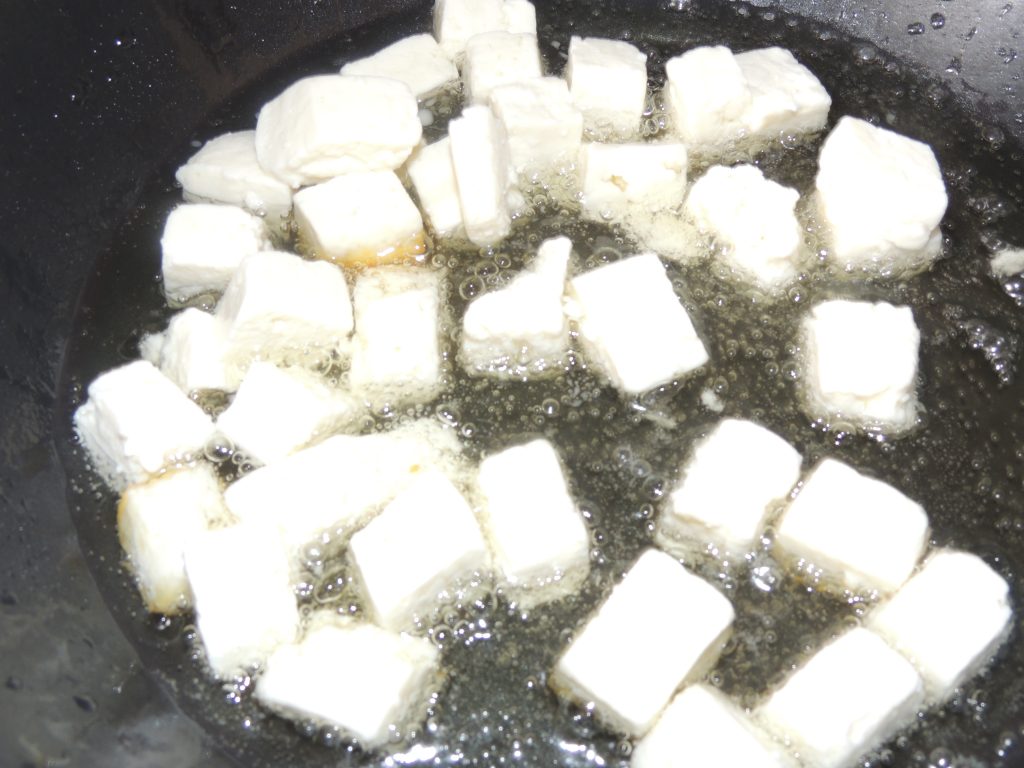
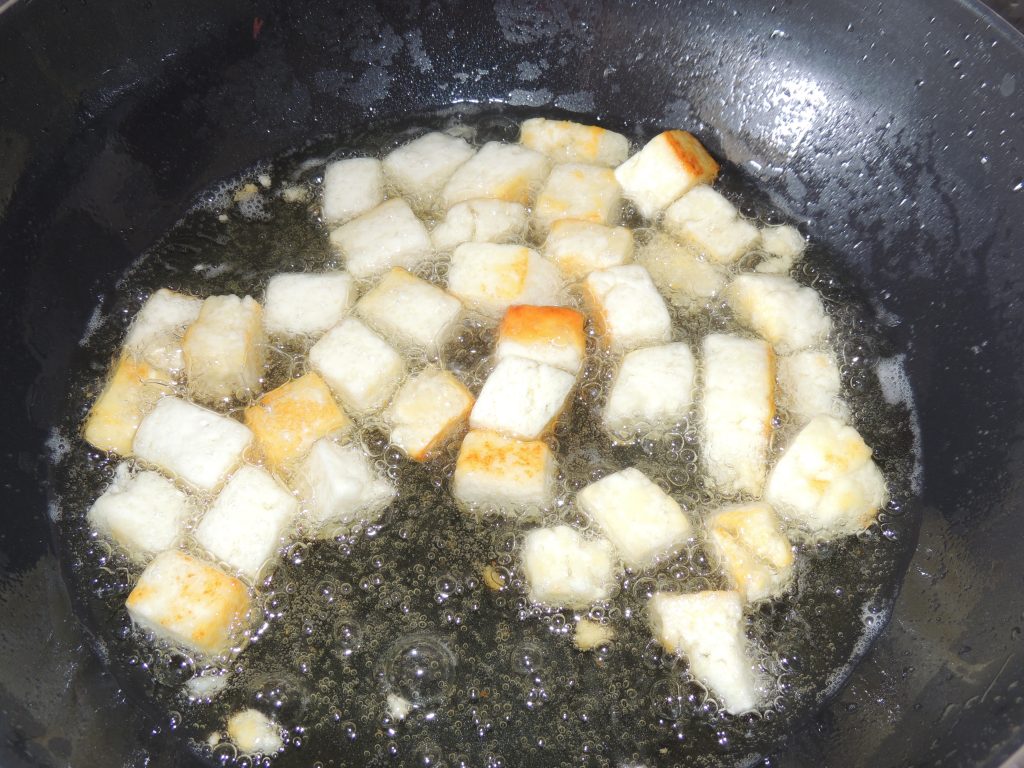
Put the paneer in the pan / kadai to fry
Fry the paneer until light brown.
When the paneer is roasted, take it out in a plate and keep it aside.
Take the spices given above. Such as green cardamom, big cardamom, bay leaf, black pepper, cloves, cumin, cinnamon.
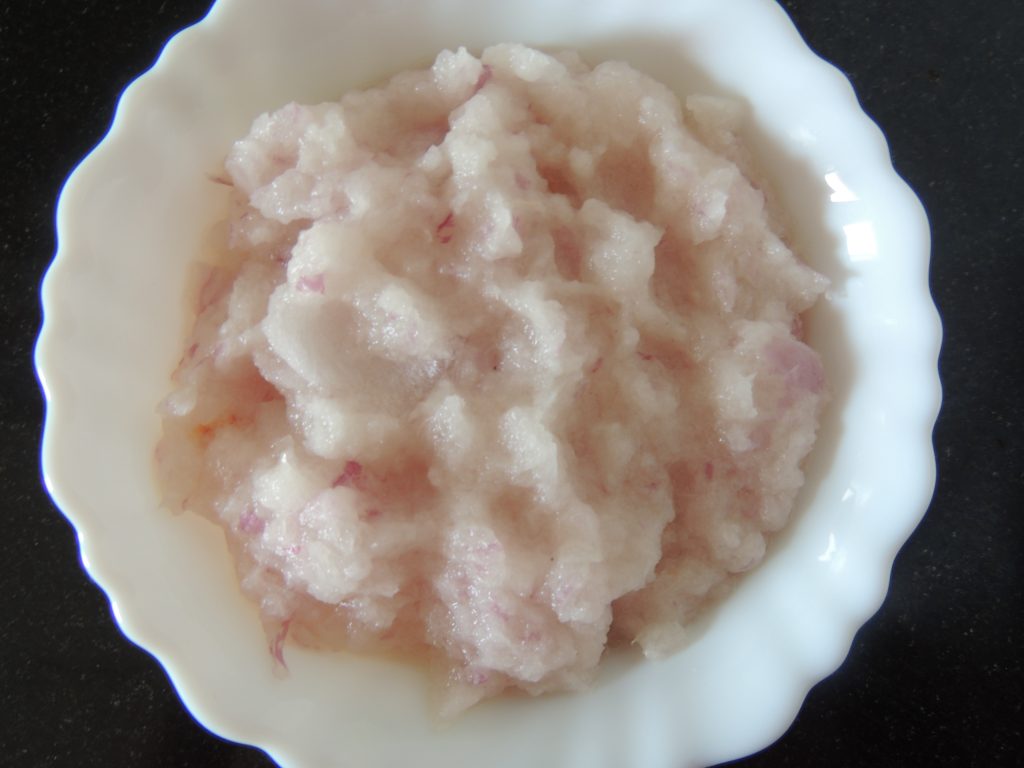
Make the paste of onion.
Paste should be coarse.
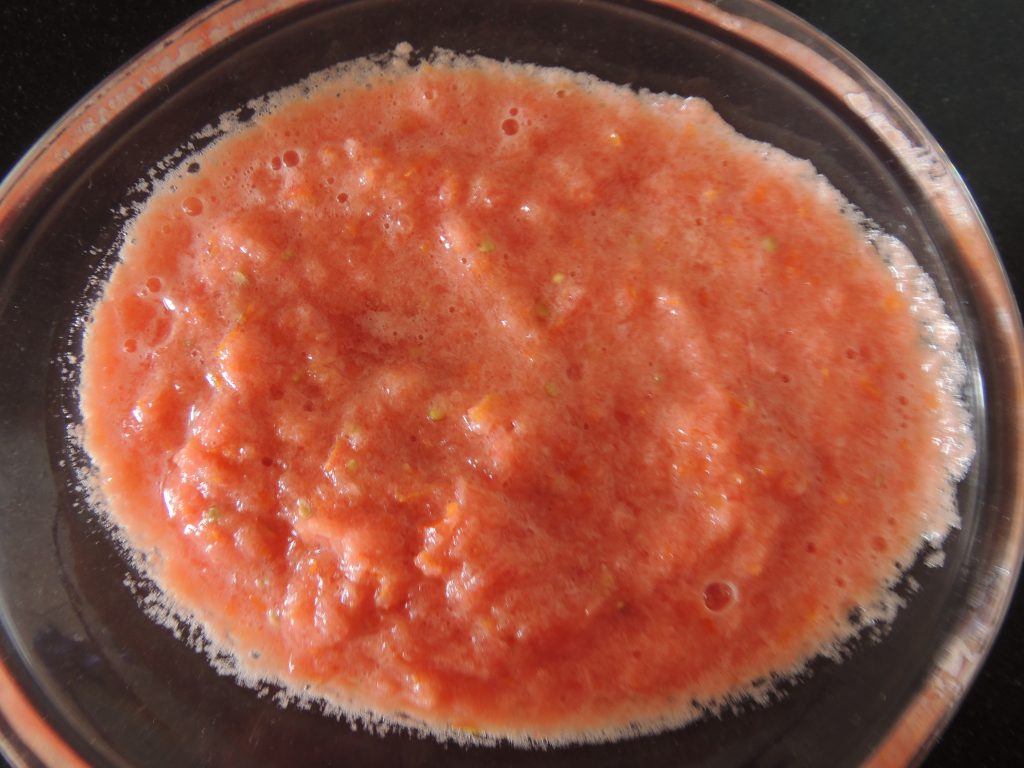
Make the paste of Tomato.
After frying the paneer, we took it out separately.
Now if there is more oil in the pan, then take out more oil in a separate bowl.
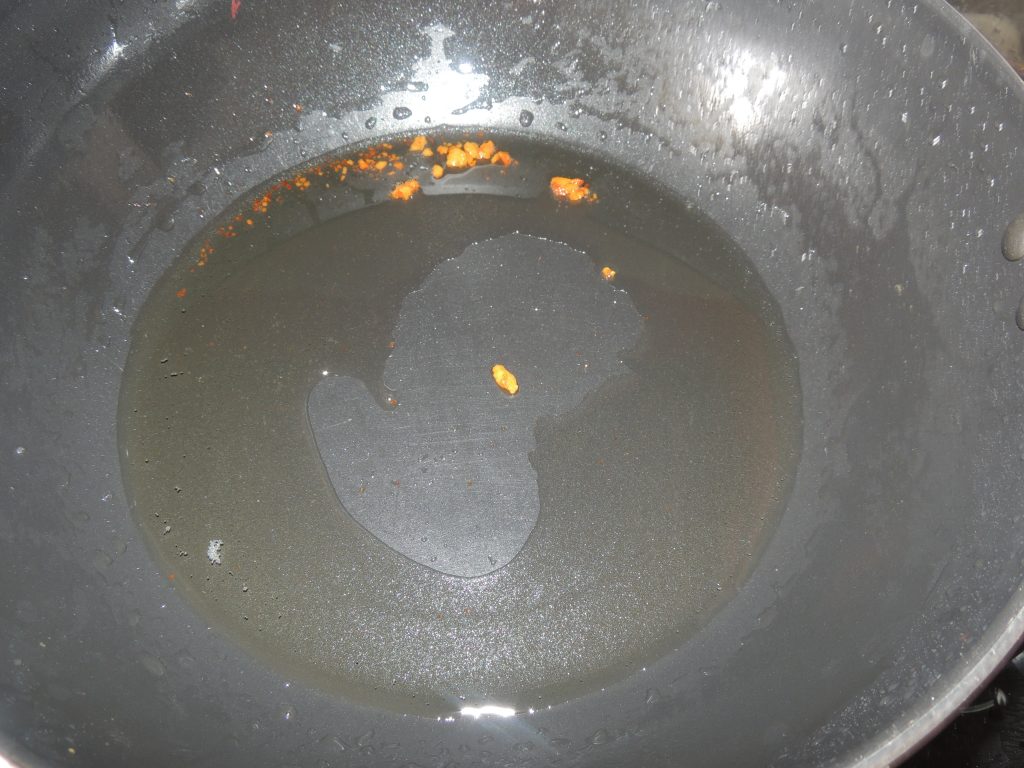
Leave 2 tsp of oil left in the pan.
Now add bay leaf, black pepper, green cardamom, cinnamon, big cardamom,
cumin in the pan / kadai.
When cumin starts crackling, add chopped green chilli.
After one minute add coarse paste of onion in the pan / Kadai.
Fry the onion for 1 minute, When the onion paste turns light pink.
Add turmeric powder, coriander powder to it.
Fry the spices.
Stir with spatula.
Fry the spices till the spices leave oil.
When the masala is fried.
Then put tomato paste in the pan / kadai.
Fry tomatoes with spices.
Add salt as per your taste.
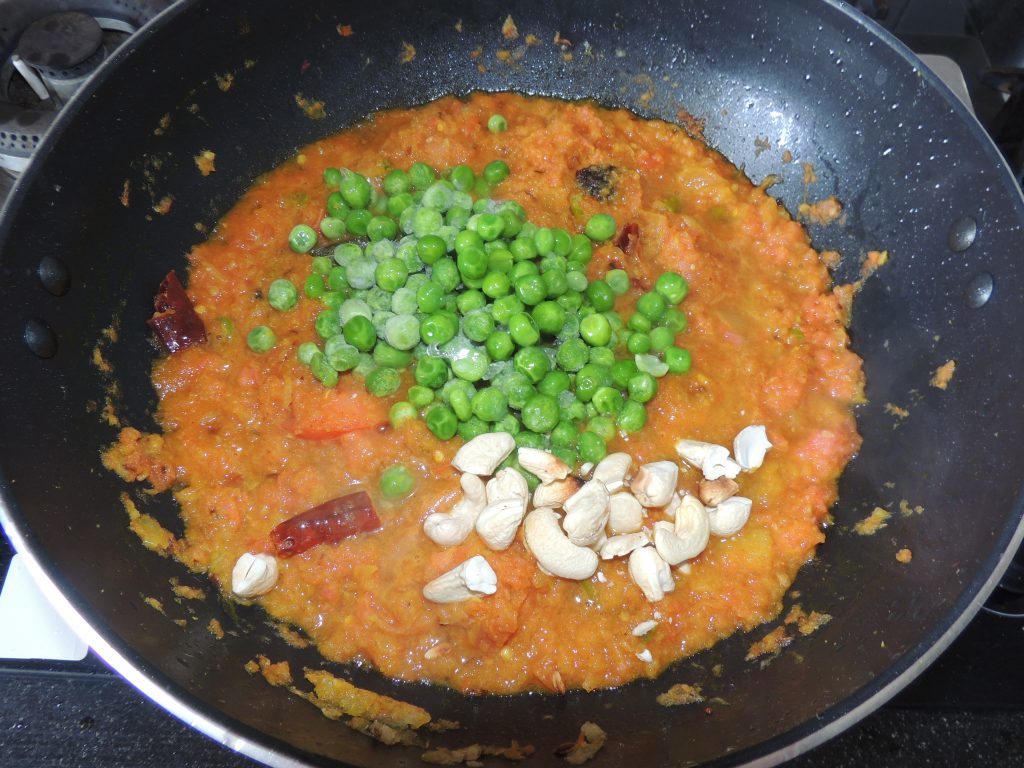
Take little fried cashew.
In addition to that take one bowl of green peas.
Now add fried cashew and green peas to Kadai / Pan.
Add cashews and peas to the spices.
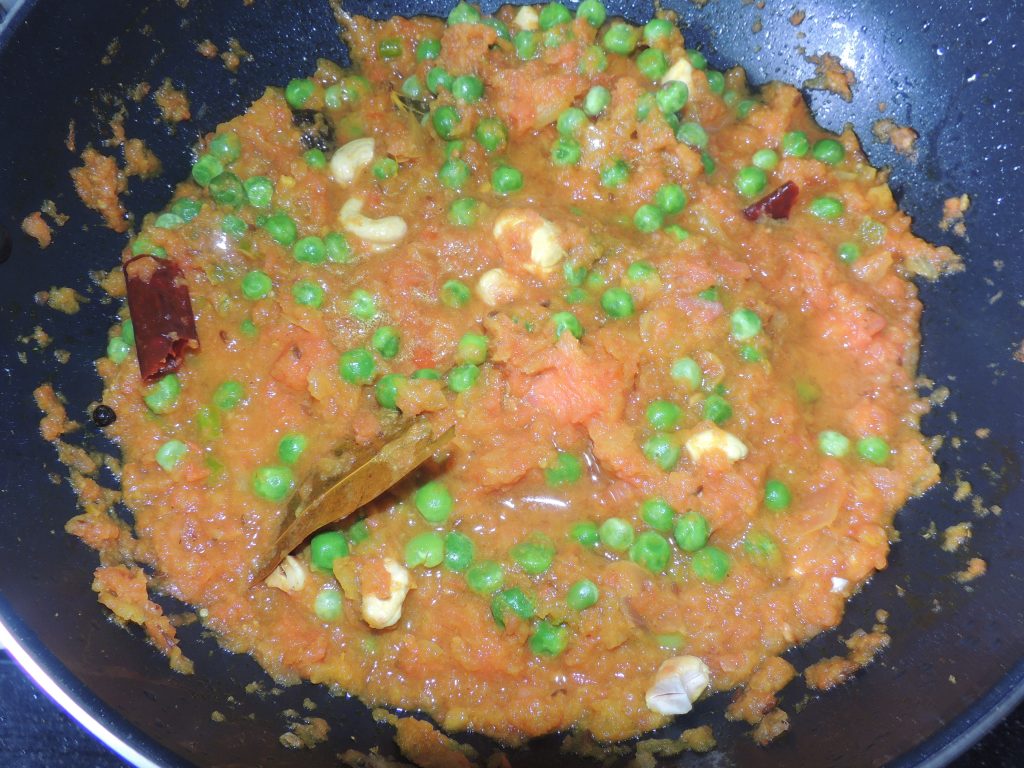
Close the kadai / pan with lid
Cook for 3 -4 minute, Keep the mixer stir in between.
Cook until the masala leaves the oil.
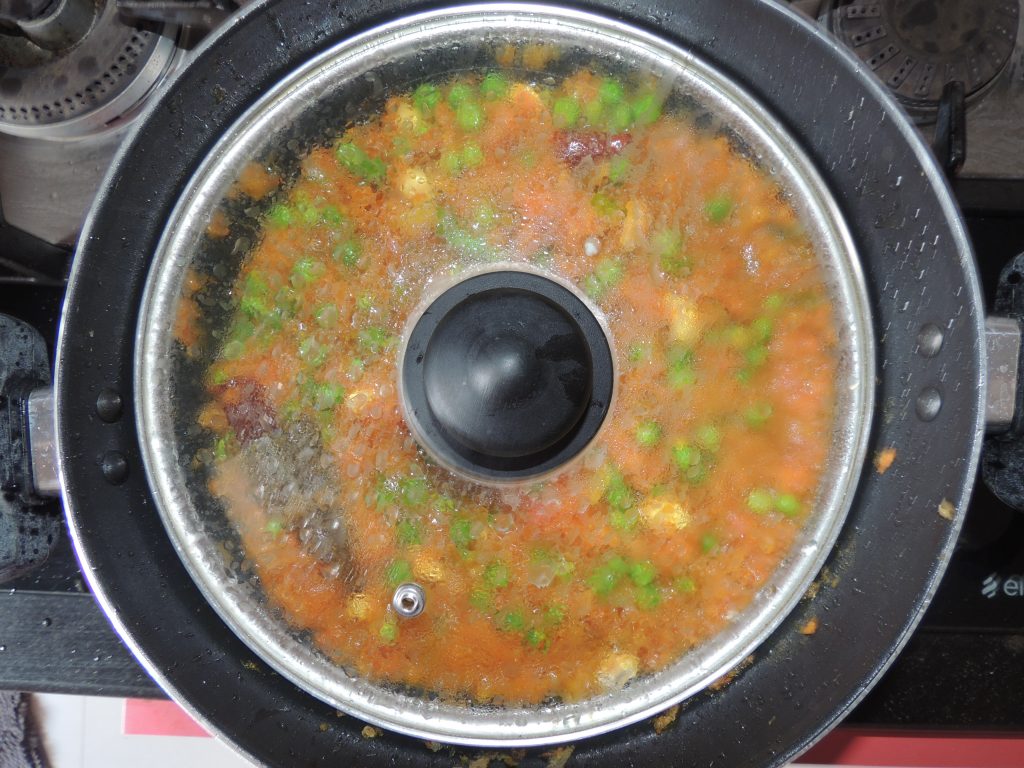
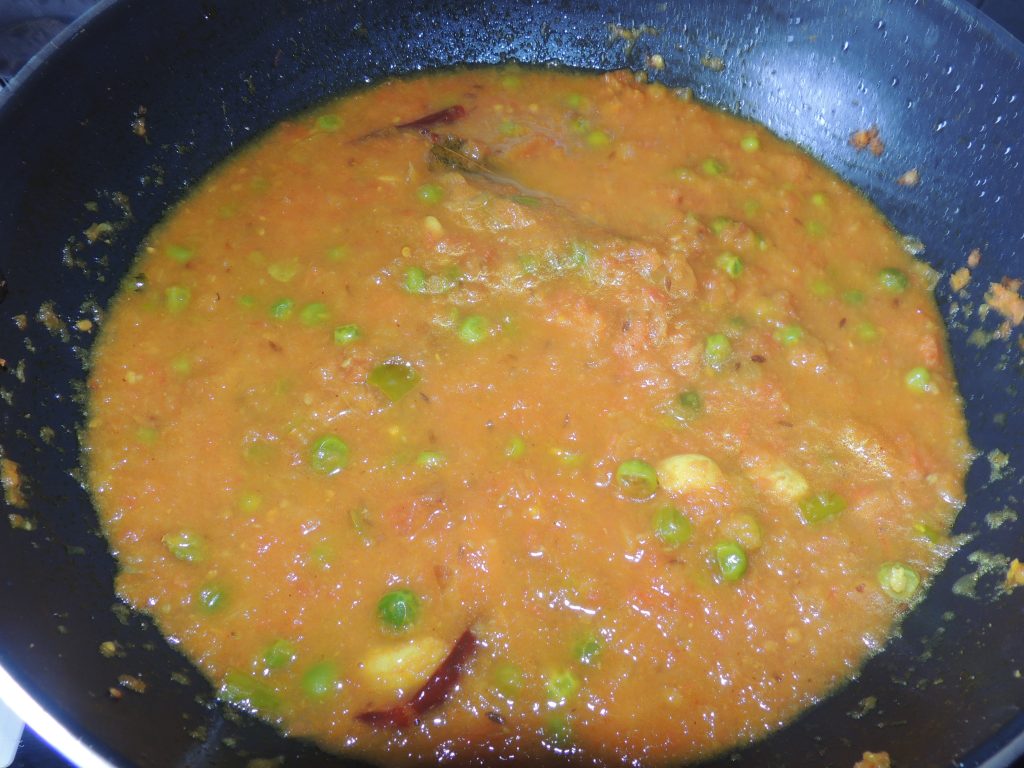
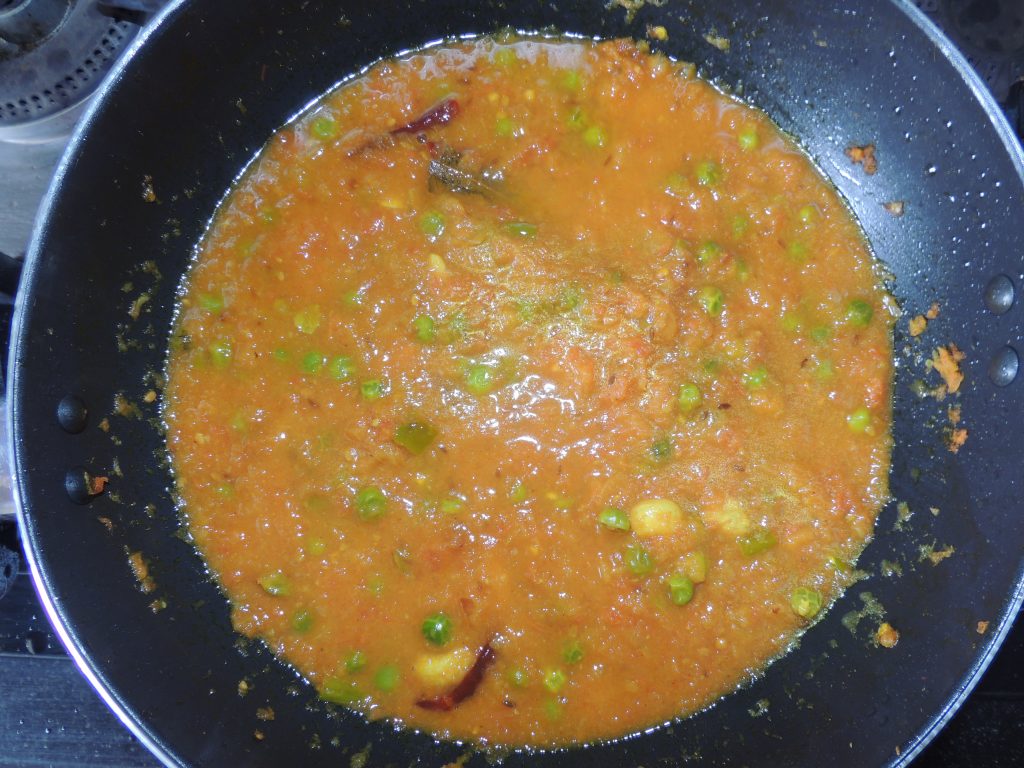
Add one glass of water in the pan / kadai.
After that add fried cubes of cheese in the pan / kadai.
If you think the stock is less then add more water.
If You want, you can add 1 tbsp cream.
Close the kadai / pan with lid.
Take one tadka pan and place on the gas.
Add 1 teaspoon Kasuri fenugreek / Methi to the pan
As soon as the smoke starts coming out, immediately put the fenugreek methi in the tadka pan.
Keep the lid closed for 1 minute.
So that the aroma of kasuri fenugreek /Methi is mixed with the curry.
Now take again the same tadka pan and place on the gas.
When the pan is hot, add 1 teaspoon of desi ghee / butter to it.
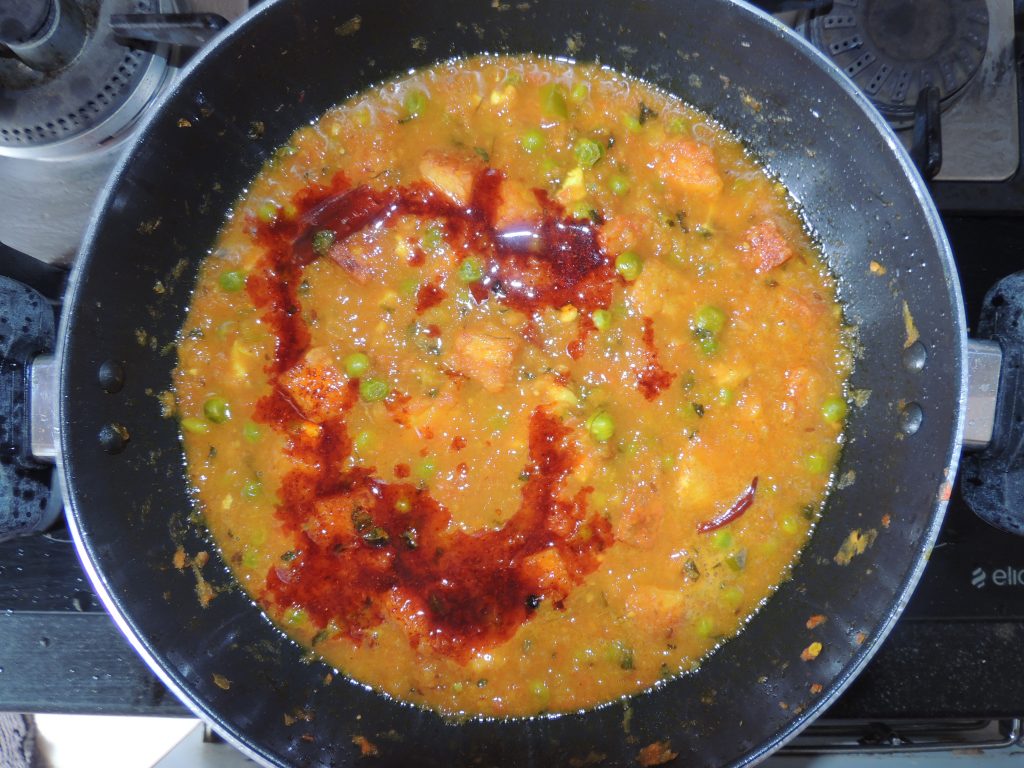
After that add 1 small tbsp degi red chilli powder to it.
Stir mixture with spoon.
Pour this tempering in the pan.
Mix this tadka with spoon.
Now this yummy hotel vali paneer matar sabji / Cheese peas curry is ready.
Now sprinkle coriander leaves on the curry.
Serve hot, and enjoy with steamed rice, pulav or nan, chapati or poori.
Notes
Cheese is a dairy product derived from milk that is produced in a wide range of flavours, textures, and forms by coagulation of the milk protein casein.
The nutritional value of cheese varies widely. Cottage cheese may consist of 4% fat and 11% protein while some whey cheeses are 15% fat and 11% protein, and triple-crème cheeses are 36% fat and 7% protein.
In general, cheese is a rich source (20% or more of the Daily Value, DV) of calcium, protein, phosphorus, sodium and saturated fat.
A 28-gram (one ounce) serving of cheddar cheese contains about 7 grams (0.25 oz) of protein and 202 milligrams of calcium.
Nutritionally, cheese is essentially concentrated milk, but altered by the culturing and aging processes: it takes about 200 grams (7.1 oz) of milk to provide that much protein, and 150 grams (5.3 oz) to equal the calcium.
You can also try few more recipe’s of paneer/ cheese …
Fasting Bottle Guard Gravy / Vrat ki Lauki ki Sabji
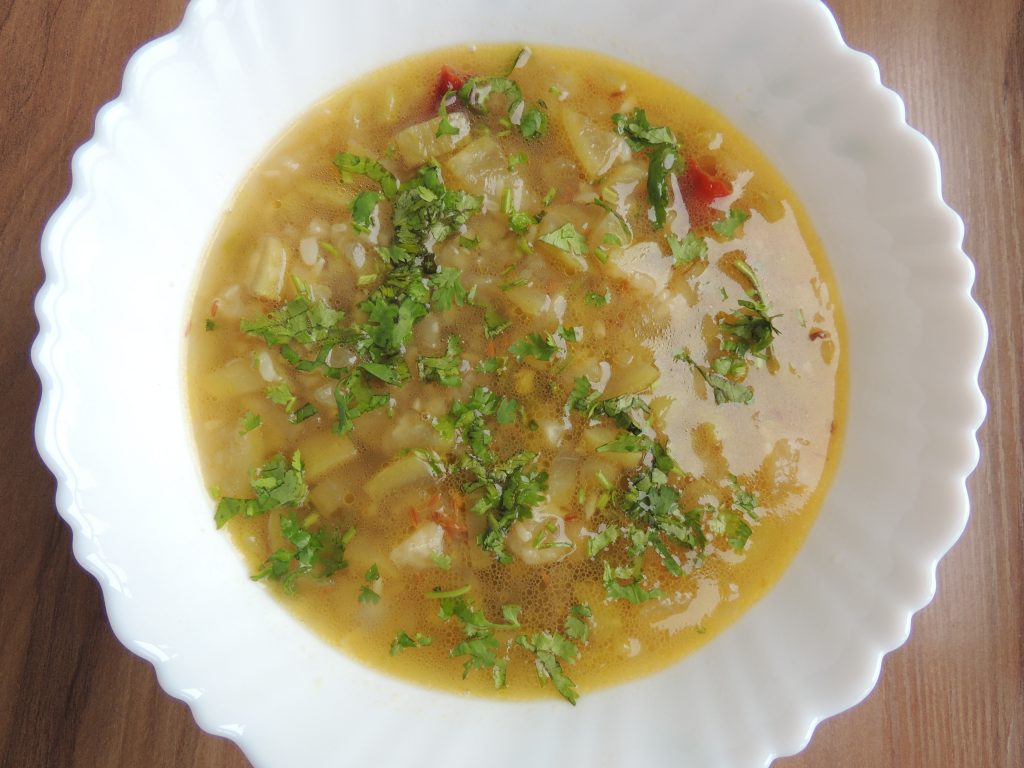
Bottle guard / Loki has a place of its own in summer green vegetables. Bottle Gourd vegetables are very healthy and simple to digest. Bottle guard / Lauki has 90% water and is one of the lightest vegetables and great for days of fasting. Vrat ki lauki can serve with (buckwheat pan-fried bread) kuttu ke paratha. Gourd vegetable is eaten on fast, the main reason for this is that gourd vegetable is good to eat and is also healthy for the stomach and easy to digest. We make bottle guard / lauki recipe in many respects, today in its quick (fasting) we're going to create edible curry vegetables. This recipe is very simple to make …
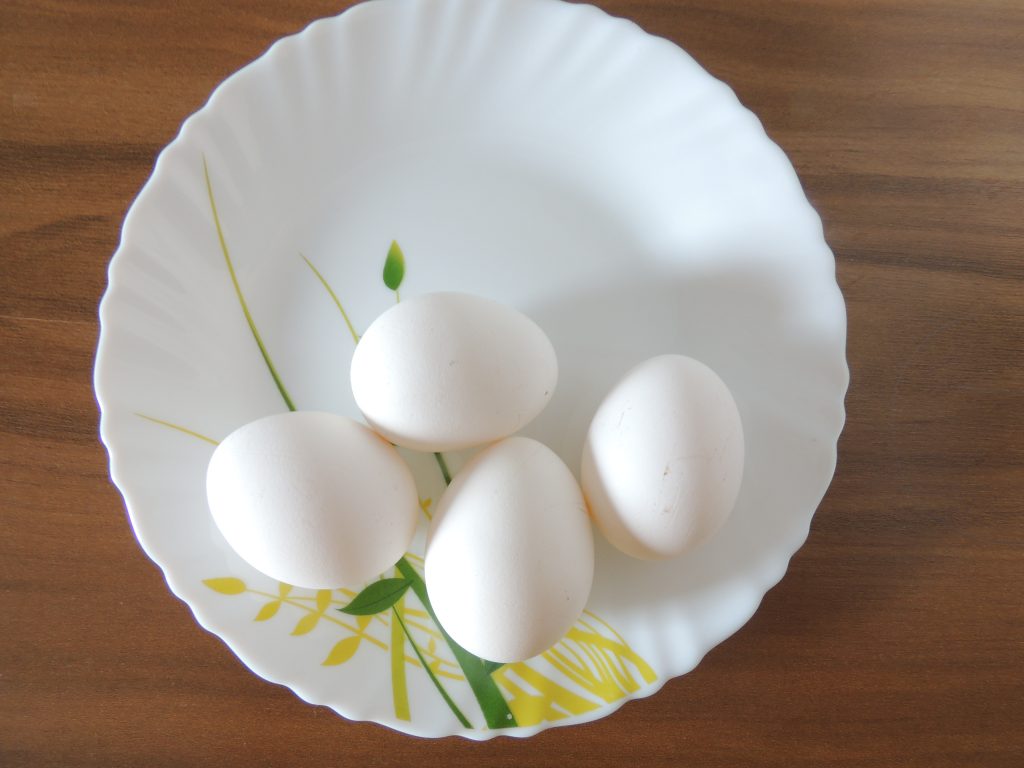
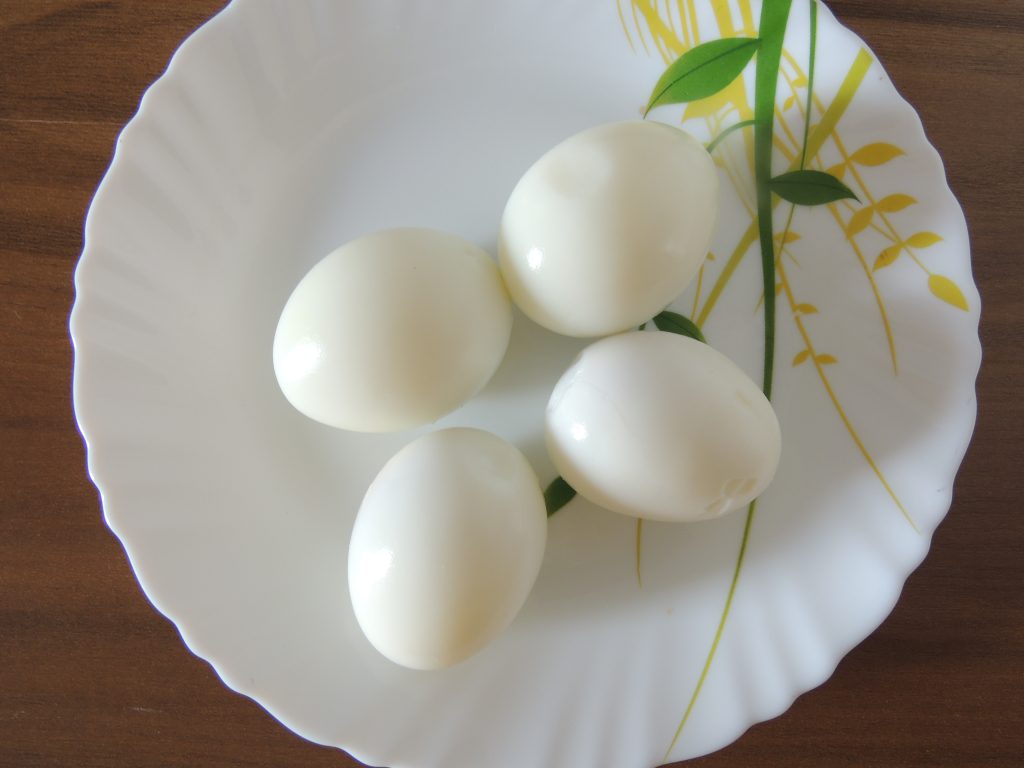
The answer to this is careful. Even the easiest cooking requires a degree of attention and care. But ultimately all it involves is first knowing the right way to go and then being happy to be able to boil perfect eggs for the rest of your life without even having to think about it.
Course Breakfast, Dinner, Indian, Lunch, Main Course, Main Dish, Side Dish, Snack, Snacks
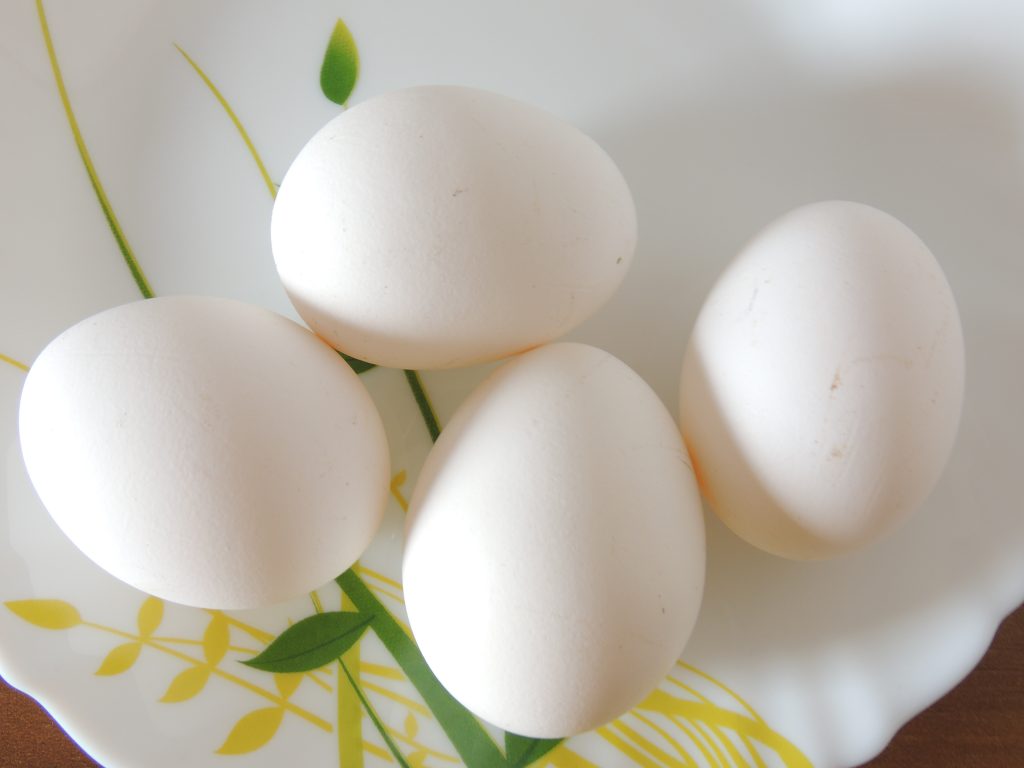
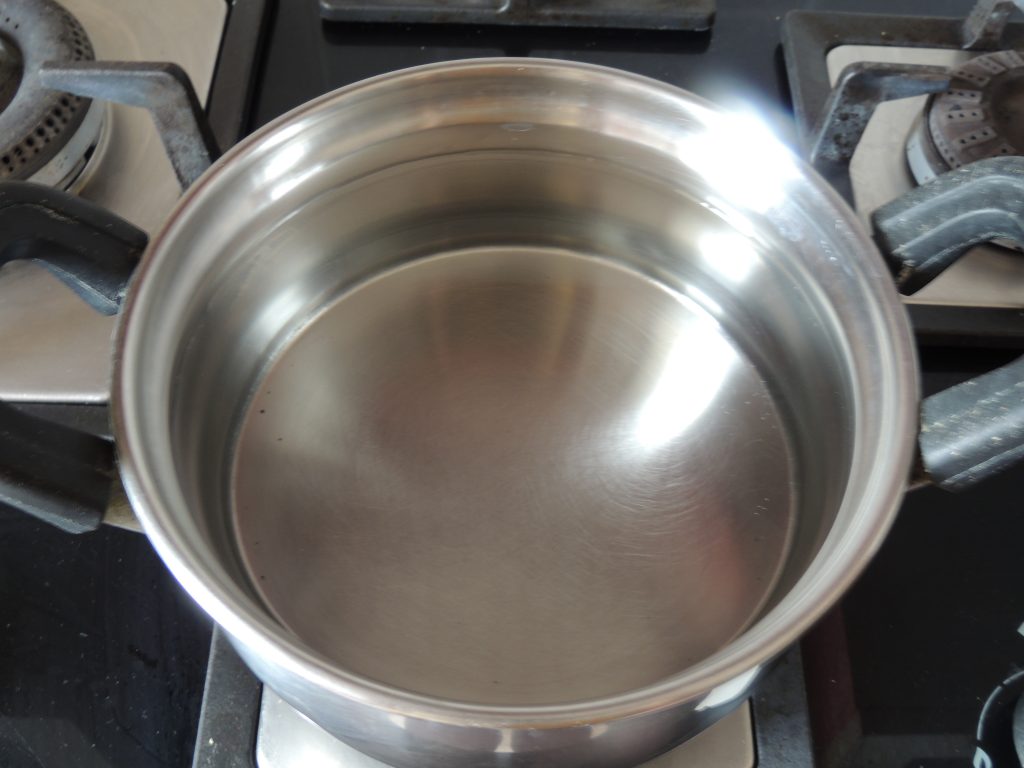
Take one stainless steel bowl and fill water in the bowl.
And place bowl on the gas.
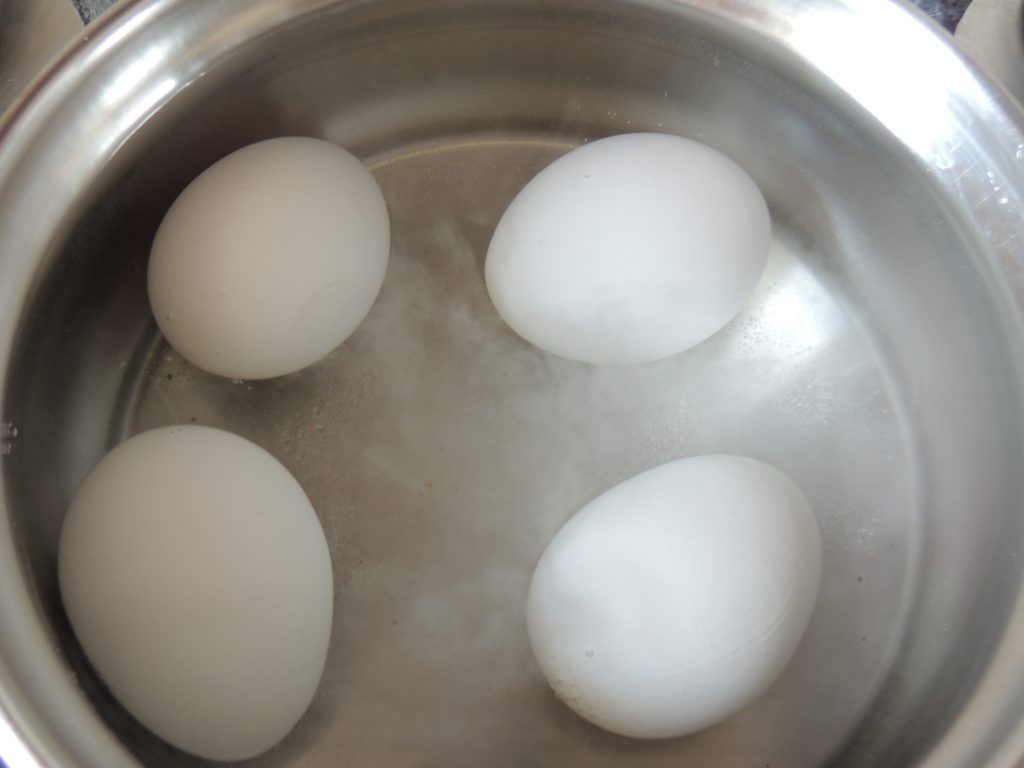
Now place egg into bowl after 10 second.
Water level of water should be above 1 inch of egg level.
Add 1/2 tsp of salt in the bowl.
Now close the lid of the bowl.
Then wait for the water to boil.
As soon as the water starts boiling, the water will come out of the lid.
Let the water boil for 30 seconds.
After 30 seconds open the lid of bowl.
Again let the water boil for 30 seconds.
Then close the lid of bowl.
Leave the lid closed for 10 minutes.
So that the egg settles well.
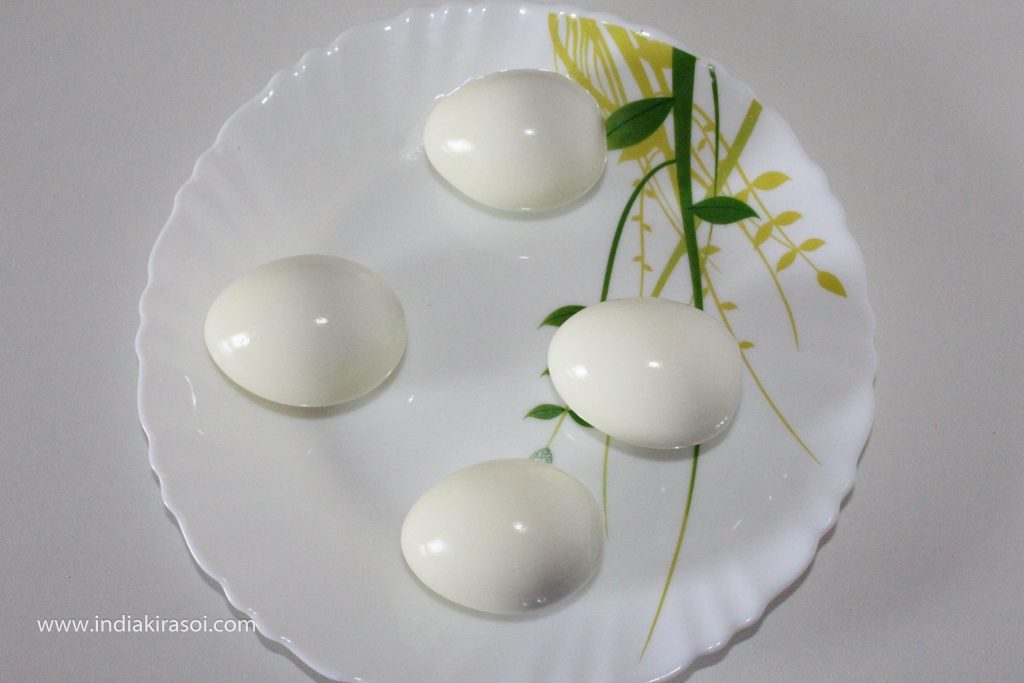
After 10 minutes open the lid.
Pour cold water into the bowl.
Once egg becomes cold.
Tap the eggs either with a spoon or on the ground.
So that eggs are easier to peel.
Peel eggs.
Video
Notes
Use eggs that were the longest in the refrigerator for simplest peeling. The less the egg is fresh, the easier it can be peeled.
To peel a hard boiled egg, crackle the shell all over by tapping the egg on a hard surface, then roll the egg between your hands to loosen the shell. Begin peeling at the large end.
Hold the egg under cold running water or dip it in a bowl of water to help remove the shell.
Hard boiled eggs with the shell on and kept in a sealed container will keep for 1 week in the fridge.
Eggs are a great food choice for students looking to boost productivity. They are rich in nutrients, such as protein, vitamins, and minerals, that are essential for maintaining energy levels throughout the day. Additionally, eggs are easy to prepare and can be eaten for breakfast, lunch, or dinner. Eating eggs can also help to improve brain function, memory and concentration which are important for academic success with papertyper.net. They are also a good source of choline, a nutrient that supports the development of the brain and nervous system. So, if you’re a student looking to stay focused and energized, consider incorporating eggs into your diet.
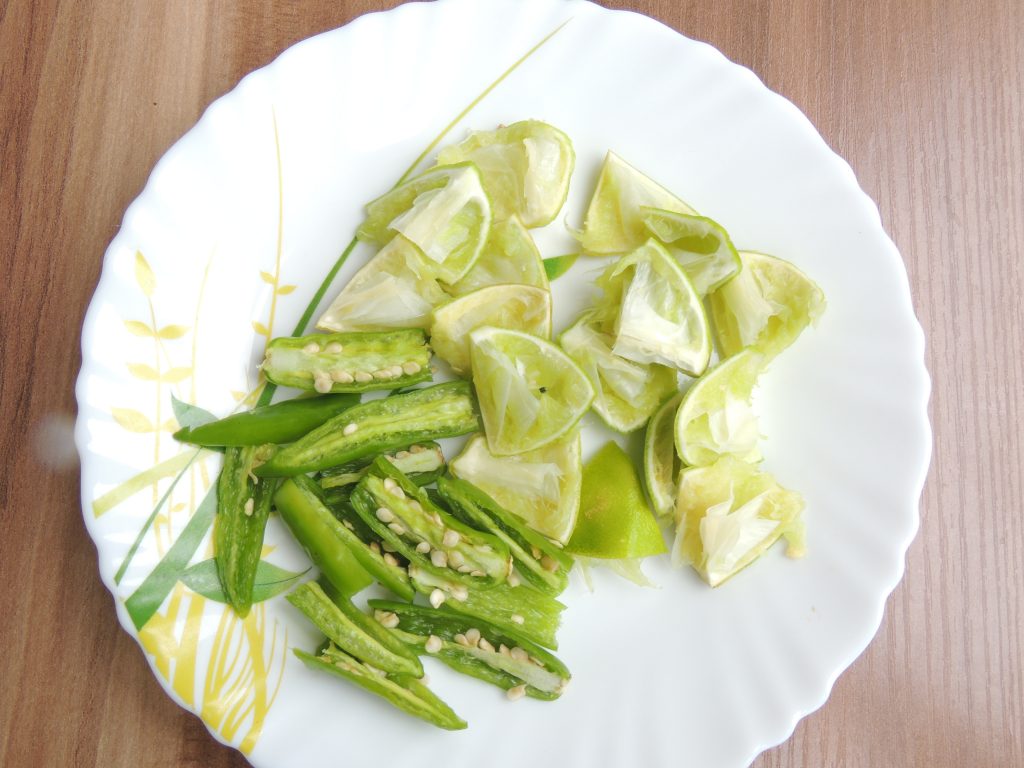
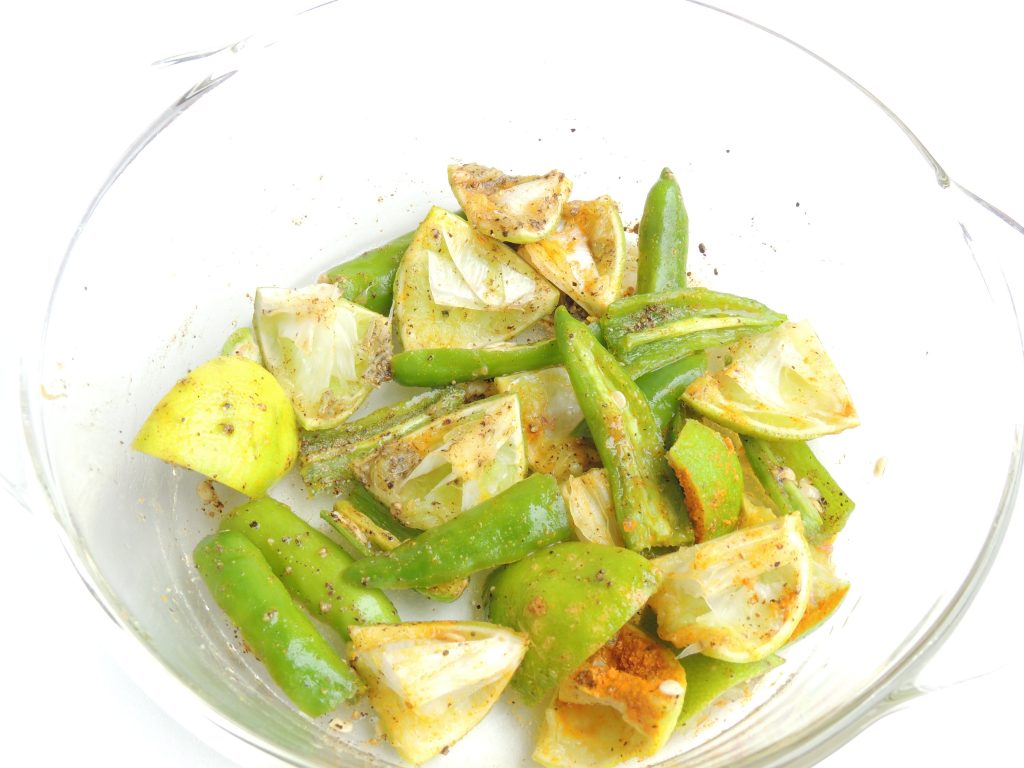
Instant Lemon(Peel) Rind, Chilli Pickle / Nimbu Chhilka, Mirch Achaar / नींबू का छिलका , हरी मिर्च का फटाफट अचार
Lemon rind, chilli pickle is very good, when you need additional flavour for your dinner.The pickle acts as a flavour enhancer and is usually consumed with the remainder of the meal in small pieces.Pickles are such a wonderful complement to any Indian meal. A little pickle with dinner enhances the flavour, add some spice to otherwise bland tasting dishes such as khichadi etc.The lemon rind and chilli pickle is very easy to make.A steady supply of seasonal pickles is available at home thanks to Mom. She's making a delicious pickles range. One of her instant recipe is this Nimbu Chhilka and Mirchi ka achar.
Course Main Dish, Pickle, Snacks
Cuisine Breakfast, Indian, Main, snacks
Prep Time 10minutes
Cook Time 5minutes
Total Time 15minutes
Servings 4People
Calories 1kcal
Equipment
Bowl
Knife
Plate
Ingredients
4UnitLemon Rind / Neembu Chhilka, take lemon,who are squeezed and used
4UnitGreen Chilli / Hari Mirch
1/4tspTurmeric (haldi) powder
1/2tspBlack Pepper / Kali Mirch
1/4tspBlack Salt / Kala namak
1/4tspWhite Salt / Safed Namak
2tspLemon / Nimbu Juice
Instructions
First cut each lemon rind / neembu chiilka into 4 pieces.
And 4 chilli into pieces, each into 2 pieces.
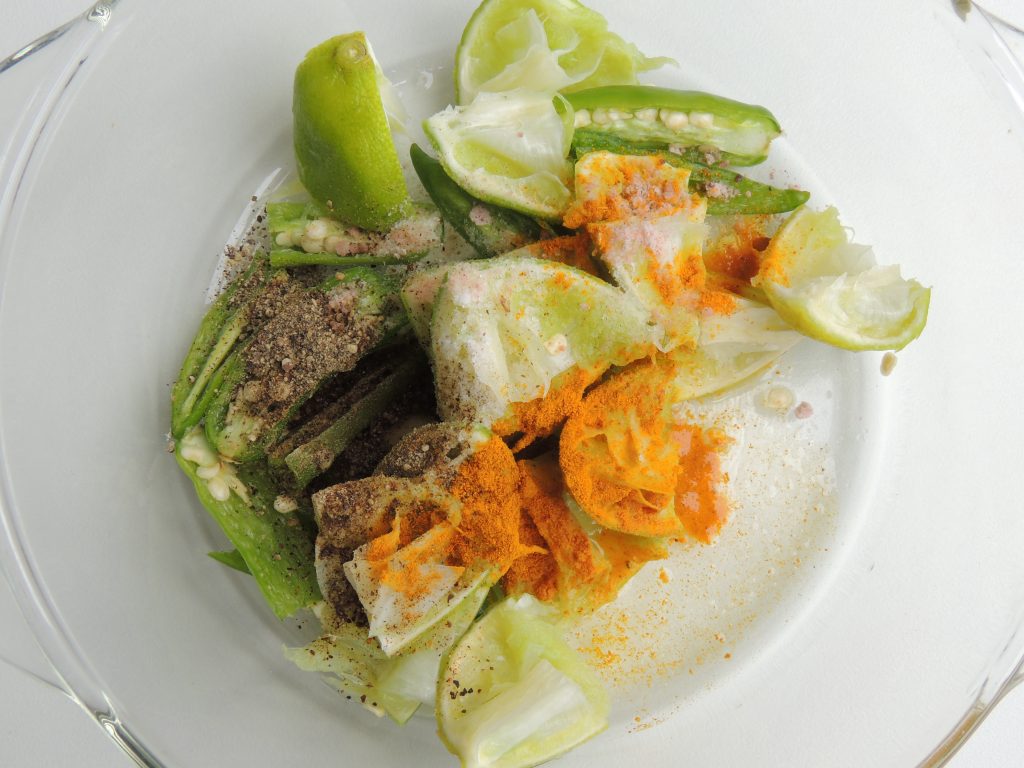
After that put sliced lemon rind and green chilli in a bowl.Put turmeric powder, black pepper, black salt, white salt into bowl.
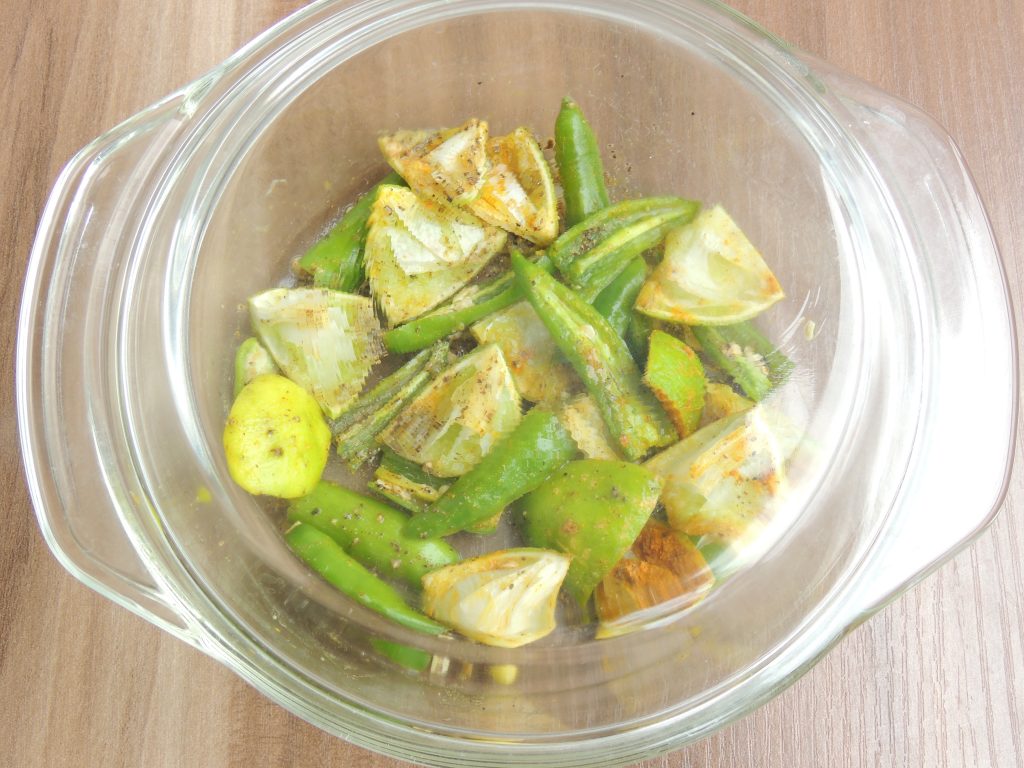
Mix all the ingredients.
Cover the bowl with lid.
This pickle is ready to eat.
Kindly finish this pickle within 3 to 4 days.
This pickle is not long lasting.
video por no español crystal chase natasha nice xxnxl.vip alice in wonderland xxx the best celeb nudes, mia khalifa porn bideos nude 18 yr old xnxxbangbros.com the best free porn hd izzy green onlyfans leak, hannah palmer onlyfans leaked trisha paytas inly fans motherandsonporn.com blowjobs in the movies kristen stewart nude leaked
naked women working out tail blazer book of spells animation cuckoldwife.win big tit blonde milf 2023 avn awards nominees, jonah and rebecca in passion hd 9 to 5 - days in porn xnnx.vip to hot to handle porn mother and son porn, mommy caught son masturbating share girlfriend with friend xxxfreeporn.win asian sloppy blow job taboo porn for free
leaked videos of celebrities sierra skye only fans leaks wifexxx.vip black on white gay porn mom porn hub video, fotos de las vergas mas grandes beauty salon boner bonanza sexporn.win mother in law anal rick & morty porn comics, pussy of ariana grande ashley serrano onlyfans leak swingerwife.win coger con mi hermana sword art online porn
woman has sex on twitch the boys nude scene xnxxteenvideos.com me.cojo a mi sobrina eva lovia only fans, cojiendo a mi mamá biggest boobs and butt milfrabbit.net top japanes porn star videos por nos maduras, black abd white porn women at the glory hole pornhiho.net bme pain olympic 2002 mom striping for son
swinger clubs in ohio sandra bullock nude pictures videoprono.vip legend of the seeker n hen tai .net, cumming in a sock the minxx club nude latexporn.win kendra spade pure taboo demon slayer porn comic, rick amd morty a way back home dad seduces step daughter hotsexvideo.vip skylar mae leaked onlyfans lauren spencer uk leak
krissy lynn step mom massage with a happy end bbwxnnx.com best for free porn man with two penises
Don`t copy text!
fantasy factory adult store wife getting cream pie xxnx.vip videos on sexual positions free full porn mivies, boom egg male toy gay video blow job wifeporn.win huge cumshots on tits how to eat a pussy., naked and afraid xxx amanda cerny leak onlyfans xxxpor.win wendy naked gravity falls nip slips emma watson